Quantcast
Channel: Linux Archives | Unixmen
Viewing all 194 articles
Browse latest View live

Essay on Haoop Part -I

$
0
0


Unixmen is continuously trying to improve the type of knowledgebase provided, in this effort we are trying to initiate some big stories of selective topics which will include not only how to? But what is? Type of information including history, relevance and in depth information, I am going to term this series under the title of “ESSEY”, today’s effort is to provide a detailed introduction about Hadoop, let’s start.

Preface

Hadoop was introduced to handle really huge storage data, we have emails, documents, pdf media files etc. Managing such really big and bigger data is really a challenge, Hadoop tries to meet such challenges. In Hadoop more than one machine, or a cluster of machine of heterogeneous type having different processing and configurations have to work together to process data. Before going more deep in Hadoop we have to understand that in this modern era of social media, each and every person either he is a technical or non- technical human begin is willingly or unwillingly in generating and processing data, the fact is that 90%-95% of total data has been created in last three or four years and virtually we are moving towards a data explosion. From data point of view we can divide types of data in basically three categories:

  • Unstructured (Doc files, PDF files, emails or media files)

  • Semi structured (XML, Excel, csv type of data)

  • Structured (As usual, such data is organized with the help of database)

Google search engine do indexing of web pages using google file system and mapreduce, the same concept is used as base technology in Hadoop. Tentatively google is indexing more than 65 billion pages, which you got in a responsive search just in a fraction of second. Similar Facebook possess world’s largest Hadoop cluster, Facebook generate almost half of PETABYTE every single day, which is unimaginable. Tweeter generate 450 million tweets a day generating almost 20 terabytes of data every single day and there is no surprise that they are also using big cluster based on Hadoop. Even General Motors has recently migrated to Hadoop. No doubt in coming 3-5 years density of this data will become double or may be triple.One thing is very Clear from above review that tradition methods (Ordinary storage drives) which we are using currently will not be sufficient future. We have to meet data processing response time challenge, volume of data is really huge which we have to handle and finally management of variety or types of data which we have manage.

Introduction

Hadoop is a software based distributed data storage management solution used for really bid data sets, it is scalable and highly fault tolerable. Hadoop consists of two components: HDFS which is a type of storage used by Hadoop and Hadoop map reduce which is used for data process and data retrieval, HDFs is self-repairing highly available storage, what Hadoop does is that it make blocks of data and distribute that data over the cluster and make three copies of these distributed blocks. Hadoop cluster consists of Name Node and Data Node. In general there will be only one Name Node in Hadoop cluster and rest of the nodes of Cluster will be known as Data Node. Name Node is Mata Data Server which store information of each and every block and every node in the cluster.

Let us understand the very first component of Hadoop system i.e. HDFS (Hadoop Distributed File System)

HDFS introduction:

HDFS architecture is a master slave type: Name node (https://wiki.apache.org/hadoop/NameNode) is the master server which controls all of the data node, it keeps a record of directory tree of all of the files in the system, and trace where a file is stored in entire cluster, whenever a user/client application have to add move or copy some specific file, it have to communicate with the Name Node which in response indicate the exact location of that specific data in to the cluster, keep in mind that Name Node does not store the data but it keep an eye over the exact location of the data. What HDFS does that whenever a file is created, it break that file in multiple blocks which are 64 MB size chunks and distribute these blocks over the data nodes and Name Node knows the location of these distributed file blocks, so keep in mind that “If Name node goes down cluster will be gone”. Data nodes simply replicate data physically and follow the instructions of Name node and client interact directly with Data Node. There another important term which you must know is secondary name node, which is a scheduled snapshot of Name Node which is used as backup. If we lose a node from our rack/cluster Hadoop will immediately replicate the data, but what if we lost entire rack, not to worry because We have an advantage with Hadoop that Name Node can understand our network topology, and once we have introduced our Network topology to Name Node it will take care of data replication and we have not to worry even on of the rack got lost from the cluster, this is known as Rack Awareness. Name Node never have to communicate with Data Node or Secondary Name Node, infect data node is responsible to communicate with the client or with the Name Node after every few seconds.

Mapreduce Introduction:

Overview

MapReduce is little complicated topic, Hadoop MapReducer is a programmable software framework used to process large sets of data in cluster. It can be classified in three sub categories:

  1. Job Client

  2. Job Tracker

  3. Task Tracker

Job client simply interact with Data Node and submit the job which he wants to process, in return Job Tracker communicate with Name Node and find where data is located and create execution plans, Job Tracker map task and reduce it and will finally submit assignment to chosen Task Tracker (Slave/Client) Node. Now, Task Trackers have to communicate continuously with Job tracker by sending Heart Beat, which send continues updated status of process to Job Tracker, if heartbeat signals are not send by Task Tracker to Job Tracker, they are deemed to have failed and job is rescheduled to some other Task Tracker. Finally if everything is fine task will be submitted successfully and Job Tracker will be informed via heartbeat signal.

Installation

An overview

We will We will first install Hadoop in a Single Machine, all of the components will be installed the same machine and there will be no issue because Hadoop support Stand Alone installation, when we will move ahead will install multi node cluster at next level.

Pre requisites:

How to install Hadoop with CentOS has already been published with unixmen, you can access this link for the article. A Latest Ubuntu 15.10 Machine installed with ssh-server, Java Version 6 or above.Create a user named as hadoop, assign password to that user.

First of all  install ssh-service

# apt-get install openssh-server

Selection_054

 Generate and share ssh key so that localhost would not ask for password again and again

# ssh-keygen

Press enter when it will ask for pass phrase. Copy that key to ~/.ssh/authorized_key file.

Selection_057

Now ssh local host and it will not ask for any password.

Install Java

# apt-get install openjdk-7-jdk

Selection_055

Download hadoop

#  wget http://www.eu.apache.org/dist/hadoop/common/hadoop-2.6.3/hadoop-2.6.3.tar.gz

Copy and extract contents to /usr/local/ directory:

# tar -xvf hadoop-2.6.3.tar.gz 
#  cp -rv  hadoop-2.6.3 /usr/local/hadoop

Edit .bashrc profile file

# nano ~/.bashrc

Append following lines

export HADOOP_PREFIX=/usr/local/hadoop
export PATH=$PATH:$HADOOP_PREFIX/bin

Configure JAVA_HOME path in $HADOOP_PREFIX/etc/hadoop/hadoop-env.sh file

# nano  /usr/local/hadoop/etc/hadoop/hadoop-env.sh

Sample output

limitations under the License.

# Set Hadoop-specific environment variables here.

# The only required environment variable is JAVA_HOME. All others are
# optional. When running a distributed configuration it is best to
# set JAVA_HOME in this file, so that it is correctly defined on
# remote nodes.

# The java implementation to use.
#export JAVA_HOME=${JAVA_HOME}
export JAVA_HOME=/usr/lib/jvm/java-1.7.0-openjdk-amd64

# The jsvc implementation to use. Jsvc is required to run secure datanodes
# that bind to privileged ports to provide authentication of data transfer
# protocol. Jsvc is not required if SASL is configured for authentication of
# data transfer protocol using non-privileged ports.
#export JSVC_HOME=${JSVC_HOME}

export HADOOP_CONF_DIR=${HADOOP_CONF_DIR:-"/etc/hadoop"}
# Extra Java CLASSPATH elements. Automatically in

Edit .xml configuration files for hadoop

# cd $HADOOP_PREFIX/etc/hadoop/

Configure name node first

# nano core-site.xml

Edit file


<!-- Put site-specific property overrides in this file. -->
<configuration>
<property>
  <name>fs.default.name</name>
  <value>hdfs://localhost:9000</value>
</property>
</configuration>

Edit mapred-site.xml


<configuration>
 <property>
  <name>mapreduce.framework.name</name>
   <value>yarn</value>
 </property>
</configuration>

Edit yarn-site.xml

<configuration>
 <property>
  <name>yarn.nodemanager.aux-services</name>
    <value>mapreduce_shuffle</value>
 </property>
</configuration>

Finally edit hdfs-site.xml

<configuration>
<property>
 <name>dfs.replication</name>
 <value>1</value>
</property>
<property>
  <name>dfs.name.dir</name>
    <value>file:///home/hadoop/hadoopdata/hdfs/namenode</value>
</property>
<property>
  <name>dfs.data.dir</name>
    <value>file:///home/hadoop/hadoopdata/hdfs/datanode</value>
</property>
</configuration>

Format namenode

# hadoop namenode -format

Selection_066

Now change directory to /usr/local/hadoop/sbin

# cd HADOOP_PREFIX/sbin

Change permission of hadoop user permisions before running next script:

# sudo chown -R hadoop /usr/local/hadoop/

run start-all.sh script

# ./start-all.sh

Sample output

This script is Deprecated. Instead use start-dfs.sh and start-yarn.sh
Starting namenodes on [localhost]
localhost: starting namenode, logging to /usr/local/hadoop/logs/hadoop-hadoop-namenode-hadoop.out
localhost: starting datanode, logging to /usr/local/hadoop/logs/hadoop-hadoop-datanode-hadoop.out
Starting secondary namenodes [0.0.0.0]
0.0.0.0: starting secondarynamenode, logging to /usr/local/hadoop/logs/hadoop-hadoop-secondarynamenode-hadoop.out
starting yarn daemons
starting resourcemanager, logging to /usr/local/hadoop/logs/yarn-hadoop-resourcemanager-hadoop.out
localhost: starting nodemanager, logging to /usr/local/hadoop/logs/yarn-hadoop-nodemanager-hadoop.out

Have a look in above output, you will find that al of the services are activating step by step.

Now access hadoop services in browser

For Name node

ip_addr:50070

Selection_067

For data node

ip_addr:50075/dataNodeHome.jsp

Selection_068

To monitor cluster

ip_addr:8088

Selection_069

Conclusion

A brief introduction to hadoop and its components is over at this stage, in upcoming series we will try to provide more practical oriented information about hadoop and its components, till then take care, Have Fun!!

The post Essay on Haoop Part -I appeared first on Unixmen.


Backup and restore Gmail with GMvault

$
0
0


Introduction

GMvault is very easy to use, lightweight and quick application that is used to backup and restore all of your email accounts from gmail. Although a number of gmail back solutions are available but gmvault is very popular and open source tool.It is available for MAC, Linux and Windows, gmvault is very stable can handle IMAP related issued with gmail.With full sync mode user can have back up of entire mail account in a dedicated unique directory without any messup, these emails can be compressed can easy to move to some another location.It can sync your  mail accounts daily to keep your data up to date. In addition even a non technical user can also easily mange their mail accounts, no data base is required to manage and organize mail backups.Another important feature of the tool is that gmvault can recreate your gmail box and any other gmail account, even all of the attributes and labels will also be preserved.

Reference link: http://gmvault.org/index.html

Installation

First we need to create a  gmail account for this demonstration purpose, we have created a demonstration email account with email id “examplelinux.com”

Selection_016Download gmvault package form this link

Extract package

$ tar -xvf gmvault-v1.9-src.tar.gz

Install required python tools

$ sudo  apt-get install python python-setuptool

After python and python tools package got installed change directory to gmvault

$ cd gmvault-1.9/

Install package using following command

$ sudo python setup.py install

Run following command to have available command line option

$ gmvault -h
Sample output
Odd. Use default python2.7.x or 2.6.x distribution.
usage: gmvault [-h] [-v] {sync,restore,check,export} ...
optional arguments:
-h, --help show this help message and exit
-v, --version show program's version number and exit
subcommands:
{sync,restore,check,export}
valid subcommands.
sync synchronize with a given gmail account.
restore restore gmvault-db to a given email account.
check check and clean the gmvault-db disk database.
export Export the gmvault-db database to another format.

Examples:

a) Get help for each of the individual commands

#> gmvault sync -h
#> gmvault restore --help
#> gmvault check -h
#> gmvault export -h

Synchronize your gmail account, give following command

 $ gmvault sync examplelinux@gmail.com

You have to press enter to launch browser, Sample output

Odd. Use default python2.7.x or 2.6.x distribution.
Use gmvault-db located in /home/virtual/gmvault-db.
Activate Gmvault db cleaning.
Authentication performed with Gmail OAuth2 access token.
Initiate interactive session to get OAuth2 token from Gmail.
gmvault will now open a web browser page in order for you to grant gmvault access to your Gmail.
Please make sure you're logged into the correct Gmail account (examplelinux@gmail.com) before granting access.
Press ENTER to open the browser.
You should now see the web page on your browser now

When you will press enter browser will popup, click allow to enable gmvault backup feature

Selection_017

A next window will appear, it will display a code and paste that code to terminal

Selection_018

Paste that code to command line already active for vmvault, press enter and synchronization will start quickly

Selection_020

All these mail will be stored in gmvault-db directory under user’s home. Have a look

$ cd /home/virtual/gmvault-db/ && ls

Selection_021

Similarly you can upload email back to gmail accounts as well.

Complete restore you gmail account to some another email account

 $ gmvault restore -d ~/gmvault-db anotheremail@gmail.com

Restore back to same account

$ gmvault restore -d ~/gmvault-db examplelinux@gmail.com

Selection_022

Let us delete all of the emails from inbox, to make sure that the tool is working or not!

Selection_023

Run gmvault again

$ gmvault restore -d ~/gmvault-db examplelinux@gmail.com

Email are visible in your inbox again.

Selection_024

The  quick restore option will only the sync last 2 months  mail of your gmail account

$ gmvault restore --type quick -d ~/gmvault-db examplelinux@gmail.com

If user want to restore all of the emails with a defined label, run the following command

 $ gmvault restore --apply-label "test" -d ~/gmvault-db examplelinux@gmail.com

Now restored emails will appear with a label named “test”

Selection_025

This is all for now, Have fun!!

The post Backup and restore Gmail with GMvault appeared first on Unixmen.

Installing DeepOfix Mail Server

$
0
0


Introduction

DeepOfix is debian based dedicated mail server operating system, which is easy to deploy and not sys admin level expertise are required. It comes with a builtin web based management tool known as easy push server management tool.

Features

Some of the highlighted features are:

  1. LDAP support

The mail server  not only  comes with a builtin LDAP support but also it sores all of the user accounts and mail addresses in LDAP.

2. Anti-Virus and Anti-Spam

No require to configure or manage additional anti virus or anti spam tools as it comes with builtin ClamAV antivirus and spam assassin for spam filtering, both of the tools got updated automatically.

3. Web Based Email

Email can be accesses via internet or on a local network, easy to use web based mail client. User can manger their mail account and passwords.

4. Email Fetch

DeepOfix works with POP3 and IMAC types of multiple protocols,  user can fetch emails from service provider’s server. Single email account can receive emails from multiple users in single inbox.

5.Server Management

Exclusive web based server management or ESM is provided to manage mail accounts, it comes with very rich features including firewall, network,account management, spam control,  server control etc. features which do not require tricky command line skills and a fresher user can also handle their user mail accounts.

Installation

A dedicated server is required with minimum 4 GB RAM, Dual Core Processor with 80 GB of Disk Space. Download the .iso image from here.

Boot system, press enter

mail

Press enter and continue

mail(001)

Accept license agreement press ok to proceed

mail(002)

Make sure you have connected to network, make plan for your domain name, ip address etc and proceed to next step

mail(003)

Select your keyboard format

mail(004)

Select drive in which you are going to make this installation, press enter to proceed

mail(005)

Define your partitions as per need and click next

mail(006)

Accept changes press enter to format disk, press enter to configure network settings in next step

mail(007)

Define IP address in our scenario ip addr will be 192.51.12.222/24

mail(008)

Configure rest of the settings and make sure you have provided proper gate way and dns addresses

mail(014)

Define hostname of system and click next to proceed

mail(015)

Define domain name and, it will be used for email accounts.

mail(016)

For mail server administration we need admin account, define password for admin account

mail(018)

Make sure you have applied all of the settings appropriately

mail(019)

Select your time zone and country:

mail(020)

Press ok, let the installation begin, after reboot you have to login to server via browser

IP_address:4080

mail(022)

login to server to manage mail services.

With easypush email management wizard you can manage all of your email related services

mail(023)

Manage accounts

Click accounts, click on manage groups add a group, let us assume to create a admin group.

mail(024)

Create a mail account in that mail new group, click manage users-> Manage user->click to add user-> provide account details, password and email password warning and password age, make sure warding date must be less then password change date. Along with user email account you can manage all of other contact details also.

mail(025)

Let us test wheather this email address is working or not. Open browser type ip address or domain name and press enter:

mail(027)Login box will appears which indicates that all of the services are working properly.

mail(030)

Explore other management tabs, let us open Server Control Tab, click monitor server and click resource graphs, where you can explore status of running processes

mail(031)

To edit and configure SMTP settings, click to mail server tab, click smtp settings

mail(032)

Similarly you can mange rest of the required settings by your self.

Conclusion:

Deepofix mail server is a must try for users who are seeking a simple and easy to manage stable mail server, as it comes in dedicated os form there is no need to make complicated configurations so that even no technical users can also configure the server very easily.

Have fun!!


The post Installing DeepOfix Mail Server appeared first on Unixmen.

configure BIND Server with Ubuntu 16.04

$
0
0


Introduction

All of  Linux users are already families with BIND service, already a lots of articles has been published with recent Ubuntu Linux versions , you can go through all of them, BIND is a dns service which assign a unique name to your IP Address which is termed a “domain name”, so that it becomes easy to resolve some ip address over the internet or even on a local area network. A network con possess only one specific domain name. When some IP Domain Name is resolved to its IP Address then it is know  as forward zone and when a IP address is back to its name it is known as reverse zone. Only to purpose of dns is to simply network queries, imagine a world where all websites are knows with their ip addresses only, there will be a big chaos as human memory can no memories so many IP Address digits, but it is always easy to remember some name that is why we assign name to IP Address on any network.

How to install DNS  on Ubuntu  Server 16.04 ?

Installation

Requisites

Our domain name : www.rajneesh.com

IP Address: 192.51.12.250

forward zone configuration file name: /etc/bind/db.rajneesh.com

reverse zone configuration file name: /etc/bind/db.192

First of all download a fresh piece of Ubuntu 16.04, make a bootable device and install to server/desktop of your choice.

update system

# apt-get update

Check your IP addresses:

# ip a


dns(004)

Installed required packages

# apt-get install bind9 bind9utils

Have a look in installed directory

# cd /etc/bind && ls

Directory will look something like

dns(003)Let us create caching only name server first

Open /etc/bind/named.conf.options, find forwards and put  dns address of your ISP

Sample output

forwarders {
 8.8.8.8;
 };

Now let us resolve google.com and see what difference this caching only server will make, note down time query time in first attempt.

# dig google.com

Output will be something like

dns(001)  Let us repeat same dig command again and see the difference in output

dns Query time is zero, you can see that how quick caching only bind service can resolve dns server.

Let us configure BIND master server now, first of all make some settings in /etc/resolv.conf. Open file and type:

# vim /etc/resolv.conf

Sample:

search rajneesh.com 
nameserver 192.51.12.250

Replace your domain name and your IP address mentioned in demo.

Change directory to /etc/bind

# cd /etc/bind

Open named.conf.local

# vim named.conf.local

Our con configuration file is something like below

// Consider adding the 1918 zones here, if they are not used in your
// organization
//include "/etc/bind/zones.rfc1918";
zone "rajneesh.com" {
 type master;
 file "/etc/bind/db.rajneesh.com";
};
zone "12.51.192.in-addr.arpa" {
 type master;
 file "/etc/bind/db.192";
};

Now, our zone name is “rajneesh.com” which will be our dns name, server is master server, so we have defined server type as master. Configuration file will be db.rajneesh.com. Similarly  for reverse lookup we have do define ip-addr.arpa for our ip address, type first three digits of yor ip address in reverse order before .in-arddr.arpa. File for reverse zone will be db.192. Make sure your have provided appropriate location for your zone configuration files.

Configure Forward zone

copy db.local sample file to db.rajneesh.com

# cp db.local db.rajneesh.conf

Open and edit db.rajneesh.com

# vim /etc/bind/db.rajneesh.com

Configure file

;
; BIND data file for local loopback interface
;
$TTL 604800
@ IN SOA www.rajneesh.com. admin.rajneesh.com. (
 2 ; Serial
 604800 ; Refresh
 86400 ; Retry
 2419200 ; Expire
 604800 ) ; Negative Cache TTL
;
@ IN NS www.rajneesh.com.
@ IN A 192.51.12.250
www IN A 192.51.12.250

www.rajneesh.com. is domain name which we are willing to resolve, make sure that you have put dot (.) after every domain name definition. admin.rajneesh.com. is email id for this domain. NS will be name server for this domain. Put A record for your host e.g. www.

Save and quit, restart bind service.

# /etc/init.d/bind9 restart

Let us check whether this are working proper or not.

# /etc/init.d/bind9 status

dns(002) Thing looks good at this stage.

Resolve dns name.

# dig @127.0.0.1 rajneesh.com

Sample output

; <<>> DiG 9.10.3-P2-Ubuntu <<>> @127.0.0.1 rajneesh.com
; (1 server found)
;; global options: +cmd
;; Got answer:
;; ->>HEADER<<- opcode: QUERY, status: NOERROR, id: 37282
;; flags: qr aa rd ra; QUERY: 1, ANSWER: 1, AUTHORITY: 1, ADDITIONAL: 2

;; OPT PSEUDOSECTION:
; EDNS: version: 0, flags:; udp: 4096
;; QUESTION SECTION:
;rajneesh.com. IN A

;; ANSWER SECTION:
rajneesh.com. 604800 IN A 192.51.12.250

;; AUTHORITY SECTION:
rajneesh.com. 604800 IN NS www.rajneesh.com.

;; ADDITIONAL SECTION:
www.rajneesh.com. 604800 IN A 192.51.12.250

;; Query time: 0 msec
;; SERVER: 127.0.0.1#53(127.0.0.1)
;; WHEN: Mon Mar 14 20:34:43 IST 2016
;; MSG SIZE rcvd: 91

We have a green signal in ANSWER section. so let us move to configure reverse zone.

copy db.127 sample file to db.192 and edit

# cp db.127 db.192

Edit file

; BIND reverse data file for local loopback interface
;
$TTL 604800
@ IN SOA www.rajneesh.com. admin.rajneesh.com. (
1 ; Serial
604800 ; Refresh
86400 ; Retry
2419200 ; Expire
604800 ) ; Negative Cache TTL
;
@ IN NS www.rajneesh.com.
250 IN PTR rajneesh.com.


File is almost a replica of forward zone file, except PTR or pointer record, which we have to mention in reverse zone file. 250 is the last digit of our ip address. Save and exit.

Restart server

# /etc/init.d/bind9 restart

nslookup IP address of your domain server.

#nslookup 192.51.12.250

Sampe output

Server: 192.51.12.250
Address: 192.51.12.250#53
250.12.51.192.in-addr.arpa name = rajneesh.com.

Things are working good. This is all for now, Have fun!


The post configure BIND Server with Ubuntu 16.04 appeared first on Unixmen.

Installing JAVA jre/jdk with Ubuntu 16.04

$
0
0


Introduction

Two variable of java are available, JRE (Java Runtime environment) and Java Development kit or JDK. JRE comes with minimal tools to create java applications. JDK is full fledged toolkit which have everything which is required to create a java applications. For previous versions of Ubuntu java installation  tutorials are already published with unixmen.com, you can visit out website to have a look. You can have all of versions installed on your Ubuntu system but need to make default  any one of them.In this tutorial w ewill install 3 versions of java (oracle, jdk, jre) and will make jre is default one.

Installation

update your system

# apt-get update

Verify if java is installed or not

# java -version

If there is no java package installed ye, output will be something like

The program 'java' can be found in the following packages:
 * default-jre
 * gcj-4.9-jre-headless
 * gcj-5-jre-headless
 * openjdk-7-jre-headless
 * gcj-4.8-jre-headless
 * openjdk-6-jre-headless
 * openjdk-8-jre-headless
 * openjdk-9-jre-headless
Try: apt install <selected package>

So, we need to install java.

There is two flavors of java available to install, one is open source and another from oracle.

install open source version first, press y to install

# sudo apt-get install openjdk-7-jre

dns(005)

In same way you can install jdk version

# sudo apt-get install openjdk-7-jdk

Install oracle version of Java, need to install few prerequisites

 # sudo apt-get install python-software-properties

Add Oracle Java repo

# sudo add-apt-repository ppa:webupd8team/java

Press enter and update system

.
.
.
More info: https://launchpad.net/~webupd8team/+archive/ubuntu/java
Press [ENTER] to continue or ctrl-c to cancel adding it
gpg: keyring `/tmp/tmpm2b6ngwv/secring.gpg' created
gpg: keyring `/tmp/tmpm2b6ngwv/pubring.gpg' created
gpg: requesting key EEA14886 from hkp server keyserver.ubuntu.com
gpg: /tmp/tmpm2b6ngwv/trustdb.gpg: trustdb created
gpg: key EEA14886: public key "Launchpad VLC" imported
gpg: no ultimately trusted keys found
gpg: Total number processed: 1
gpg: imported: 1 (RSA: 1)
OK

Update system

# apt-get update

Install package

# sudo apt-get -y install oracle-java8-installer

Press enter, press ok

dns(007) Select ok, press enter

dns(008)

Installation will be complete with following message

.
.
Oracle JRE 8 browser plugin installed
Setting up gsfonts-x11 (0.24) ...

Now have a look what we have installed

# java -version

Sample output

java version "1.8.0_74"
Java(TM) SE Runtime Environment (build 1.8.0_74-b02)
Java HotSpot(TM) 64-Bit Server VM (build 25.74-b02, mixed mode)

As we have three different flavors of Java installed, let us find appropriate path for java version you wants to make default

root@um-VirtualBox:~# java -version

Sample  output

java version "1.8.0_74"
Java(TM) SE Runtime Environment (build 1.8.0_74-b02)
Java HotSpot(TM) 64-Bit Server VM (build 25.74-b02, mixed mode)
root@um-VirtualBox:~# sudo update-alternatives --config java
There are 2 choices for the alternative java (providing /usr/bin/java).

Selection Path Priority Status
------------------------------------------------------------
* 0 /usr/lib/jvm/java-8-oracle/jre/bin/java 1072 auto mode
1 /usr/lib/jvm/java-7-openjdk-amd64/jre/bin/java 1071 manual mode
2 /usr/lib/jvm/java-8-oracle/jre/bin/java 1072 manual mode

Press <enter> to keep the current choice[*], or type selection number:

You can see Oracle-Java is default java environment for now, let us change it to jre, select 2 and press enter.

Open and edit /etc/profile file

# vim /etc/profile

Put following line in last line of the file, copy jre path from previous command:

dns(009)

Reload this file, so that changes can get applied effectively.

# source /etc/profile

Verify default JAVA_HOME is effectively modified or not

# echo $JAVA_HOME

Output

# /usr/lib/jvm/java-8-oracle/jre/bin/java

So, now you have installed java successfully on your Ubuntu 16.04 machine. Have fun!!

The post Installing JAVA jre/jdk with Ubuntu 16.04 appeared first on Unixmen.

Top Things to do after installing Ubuntu 16.04

$
0
0


To have a fully functional and smoothly running Ubuntu 16.04 Desktop users need to have some services application running before they start working with this fresh flavor of Ubuntu, although it depends upon nature of services for which system will be utilized, we have tried to figure out some of the common services which are required to run on every system.

Lets tell you top things to do after installing Ubuntu 16.04

Update your system

# apt-get update
  1. Install flash player

Open terminal and run following command

# sudo apt-get install flashplugin-installer

Download package from official website of Adobe click this link

Downlaod .tar.gz package of flash

# wget https://fpdownload.adobe.com/get/flashplayer/pdc/11.2.202.577/install_flash_player_11_linux.x86_64.tar.gz

Unzip folder

# tar -xvf install_flash_player_11_linux.x86_64.tar.gz

Copy libflashplayer.so file to  /usr/lib/mozilla/plugins

# cp libflashplayer.so /usr/lib/mozilla/plugins/

Close browser and restart.

Open browser and verify

dns(011)

2. Install dropbox

Dropbox is cloud storage, which synchronize on all of your devices.Download package form official website

# wget https://linux.dropbox.com/packages/ubuntu/dropbox_2015.10.28_amd64.deb

Install package

# dpkg -i dropbox_2015.10.28_amd64.deb

Open Dropbox icon and install package

dns(012)

3. Install wine

wine is required to run windows compatible (.exe) application to Linux, it is a compatible layer which facilitate to run  windows applications.

If you are running a 64 bit system, first enable 32 bit architecture

# dpkg --add-architecture i386

Add repo

# add-apt-repository ppa:wine/wine-builds

Update system

# apt-get update

Install package

# sudo apt-get install --install-recommends winehq-devel

After installation is complete, wine package icon will appear.

4. Install uGet Download Manager

Now, you have configured some important features in your system, let us have some decent download manager which can accelerate, manage multiple downloads on a single time,  uGet is perfect solution for that.

Add repo

# sudo add-apt-repository ppa:plushuang-tw/uget-stable

Update system and install package

# apt-get update

Install uGet

# apt-get install uget

dns(013)

5. Disable Guest login account

To assure security of your Ubuntu desktop it is  recommended to disable guest session login which does not require any password. You have to edit lightdm display manager file

Install following package

# apt-get install gksu

Open Terminal and run following

# gksu gedit /etc/lightdm/lightdm.conf

Add following lines

 [SeatDefaults]
greeter-session=unity-greeter
allow-guest=false

Restart service

# sudo /etc/init.d/lightdm restart

Now logout and try to login guest session, it is gone!

6. Secure your passwords with Enpass Open source password management tool

Enpass is a Open Source tool used to secure and mange all of your critical passwords, ytou can manage and secure all of your critical password to your local system. It uses 256 bit AES encryption system to secure your information.

To install Enpass enter new repo

# echo "deb http://repo.sinew.in/ stable main" > /etc/apt/sources.list.d/enpass.list

Import key that is used to sign the release

 wget -O - http://repo.sinew.in/keys/enpass-linux.key | apt-key add -

Update packakge

# apt-get update

Download Enpass package

# apt-get install enpass

dns(014)

Give password

dns(015)

Configure all of your required password settings


7. Install VLC media Player

VLC media player is an opensource, cross platefrom multimedia player, and framework that plays most of the multimedia files. with Ubuntu 16.04 is is not installed by default so we have to install that package, update and install vlc.

# apt-get install vlc browser-plugin-vlc

8. Install midori Browser

Midori browser is very quick and fast browser, it comes with all of the latest features which make that application fast and secure.

Add repository to install that application

# sudo apt-add-repository ppa:midori/ppa

Update system and install browser

# apt-get update -qq && sudo apt-get install midori

dns(017)

9. Install Codeblocks

Codeblocks is very popular open source IDE for C, C++ development, codeblocks has provided repository for Ubuntu 16.04,  codeblocks comes with several plugins which can be added as and when required.

Install package

# pat-get install codeblocks

Open terminal and run codeblocks

# codeblocks

dns(018)

10. Install putty

To manage your server  you may need to have some remote login tool and putty is most easy to use and quick to deploy remote login application.

# apt-get install putty

dns(019)

 11. Change ssh default port

You secure your machine you must change ssh default port so that can avoid anonymous security theft.

Open ssh configuration file

# vim /etc/ssh/sshd_config

Change default 22 port so some another unique port.

# What ports, IPs and protocols we listen for
Port 989
# Use these options to restrict which interfaces/protocols sshd will bind to
#ListenAddress ::
#ListenAddress 0.0.0.0
Protocol 2
# HostKeys for protocol version 2
HostKey /etc/ssh/ssh_host_rsa_key
HostKey /etc/ssh/ssh_host_dsa_key
HostKey /etc/ssh/ssh_host_ecdsa_key
HostKey /etc/ssh/ssh_host_ed25519_key
#Privilege Separation is turned on for security
UsePrivilegeSeparation yes

Restart service

# /etc/init.d/ssh restart

Try to login with changed port

 $ sudo ssh -X -p 989 um@192.51.12.250

dns(020)


12. Edit /etc/hosts

Some times you do not have any FQDN in your network, in absence of name server you can map your ip address and a hostname.

Open and edit /etc/hosts

# vim /etc/hosts

Edit and provide ip address with hostname, put one more extra entry for some remote machine.Do similar setting in remote machine.

dns(021) Try to ssh login this machine using hostname.

dns(022) You can see, things are working.

13. Install filezilla

Filezilla is a open source ftp server and client open source application. It is easy to use cross platform. Very rich in features like tabbed user interface, ipv6 support, drag and drop, remote file search and editing, even you can save sessions. IT is a must have for any Linux user, install this applcaiton with apt-get.

# apt-get install filezilla


14. Install and configure  Geary Email Client

 Geary is one of the most popular  mail client application. It is a full feature HTML based mail client and support all of the famous email systems like Gmail, Ymail, Outlook etc.

To install Geary, add repo

# add-apt-repository ppa:yorba/ppa && apt-get update

Install

# apt-get install geary

dns(023)

15. Install LNAV -Log file navigator

Logfile navigator or lnav is very rich and advanced logging tool. all of the log contents are merged into a single view based on time stamps. It detects log message automatically while scanning log flies, it displays that matched or do not matches a single set of regular expressions. session information is saved automatically and restored when your viewing same set of files, filters applied, current location of files, everything is saved in session.

Installation

# apt-get install lnav

Start session

# lnav

dns(024)

Let us view logs from some specific part only

# lnav /var/log/apt/history.log

dns(025)

16. Install skype

To install skype with Ubuntu, open  software and updates, click other software and  select canonical partners checkbook to enable. update your system and install skype.

dns(026)# apt-get update && apt-get install skype

dns(028)


This is all for now, soon we will more applications and services configurations with Ubuntu 16.04. Have Fun!!

The post Top Things to do after installing Ubuntu 16.04 appeared first on Unixmen.

Top things to do after installing Arch Linux

$
0
0


After Arch Linux is installed the only thing that users see is a command line without any X server so user should install X server and a Desktop and some other applications to do his/her daily works, in this post we will cover things after installing Arch Linux.

X server:

For having GUI on your system you need to install X server and it can be installed on system by following command (although you are not forced to install all members of this group package):

sudo pacman -S xorg


Installing Desktop:

After installing X server you need a Desktop Enviroment or a Windows manager to do your works with that!
Note: Installing Extra group packages is optional!

Gnome Shell:

sudo pacman -S gnome gnome-extra

Cinnamon:

sudo pacman -S cinnamon nemo-fileroller

XFCE:

sudo pacman -S xfce4 xfce4-goodies

KDE:

sudo pacman -S plasma

I3wm:

sudo pacman -S i3

Openbox:

sudo pacman -S openbox obconf

Mate:

sudo pacman -S mate mate-extra


Display manager:

There are lot of Display manager to use such as XDM, slim and etc but my favorite one is LightDM because it’s fast and really customizable.

Note:some desktops such as Gnome Shell and etc has their own Display Manager then you won’t need LightDM anymore!

for installing this Display manager use following command:

sudo pacman -S lightdm lightdm-gtk-greeter

You can install following package to be able to customize your LightDM by a graphical application:

sudo pacman -S lightdm-gtk-greeter-settings

If you llike to have other greeters on your Arch Linux you can use this command to check available:

pacman -Ss greeter

After you installed your favorite greeter you can go to /etc/lightdm/lightdm.conf and change it’s greeter, so put the name of your greeter in front of this line in that configuration text file:

sudo nano /etc/lightdm/lightdm.conf
[Seat:*]
...
greeter-session=lightdm-yourgreeter-greeter

Now enable the service:

sudo systemctl enable lightdm

Bluetooth:

For bluetooth you need to install some packages and start Bluetooth service, enter following command in Terminal to install packages:

sudo pacman -S bluez blueman bluez-utils

Now start btusb module:

modeprobe btusb

Enable and Start bluetooth service:

sudo systemctl enable bluetooth && sudo systemctl start bluetooth

Done!

AUR Repo:

Some of packages such as Kazam, i3blocks and etc can’t be find in Main repositories so we should install them from AUR and for do as well we need to add AUR address at the end of /etc/pacman.conf file.

First open this file with nano editor:

sudo nano /etc/pacman.conf

Now add these lines at the very bottom of file:

[archlinuxfr]
SigLevel = Never
Server = http://repo.archlinux.fr/$arch

Now save the changes and update and upgrade your system by following code:

sudo pacman -Syu

Yaourt is the tool which let users to download and install packages from unofficial repository so install this tool by following command:

sudo pacman -S yaourt

Test Yaourt, for doing this you just need to install a package with that as an example install Kazam package with that:

yaourt -S kazam

Note: Users shouldn’t use sudo while they are using yaourt command.


Remove beep sound:

After we installed Arch Linux sometimes we hear some beep sound which related to a special module which we should blacklist it, as an example this sound will be heard when you push Backspace buttom while there are nothing to remove, now for blacklisting the sound we should do following steps:

First users should make a directory:

sudo mkdir /etc/modeprobe.d

Make a empty text file in that:

sudo touch /etc/modeprobe.d/pcbeep.conf

Now open that file and put this line in that:

blacklist pcspkr

Reboot and enjoy your system! you won’t be bothered anymore with that sound.

reboot


Network:

We need some packages and some other configuration to have Wifi and ethernet on our Arch Linux so install following packages:

sudo pacman -S dialog wpa_actiond ifplugd wpa_supplicant

At this point you should check your interface name with ip link output:

ip link

Output:

[hossein@ArchLinux ~]$ ip link
1: lo: <LOOPBACK,UP,LOWER_UP> mtu 65536 qdisc noqueue state UNKNOWN mode DEFAULT group default qlen 1
    link/loopback 00:00:00:00:00:00 brd 00:00:00:00:00:00
2: enp2s0: <BROADCAST,MULTICAST,UP,LOWER_UP> mtu 1500 qdisc fq_codel state UP mode DEFAULT group default qlen 1000
    link/ether 68:f7:28:cf:67:c3 brd ff:ff:ff:ff:ff:ff
3: wlp3s0: <NO-CARRIER,BROADCAST,MULTICAST,UP> mtu 1500 qdisc mq state DOWN mode DORMANT group default qlen 1000
    link/ether 34:e6:ad:f1:0b:8f brd ff:ff:ff:ff:ff:ff

So as you see mine is enp2s0 so I should enter following commands in my terminal(you have to replace your interface name with mine in commands!):

sudo systemctl enable dhcpcd && sudo systemctl start dhcpcd
sudo systemctl enable dhcpcd@enp2s0 && sudo systemctl start dhcpcd@enp2s0

Do this also for wireless interface name:

sudo systemctl enable dhcpcd@wlp3s0 && sudo systemctl start dhcpcd@wlp3s0

You should also enable dhclient service, enter following commands:

sudo systemctl enable dhclient && sudo systemctl start dhclient
sudo systemctl enable dhclient@enp2s0 && sudo systemctl start dhclient@enp2s0
sudo systemctl enable dhclient@wlp3s0 && sudo systemctl start dhclient@wlp3s0

The last service you should start and enable is NetworkManager so enter this command:

sudo systemctl start NetworkManager.service && sudo systemctl enable NetworkManager.service

Users also can install a applet to manage their network:

sudo pacman -S network-manager-applet

This applet can be run by:

nm-applet

Or you can put it in your desktop menu :)


Sound Server:

Next thing that a user need is sound, you just need some packages to have sound so install following packages:

sudo pacman -S pavucontrol alsa-firmware alsa-utils alsa-plugins pulseaudio-alsa pulseaudio

Note: This commad install Alsa and Pulseaudio together!
Now you can either use pavucontrol or alsamixer command in terminal to choose sound card!


Optional Packages:

This step is not necessary to pass but if you like enter following command to install some optional packages like firefox, ffmpeg, touchpad driver, gedit and etc:

sudo pacman -S firefox vlc xf86-input-synaptics gedit ffmpeg unzip thunar 


The post Top things to do after installing Arch Linux appeared first on Unixmen.

SSH to your Linux systems from Android

$
0
0


Let us say, you are out of the office. You got a call from your office, and you are asked to fix an important issue in the Linux server. All you have is just your Android smartphone with Internet connection. What will you do in such kind of hectic situation? No worries, there is an all in one Terminal client called JuiceSSH for Android operating systems. It includes SSH, Local Shell, Mosh and Telnet support. Just install the app, and control and manage the Linux systems from any Android devices on the fly.

JuiceSSH is available as free and pro version (Pro version has some extra features. See the features section below). In this brief tutorial, let us see how to Install and use JuiceSSH to control and manage the Linux systems from any Android tablets or smartphones.

Features

JuiceSSH has lot of important features.

Here is the complete list of features for the free version.

  • Full colour terminal / ssh client ;
  • Popup keyboard with all those normally hard to find characters ;
  • Change font size using the volume keys ;
  • External keyboard support ;
  • Gestures for irssi, weechat, tmux and screen ;
  • Community and third party plugins ;
  • Official Mosh support ;
  • Telnet support ;
  • Local Android terminal support ;
  • Support multiple themes, including Dark, Light, 80’s hacker, Molokai, Solarized Dark and Solarized Light terminal color themes ;
  • Click URLs to open in a browser ;
  • Copy & Paste within sessions ;
  • Save and Share SSH transcripts to Dropbox / Evernote / Email & SD card ;
  • UTF-8 character support ;
  • Easily organise your connections by group ;
  • Keep multiple SSH sessions running in the background ;
  • Seamlessly connect ‘via’ other SSH connections with one click ;
  • Immediate access when you open the app to your frequently used connections ;
  • IPv6 support ;
  • Password & OpenSSH private key support (ECDSA, RSA and DSA) ;
  • RSA key generator (encryption supported) ;
  • SSH key agent forwarding ;
  • Support for two-factor authentication (eg: Google Authenticator) ;
  • Identities (users / password / keys) are abstracted from connections. Instead of updating every connection when you change your password – just update the identity and any connections linked to it will use the new password/key ;
  • zlib compression to improve SSH sessions on high latency connections.

Pro Features (optional in-app purchase).

  • Quick and easy port forwards that can be connected to via the app or widget and can automatically open in a browser if required ;
  • Integrate with Amazon AWS / EC2, synchronise connections and automatically group servers based on their class or security groups ;
  • Securely keep everything in sync between multiple devices ;
  • Automated AES-256 encrypted backups of all of your connections and settings ;
  • A beautiful widget for fast access to either your frequently used connections, or a specific group (Android 3.0+) ;
  • Team collaboration. Share your groups of connections with team members and start working together instead of separately ;
  • Handy snippets library for quick access to your frequently used commands ;
  • Security lock to automatically protect JuiceSSH after a period of inactivity.

Install JuiceSSH

Open Google play store and search for JuiceSSH.

Screenshot_2016-04-13-14-43-52

Click Install.

Screenshot_2016-04-13-14-44-37

Once you installed JuiceSSH, launch it. Here is how the default interface of JuiceSSH looks like.

Screenshot_2016-04-13-14-46-32

You are not connected to any servers yet. So, click on the Connections tab on the top. In the next window, click the plus (+) sign to add servers that you want to SSH from the Android device.

Screenshot_2016-04-13-14-47-40

In the next window, Enter your Linux system’s name, IP address. Make sure you selected SSH in the ‘Type’ drop down box. Next, we need to enter the user name and password for the Linux server. To do that, select ‘New’ from the Identity drop down box.

Screenshot_2016-04-13-14-50-42A new window will open. Enter your remote system’s nick name, username, and password in the respective fields. Once you entered all required details, click tick sign on the top right corner.

Screenshot_2016-04-13-14-52-18

You’ll now see the Identity is changed. Finally, click the tick sign on the top to save the changes.

Screenshot_2016-04-13-14-55-01

That’s it. Our Linux system has been added. Similarly, you can add any number of devices that you want to manage from the Android devices.

After adding the Linux system, Tap on it from the Connections tab to start the SSH session from the Android device.

Screenshot_2016-04-13-14-55-39

Click Accept to host verification’s key:

Screenshot_2016-04-13-14-56-15

That’s it. Start managing your remote Linux systems right from the Android device. At first time, you’ll see a little help guide that describes how to use JuiceSSH. You can use volume buttons of your Android device to increase or decrease the font sizes.

Tap the Terminal to bring up the a pop-up keyboard. Swipe it right to enable or disbale autocomplete. To copy / paste the texts, long press the texts. Click OK to close the help guide.

Screenshot_2016-04-13-14-57-07

Here is the SSH session of my remote Ubuntu 14.04 LTS system. You can use the JuiceSSH interface as the way you use the normal SSH session from any computer.

At the bottom of the JuiceSSH window, you’ll see the list of standard keys from the normal keyboard. To open the Keyboard, just tap on the keyboard icon. To autocomplete a command, tap on the tab icon. To view the command history, tap up/down arrows.

Screenshot_2016-04-13-14-58-22

Let us try to ping a host. For example, ping unixmen.com:

Sample output:

Screenshot_2016-04-13-14-59-11

To exit the ping process, just tap ctrl button in the above window, and press ‘c’ from Android device keyboard.

We can install, upgrade, update packages as the way we do in the normal Linux system.

Screenshot_2016-04-13-15-05-03

To exit from the SSH session, type exit in the Terminal.

That’s all for now. As far as I tested, JuiceSSH worked like a charm. I didn’t encounter even a single issue while testing. Give it a try, you won’t be disappointed.

If you like our tutorial, please share it with your contacts and support us.

Cheers!

Source & Reference links:

The post SSH to your Linux systems from Android appeared first on Unixmen.


Videocast: Custpmize I3wm on Arch Linux

$
0
0


I3wm is customizable windows manager which is really lightweight so its suitable for old computers, in this videocast we are going to talk a little about it’s customizing on Arch Linux distribution, Things we will cover:

  • i3bar
  • i3blocks
  • fonts
  • colors
  • …..

For installing this window manager on Arch use command below:

sudo pacman -S i3

For installing i3blocks use this command:

yaourt -S i3blocks

This is a picture of my screen:

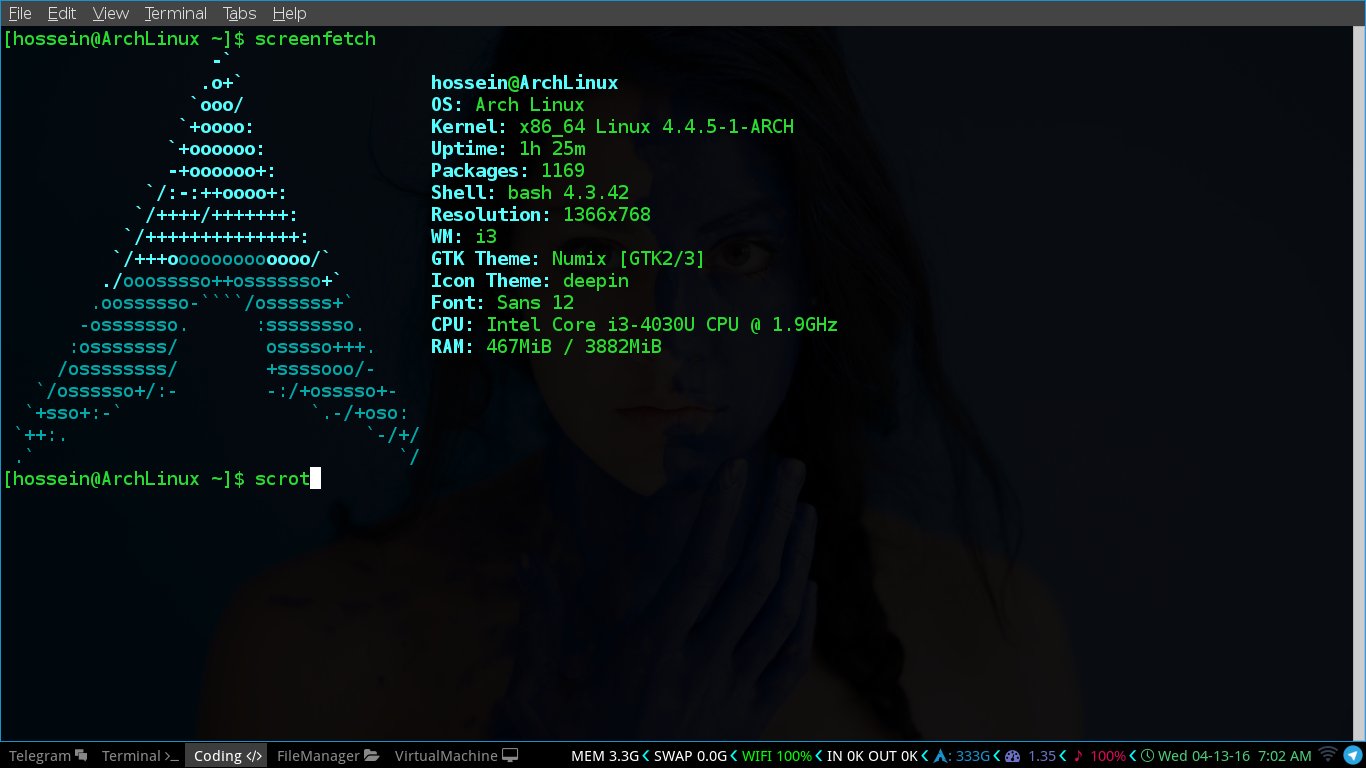
2016-04-13-070259_1366x768_scrot

Here is the video:

We are not native English people   :(  . We  try  only to help.

The post Videocast: Custpmize I3wm on Arch Linux appeared first on Unixmen.

Minimal Tools on Arch Linux

$
0
0


Some people use old comupters so they can’t use KDE, Gnome and etc  and they mostly use some Windows Managers like OpenBox, I3wm and etc with some other Terminal Apps, in this post we are going to talk about I3wm, OpenBox, Xmonad, etc and how people can live in Terminal and using Terminal Music players, Terminal File Managers!

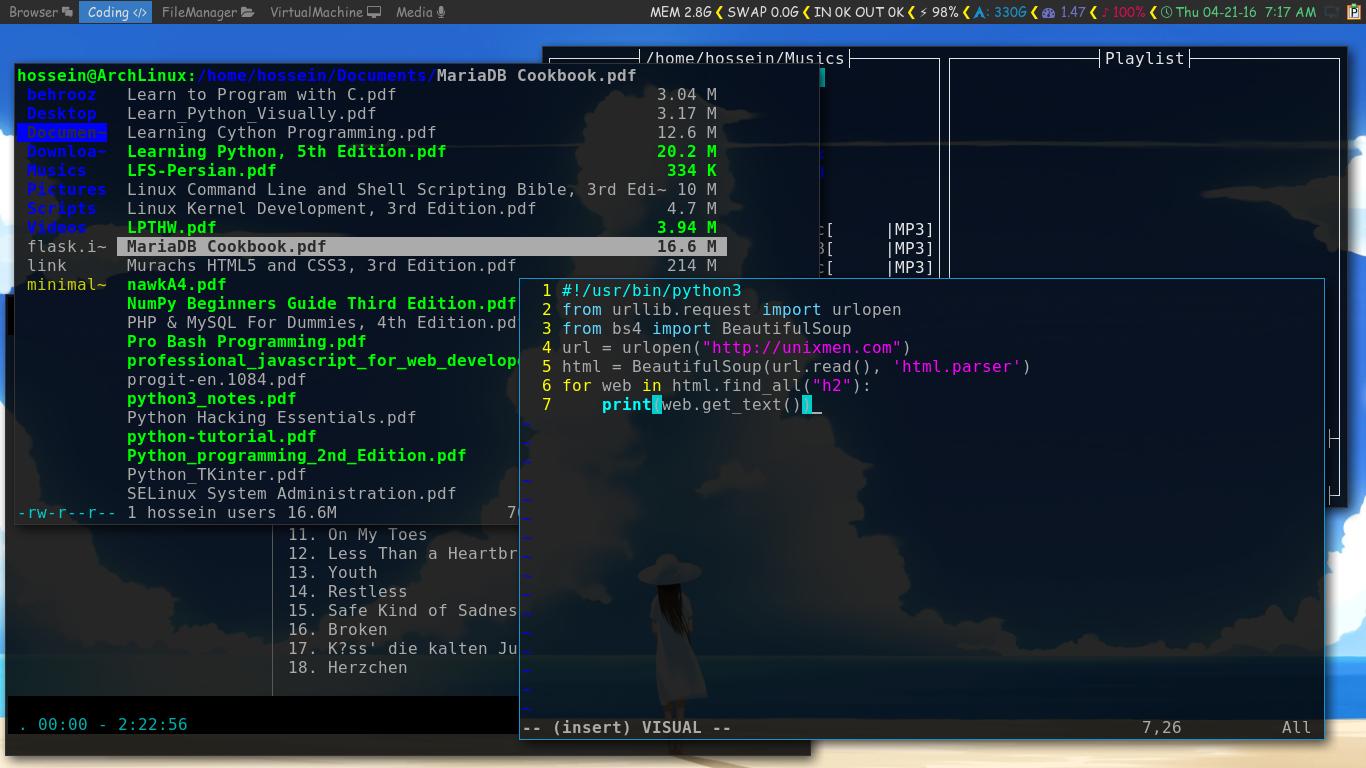
screenshot-2016-04-21_07-17-36

I3wm on Arch Linux:

For installing I3wm on Arch Linux use this command:

sudo pacman -S i3

In the command above i3 is a Group Package which will install “i3-status“, “i3-lock” and “i3-wm“, I3lock is customizable as an example “i3-fancy Lock” that also can be found in Terminal is a good look i3lock that you can use, here is the screenshot:

Tooltip_001

If you wanna install  this lock you can use following command in terminal:

yaourt -S i3lock-fancy-git

After installing it you should use this command to run it:

i3lock-fancy

Running a lock in Terminal for i3wm is a little foolish move so let’s make a shortcut for it, use “nano” to open i3wm config file:

nano ~/.config/i3/config

Now add following lines in your file config for i3lock-fancy shortcut to be started with $mod+l :

# lock
bindsym $mod+l exec i3lock-fancy

Now restart your i3wm and enjoy your lock!

Xmonad on Arch Linux:


Xmonad is a lightweight Windows Manager which has been written with Haskell, for installing this Windows Manager use this command:

sudo pacman -S xmonad xmonad-contrib

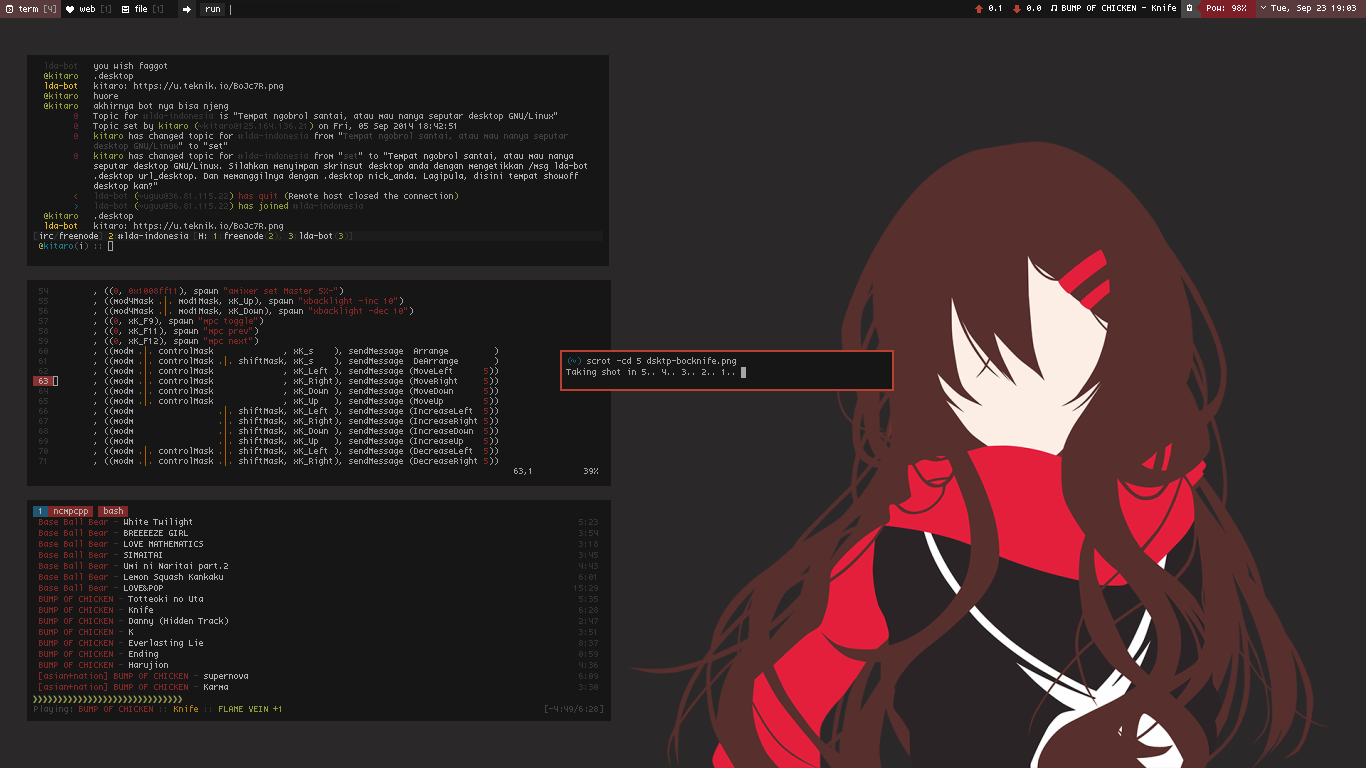
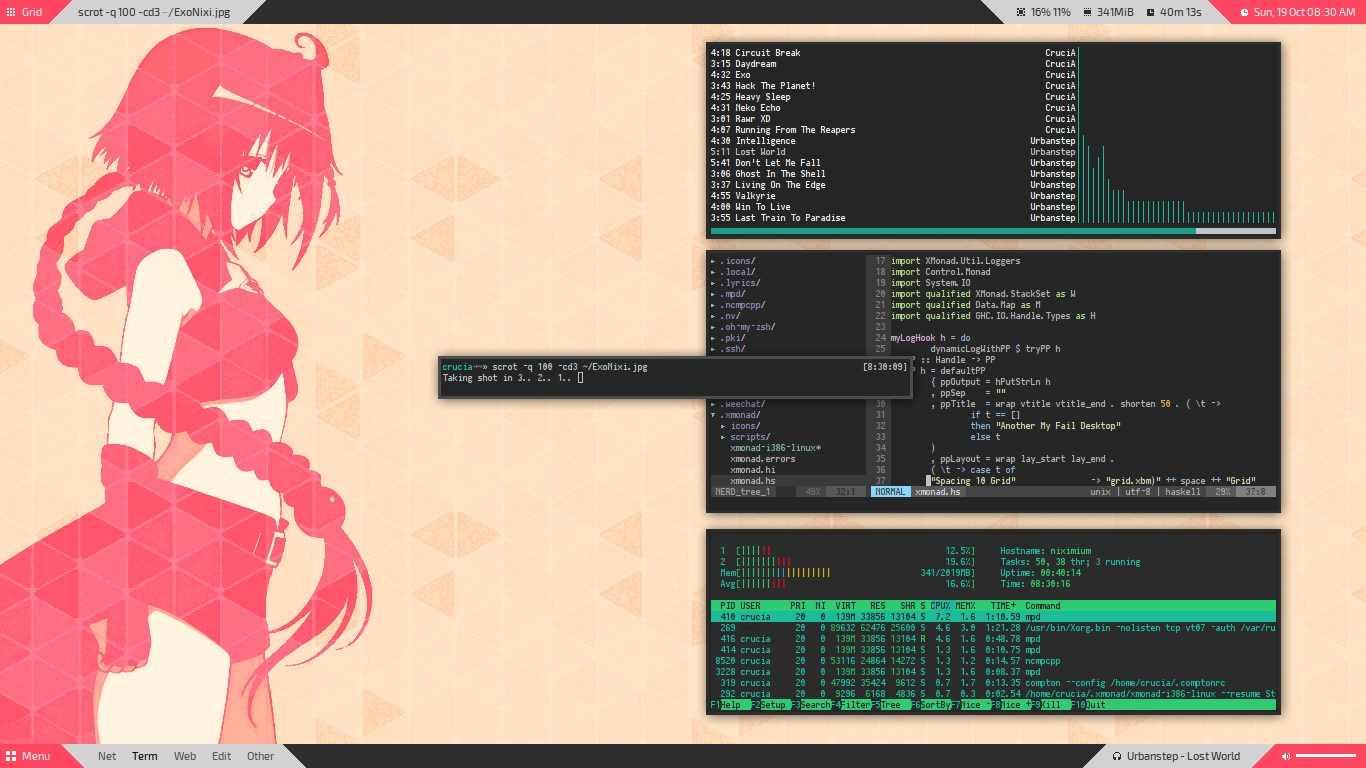
Here you can see one of it’s screenshots:

dsktp-bocknife

ExoNixi

(Xmonad Screenshots are from Anant Paatra)

you can see other Screenshots on the Internet!

 OpenBox on Arch Linux:

OpenBox is also hightly customizable Windows Manager and it has lot of fans around the world, this Windows Manager can be installed by this command:

sudo pacman -S openbox

With following command you can install “tint2” which is a configurable menu and “obconf” which can Help you to customize OpenBox:

sudo pacman -S tint2 obconf

Here you can see screenshot:

2015-11-02-002404_1366x768_scrot

Use this command to make a directory for OpenBox file config:

mkdir -p ~/.config/openbox

Now copy OpenBox config files there:

cp /etc/xdg/openbox/{rc.xml,menu.xml,autostart.sh} ~/.config/openbox

Now by going in ~/.config/openbox you can make some changes in your OpenBox.

Terminal Music Players:

There are different Terminal Music Players but my favorite ones are Cmus and Mocp, these two Terminal Music Players can be customized and they both are in Official Arch Linux Repositories so install Cmus with this command:

sudo pacman -S cmus

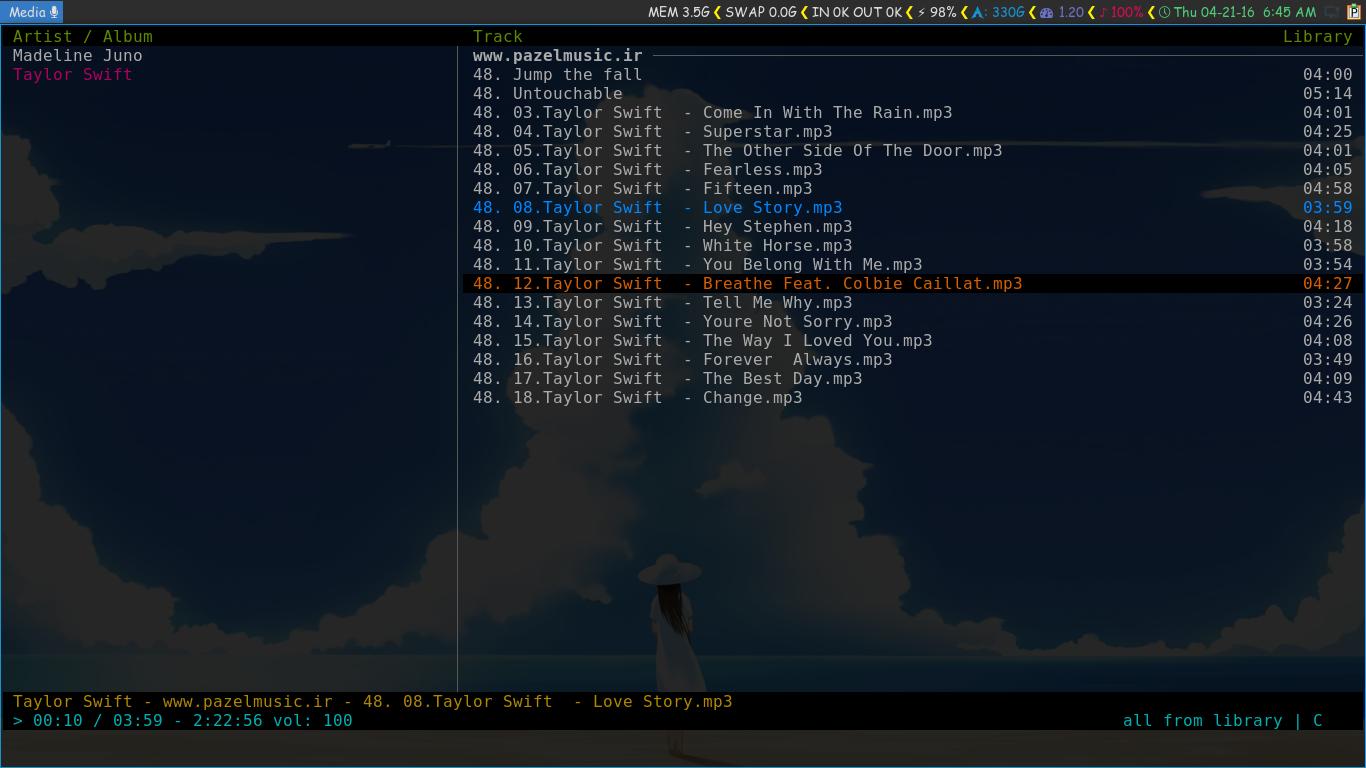
Now let’s put a theme for it, Solarized is a good theme which you can see it’s screenshot here:

screenshot-2016-04-21_06-45-57

For having this theme, first make Cmus config’s directory in /home/$USER, following code will help:

mkdir -p $HOME/.cmus

Now make a text file there:

touch $HOME/.cmus/solarized.theme

Open file with nano:

nano $HOME/.cmus/solarized

Copy following lines in that empty file:

# colors from solarized: http://ethanschoonover.com/solarized
# default text color
set color_win_fg=default

# overall background color
set color_win_bg=default

# command-line colors
set color_cmdline_bg=default
set color_cmdline_fg=default
set color_error=160
set color_info=136
set color_separator=240

# bottom status line
set color_statusline_bg=0
set color_statusline_fg=37

# bottom title line
set color_titleline_bg=0
set color_titleline_fg=136

# top title area
set color_win_title_bg=0
set color_win_title_fg=64
##### playing file colors ######################################################
# unselected currently playing track's text
set color_win_cur=33

# active selection for currently playing track
set color_win_cur_sel_bg=0
set color_win_cur_sel_fg=33

# inactive selection for currently playing track
set color_win_inactive_cur_sel_bg=default
set color_win_inactive_cur_sel_fg=125

##### non-playing file colors ##################################################
# active selection
set color_win_sel_bg=0
set color_win_sel_fg=166

# inactive selection
set color_win_inactive_sel_bg=default
set color_win_inactive_sel_fg=125

##### file browser view colors #################################################
# directory listing color
set color_win_dir=33

Now run Cmus and use this command in that:

:colorscheme solarized


Another nice Terminal Music Player you may like can be “Moc“, install it with this command:

sudo pacman -S moc

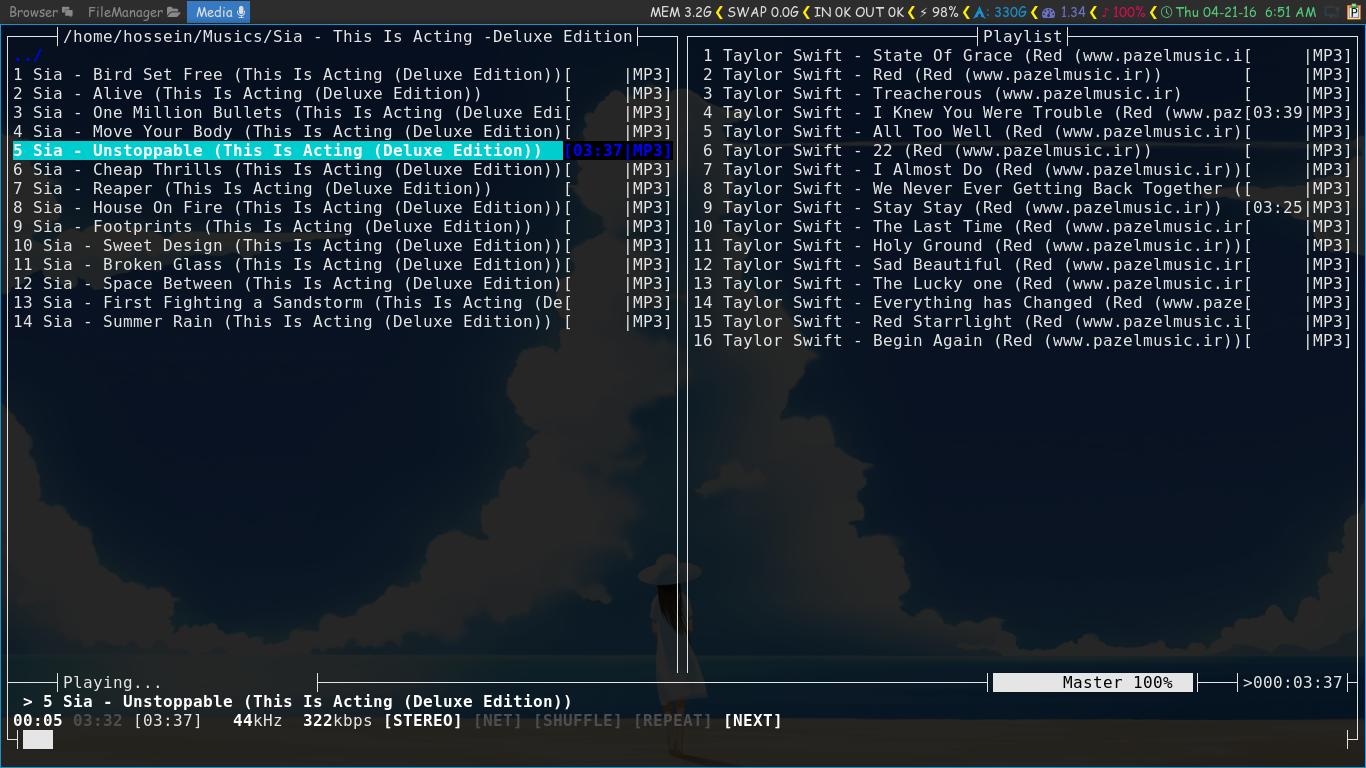
Here you can see a screenshot with a Darkdot Theme:

screenshot-2016-04-21_06-51-41For running Moc you should use mocp command in terminal but if you want it to be started with Darkdot Theme you should use following code:

mocp -T darkdot_theme

Users can’t always use this long command to get Moc with Darkdot Theme so we can use alias, then each time we use mocp command we get our MOC with Darkdot Theme, so open .bashrc file:

nano $HOME/.bashrc

Now add this line to the file:

alias mocp='mocp -T darkdot_theme'

Save and close the Terminal, from now when ever you enter mocp command in terminal mocp -T darkdot_theme will be excuted!


Terminal File Managers:
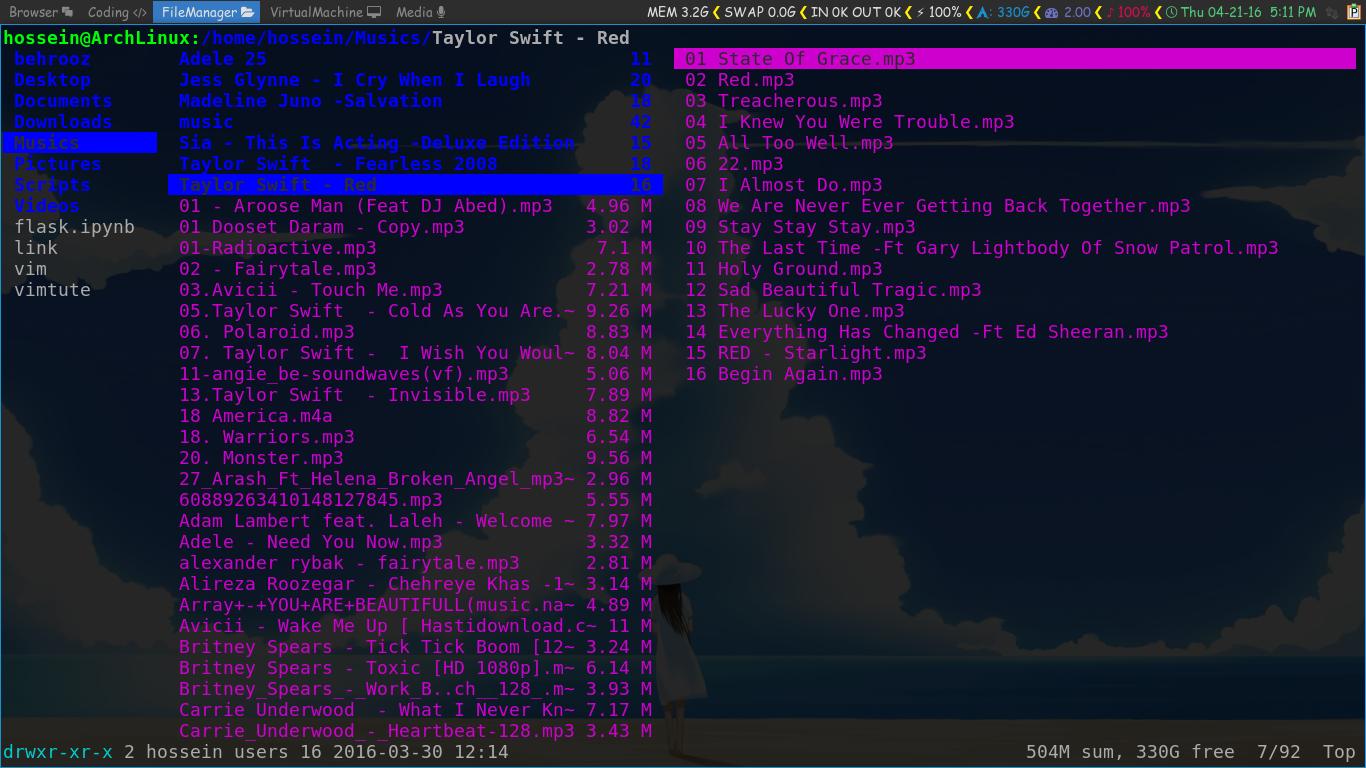
In this part of tutorials we are going to cover some Terminal File Managers like Ranger, MC,Vifm, Among these three Terminal File Managers I personally prefer Ranger but they are all good file managers that you can easily make directory, rename, remove, copy and move your files and you also can enter some commands in them like vim!!

Ranger:
For installing Ranger use following command:

sudo pacman -S ranger

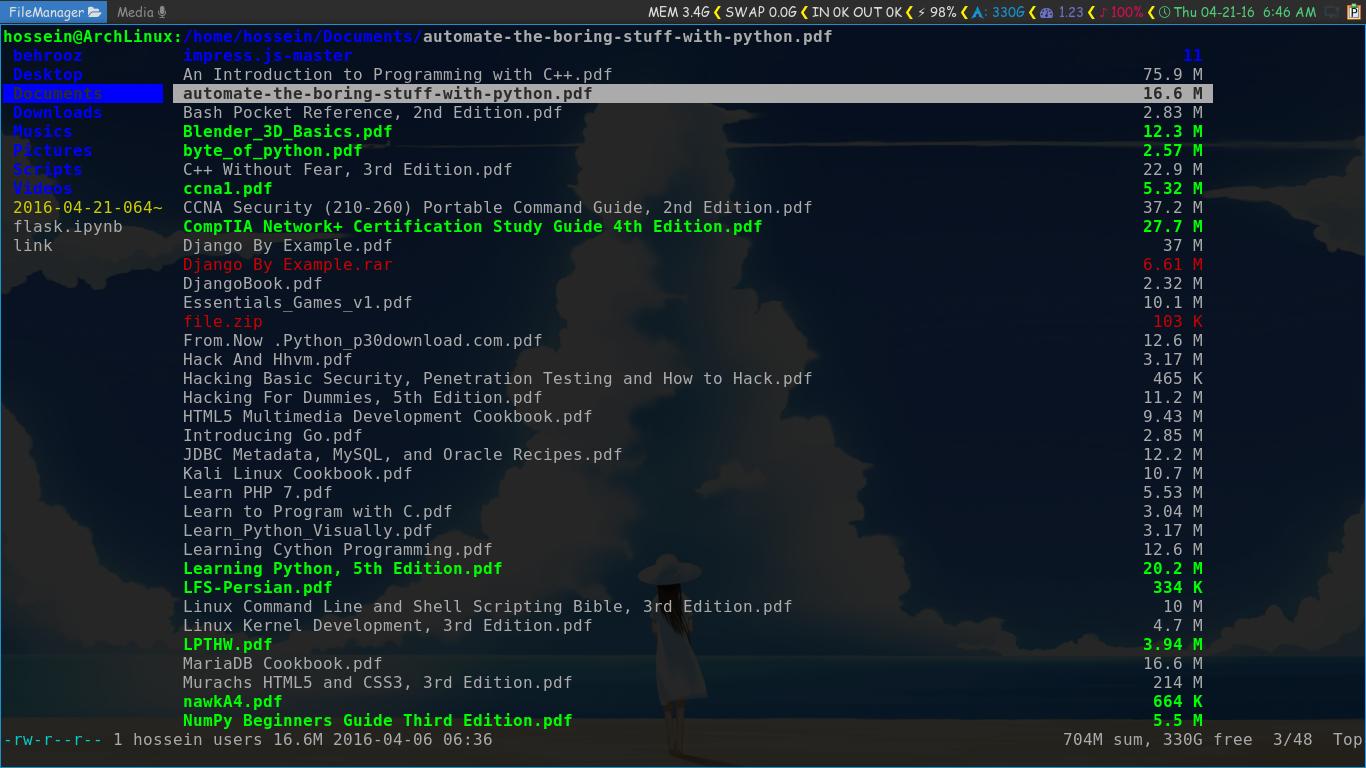
Here you can see some screenshots of Ranger:

screenshot-2016-04-21_06-46-14

screenshot-2016-04-21_17-11-22

Ranger is lightweight Terminal File Manager that you also can enter some command in it, for entering command just like vim and vi editor first put : and then enter your command for example:

:touch somefile.txt

You can use arrow keys to go in different directories in Ranger, and when you use Enter key on a file if it is music or video it will be played with Mplayer, if you Enter on a text file, Ranger aks you :open_with then  you can write nano or vim or etc to open with!

MC:

Install MC with this code:

sudo pacman -S mc

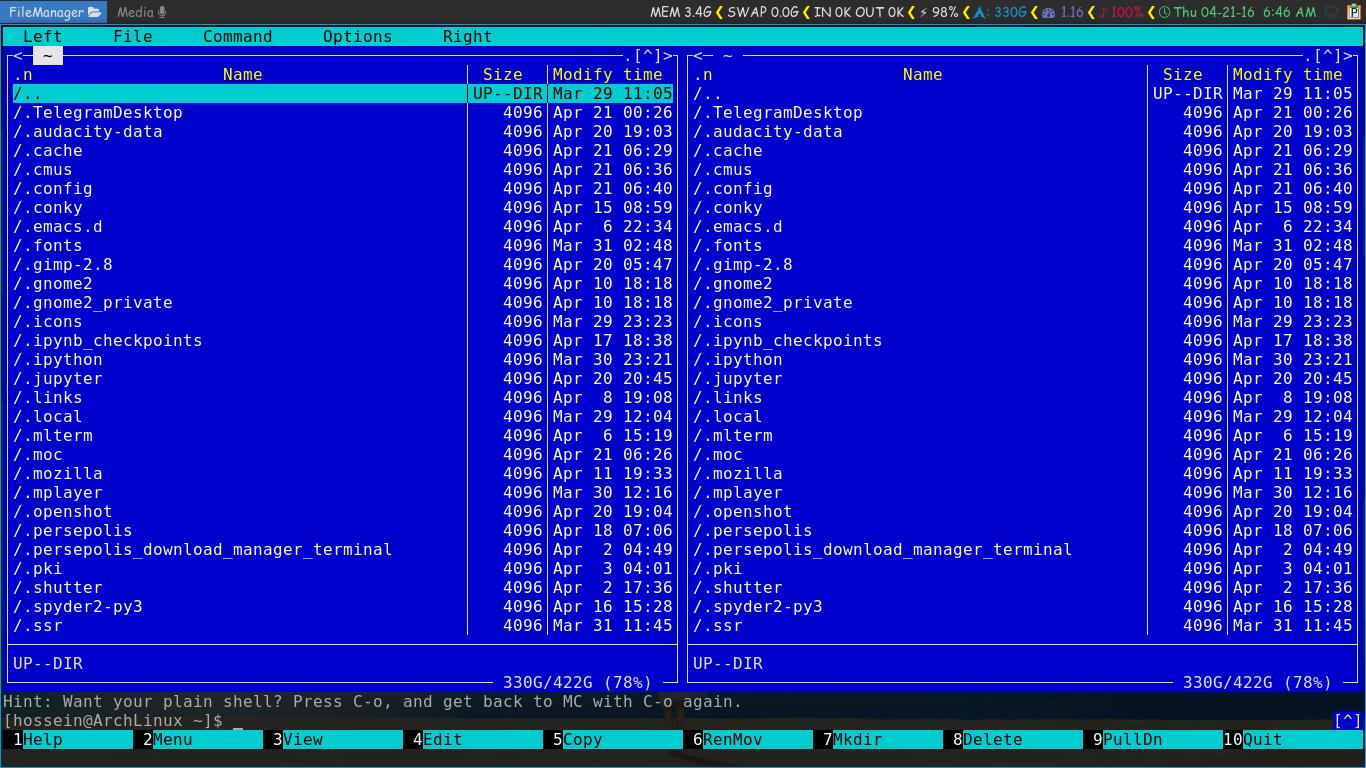
Here you can see screenshot:

screenshot-2016-04-21_06-46-31

As you can see in the picture above it has some shortcut keys for example by pressing 7 on the keyboard you can make new directory, you also can enter some commands in that!

Vifm:

screenshot-2016-04-21_06-46-25

Vifm package is in official Arch Linux repositories and it depends on vi package, for installing it use following code:

sudo pacman -S vifm

For entering command in this File Manager first put a : then enter your command just like Ranger!


Unicode-Rxvt Terminal:

Urxvt is really lightweight terminal which is also hightly configurable, install this Terminal with this command:

sudo pacman -S unicode-rxvt

Here is a screenshot of customized Urxvt:

Selection_001

For transparent this terminal open .Xdefaults file with this command:

nano $HOME/.Xdefaults

Add this lines to the file:

URxvt.transparent: true
URxvt.tintColor: white
URxvt.shading: 15

Now save the file and exit!

Following commad will give you the Terminal that you Saw in the Picture above:

urxvt -bg grey17 -fg grey67 -fn "xft:Mono Space:pixelsize=15" +sb -depth 32 -pr white -uc -bc -sl 100000

As you know we can’t always enter this really long command when we need a new terminal so let’s use aliases!

Add this line to .bashrc file in your $HOME:

alias urxvt='urxvt -bg grey17 -fg grey67 -fn "xft:Mono Space:pixelsize=15" +sb -depth 32 -pr white -uc -bc -sl 100000'


Terminal Browsers:

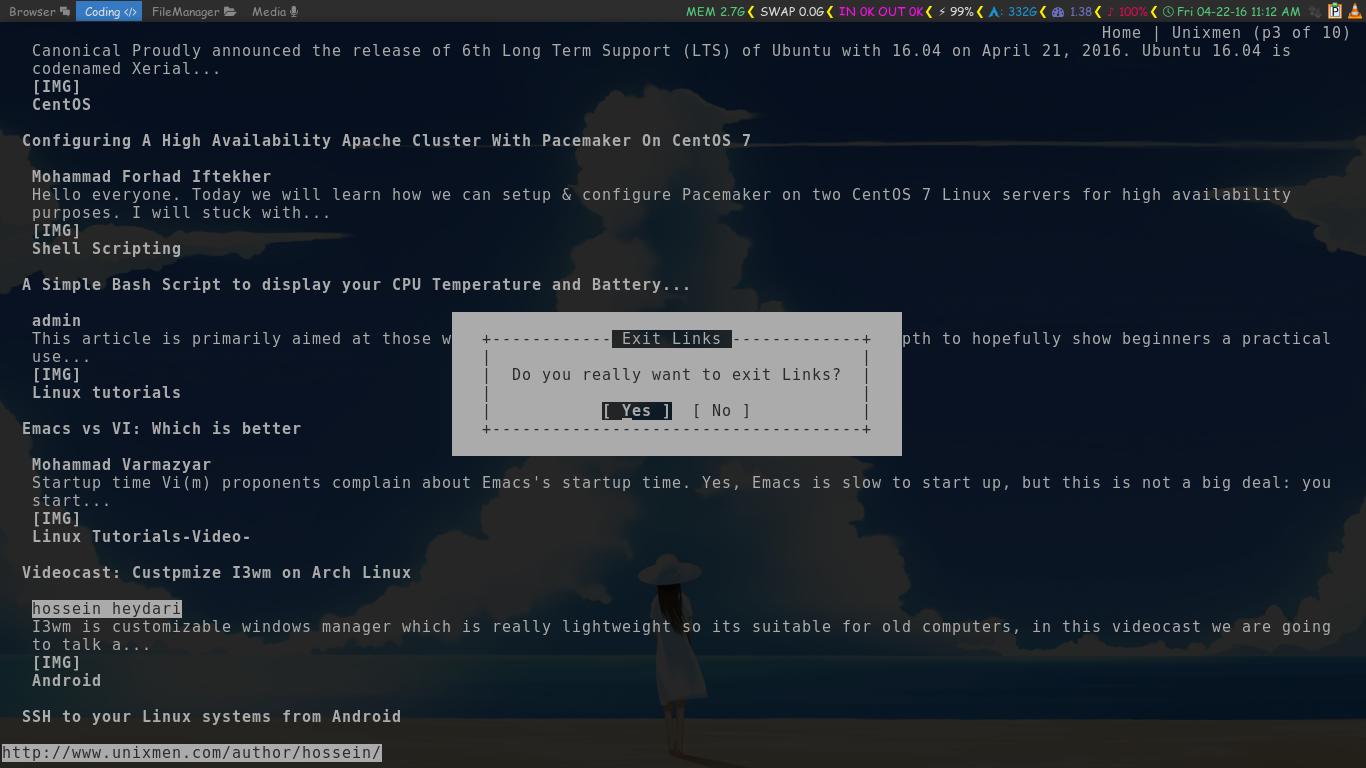
We even can browse in Terminals “Links” and “w3m” are good tools for that, following screenshot is links which opened Unixmen.com:

screenshot-2016-04-22_11-12-09

And when we want to exit from links browser:

screenshot-2016-04-22_11-12-16

Following screenshot is w3m that opened Unixmen website:

screenshot-2016-04-22_11-13-03

For installing w3m and links use following command:

sudo pacman -S w3m links

I wish you enjoyed reading this article 🙂

The post Minimal Tools on Arch Linux appeared first on Unixmen.

Review: Ubuntu 16.04 LTS (Xenial Xerus)

$
0
0


ubuntu-16.04

Introduction

Here we are again staring down the face of a new release of Ubuntu. This time around we see the release of the new Long-Term-Support version, or better known as simply LTS. Ubuntu needs no introduction as it’s one of the most popular Linux distributions around. Freedom Publishers Union (and our Staff members) have been reviewing it for a number of years. So it is very familiar to not only everyone around the office, but also our readers.

Its popularity and loyal following is largely due to its continued development and good support for a large variety of packages (40,000+ in total). Despite the many delays we’ve experienced in the past few releases with specific features, it still offers us something relatively stable and usable every time. Something to work with and build upon.

Let’s jump right in without any further delay and see what the latest update of Ubuntu 16.04 LTS (Xenial Xerus) brings us.

Linux kernel

I have to admit, we were a little shocked when we discovered that 16.04 LTS included the 4.4 branch of the Linux kernel. We expected the release to include the 4.5 branch as both 4.5.1 and 4.5.2 have been released for Ubuntu 15.10 and development of Linux 4.6 is well underway. We understand that 16.04 is a Long-Term-Support release, however we found this decision to stick with 4.4 a little disappointing.

ubuntu-16.04-review-1

Our very own core server which Freedom Publishers Union resides runs a 4.5 Linux kernel on top of a Ubuntu 14.04.4 base and it’s a rock-solid configuration. We understand that our own server configuration is highly customized and lots of changes have been made to this system, yet we still find that there was much more room for upgrade with Ubuntu 16.04 LTS than what has been delivered.

Boot issues

When we set out to assess Ubuntu 16.04 LTS for this Review, we did plan to use the vanilla version as a basis for analysis. Our loyal readers who have read our previous Reviews of Ubuntu will know by now we adopted Xubuntu as our de facto version to base our Reviews on, several versions back. We were going to make an exception for this Review because we heard rumors there were some exciting changes with Unity which made the desktop more customizable. However, we were faced with problems right from the beginning with our vanilla Ubuntu boot image failing to load.

We attempted to boot the system on a consumer laptop and desktop system but were met with boot problems on both systems. We experienced problem after problem with USB device detection to get the boot image to be recognized and in a position to commence load. After much configuration tweaks and sheer luck through crossing our fingers, we did get it to recognize the boot device and commence a boot operation, only to be met with errors which resulted in the entire boot process being halted with no further progression possible.

We were able to replicate all of the same issues and errors on both systems we attempted to test on. Through our ability to replicate and repeat the problems at will, we concluded that the actual boot image we were using was corrupted. This was confirmed when we performed a MD5 checksum verification on the ISO file, as illustrated in our screenshot below.

ubuntu-16-04-md5

We then resorted to our backup ISO of Xubuntu 16.04 LTS. We experienced none of the boot problems with Xubuntu that we experienced with the vanilla Ubuntu.

We must mention that boot times were extremely fast, even for a live system.

Desktop/Software

With our boot problems out of the way, we were finally staring at the screen of a fresh new Ubuntu desktop, built up around a XFCE desktop-environment.

ubuntu-16.04-review-2

Stand-out features for this desktop are Firefox for internet browsing, Thunderbird for email and LibreOffice for all of your office duties. They come in at versions 45.0.2, 38.6.0 and 5.1.22, respectively.

ubuntu-16.04-review-3

ubuntu-16.04-review-4

The new Software Store package included in Ubuntu 16.04 LTS also finds its way into Xubuntu.

ubuntu-16.04-review-5

Before we comment about this package specifically, we must declare that we are not users of any kind of graphical software or package manager and solely use the terminal console for package management. This is purely because we are Linux veterans and it is just how we do things because it’s much quicker. Our fellow veterans alike will understand. But we also need to accept that new users will not feel confident enough from the beginning to go down this route, therefore there is still a market (if I can use that word) for graphical package managers. Or Software Stores as they seem to now be referred to as. We try to refrain from using the terms market and store because it somewhat distorts the purpose of the packages, giving the impression they are a shop front to commercial software. They are not.

Despite us having no genuine intention to poke around in the Store, we did boot it up simply because curiosity got the better of us. We were quickly faced with a ‘nothing to see here’ facade. No, we literally were! The Software Store did not load and simply displayed us a black screen with a bunch of empty placeholders. It was as though we had no active internet connection to the Software server. We did.

ubuntu-16.04-review-6

We tried several times to get the Software Store operational, but it was soon confirmed that nobody wanted to serve us anything. As veterans do, we opened up a terminal console, threw in a few quick apt-get commands and we had our packages installed in just a couple of minutes. Job done.

If you’re installing Software from the Store, then we hope that you have better luck than we did.

There is one specific feature that did stand out to us – the Additional Drivers installation tool. According to the Additional Drivers tool, we were not using any proprietary drivers. This was known to us already, as it was well documented leading up to the release of Ubuntu 16.04 LTS that Canonical/Ubuntu would be encouraging the use of free and open-source based drivers for video/graphics cards and other hardware from now on. We still had the option to use a proprietary driver for our Intel CPU micro-code using the intel-microcode package. Although we stand by Ubuntu’s decision to always provide and advocate for the use of free and open-source drivers, there will always be occasions where it is just not possible. Therefore, we enabled the intel-microcode driver in this instance.

ubuntu-16.04-review-7

ubuntu-16.04-review-8

Conclusion

When we get to our Conclusion, we always find recent Ubuntu releases a little difficult to summarize. This is probably because each new release does not really bring major changes to the table anymore, rather they all seem to feel like just another update. In truth, that’s all they really are. But when third-party Linux distributions continue to innovate and give their users something fresh each time a new release is delivered, we can’t help but wonder why Ubuntu Developers can not achieve the same. Yet we can not quite put our finger on what Canonical are doing wrong. Essentially, they’re not really doing anything wrong. They are just not really offering anything fresh, new or innovative anymore.

Ubuntu 16.04 LTS (Xenial Xerus) offers a very snappy desktop-environment with its XFCE counterpart. I guess we really didn’t expect anything any different from this lightweight option.

We did find the problems with getting our first boot image running a little bothersome. Albeit, we’re not directly blaming Ubuntu (or Canonical) for this, as file corruption can occur for a myriad of different reasons and are quite common. So we’re not going to deduct points off them for this.

In the Conclusion of our Review of Ubuntu 15.10, we mentioned continued delays with Mir and Unity 8. Well we’re gonna be sounding like a broken record pretty soon, if we don’t already. We were hopeful that Mir and Unity 8 would make its way into 16.04 LTS. Ubuntu users are again disappointed as it has still not been included. It is available to be installed, but we warn users to use it at your own risk as it is still in Preview development stage. If you’re feeling brave, you can test it our for yourself by running the following command in a console terminal, then log-out and change the Session at the login screen:

sudo apt install unity8-desktop-session-mir

To wrap things up here, we’re going to declare Ubuntu 16.04 LTS a bitter disappointment. We expected so much more from this release as much more is what is needed from this popular Linux distribution, we believe. The most positive spin we can put on it is the fact that the server components of this release are going to impress server system administrators who upgrade to 16.04 LTS. MySQL and PHP have both had major updates to 5.7 and 7.0, respectively. This is great news for anyone running 16.04 LTS on the server as both updates are major updates to these popular and almost necessary server components for any decent web server. What we find a little confusing is why such bleeding edge versions of these packages were included in Ubuntu 16.04 LTS when the Linux kernel was essentially held-back at 4.4.

We can find lots to pick on with this release. Unfortunately we feel that Ubuntu users have been let down, again. If you’re running a server based on 16.04 LTS then you’re going to have enough expertise to pull off a smooth transition to get the MySQL and PHP updates. While you’re at it, we recommend manually upgrading your Linux kernel to the 4.5 branch. But we only recommend this to advanced users who are comfortable with this kind of hands-on work.

If you feel that we have been too harsh on this release, then by all means give it a try for yourself. But our advice is if you really want a Linux system based on Ubuntu, then look at third-party Linux distributions that offer something much better than the bog-standard that we are seeing pushed out from Canonical. In its default form as its presented out-of-the-box, we just can’t recommend it as we feel it’s just not up to the standard of what we should expect from a Linux distribution.

The post Review: Ubuntu 16.04 LTS (Xenial Xerus) appeared first on Unixmen.

Learn file management commnad line required for RHCSA

$
0
0


3.0 Introduction to Red Hat Linux Key file system

Welcome back, in this ‘RHCSA examination preparation guide’ series two articles are published, this is third part of the series in continuation, in previous two articles we understood basics of Red Hat Enterprise Linux including Installation, system registration to Red Hat network, then we learned few Linux basic commands, what is bash, what is Linux terminal. Let us move ahead, as we know that everything in Linux is a file, all of the configurations settings, drivers software etc. everything is stored in Linux as editable text file, therefore to govern Linux System it is must for Linux user or administrator to understand key files which act as skeleton of the system, every file or directory in Linux architecture is designated to play some unique and important role, such files/directories are called system default files/directories. Any defect in these configuration files or some unauthorized access to the files can give some serious damage to the system, some important key files and directories are common for all of Linux distributions.

3.1 Understanding Linux file system hierarchy

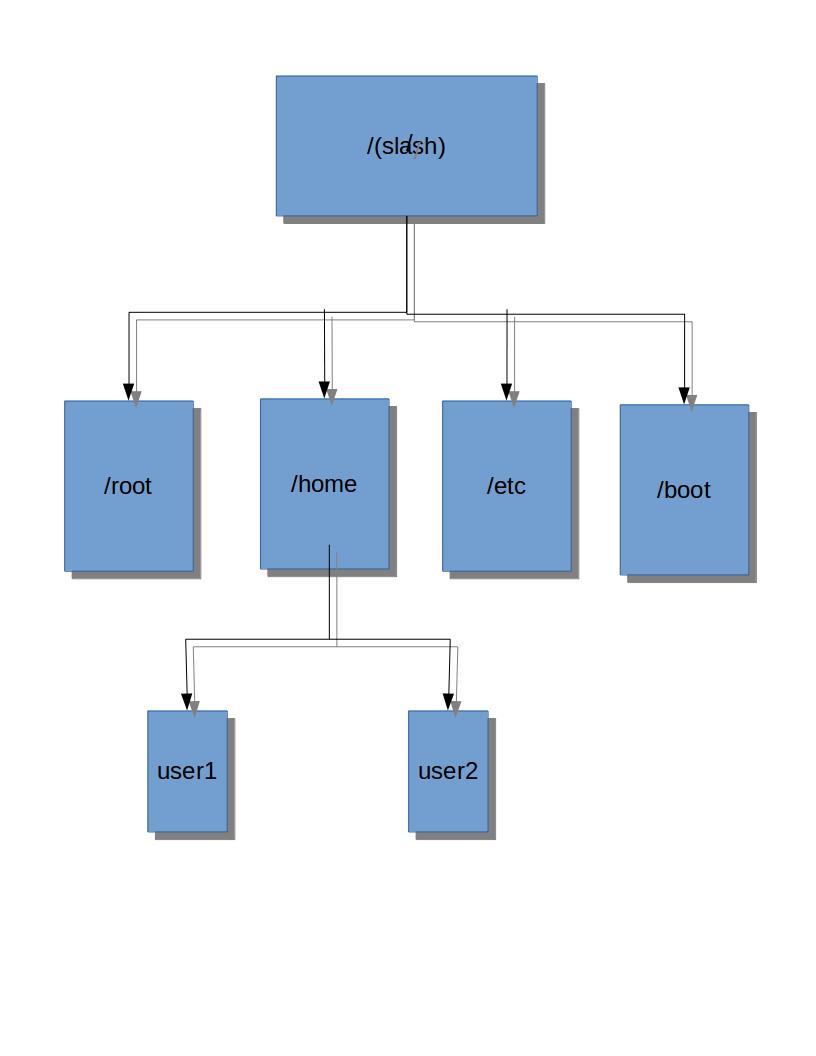
Slash is known as the root directory, rest of the files and directories resides under root (/), this is like the root of a tree where rest of the files/directories are like branches of that root. Important to note there is no need to memorize all of the directories, you just need to understand only a few directories which are important from RHCSA exam preparation point of view have a look.

$ cd /
$ ls

dns(024)

Let us discuss every file system step by step

  1. /boot:/boot is a dedicated separate partition on hard disk. It stores Linux kernel and related files, initramfs and grub (boot loader). After BIOS process is handed over to /boot to boot the system, it contains kernel configuration options. Config-x-x-x It is a text file that contains kernel configuration options, have a look in that file. Give ‘uname -r’ command:

dns(026)

See the input, it will display kernel version installed. It has same extension as of config-x.x.x file. Initramfs It provides drives appropriately to find the root system, if you rename or remove that file your system will get the boot failure, so never tease /boot files. VM Linux It is the kernel itself. In a nutshell /boot contains all of the files which are required for boot process.

2. /usr: directory can be called software directory as in includes all installed software, shared libraries, user commands, directories which come under /usr are as follows:

2.1 /usr/local- Locally customized software goes under this directory.

2.2 /usr/bin- All of the command scripts resides under that directory.

2.3 /usr/local– All of the Administration related commands available under this directory.

3. /etc- All of the configuration files are stored in /etc/, all of servers or services which you will configure, have their editable configuration files stored under /etc.

4. /home- This is the directory where user stores all of their data, and configuration files, every user have their separated sub-directory under /home.

5. /tmp- This directory is also known as a temporary directory, where all of the temporary data is stored, it can be accessed equally by root and ordinary users.

6. /var- contains files that may change in size dynamically, like log files, spool or mail files.

7. /dev- contains files that is required by the system to interact with the hardware, these directories are mandatory for booting the system.

8. /proc- this file system provides access to kernel, cpu, memory related information can retrieve from that directory.

9. /media- By default optical or usb devices are mounted in that directory.

10. /lib, /lib64- Shared libraries that are utilized in /boot, /sbin and bin.

3.2 Essential Linux file management tasks

3.2.1 Absolutes paths and relative path

By default a user login to his home directory, when a user needs to handle certain xyz file or directory across the system, it is required to define the path of that xyz directory. Now, path of this particular directory can be defined by two methods, the first option is that user start defining address of xyz directory Starting from very top location i.e.  from slash and move down step by step to desired location of xyz, that is known as absolute path, absolute path will always begin with / (slash). Let us assume that we are logged in as user1 user, and wants to go to user2 directory, which is the home directory of another user, have a glimpse of below diagram.

slash

Top parent directory is / under which home directory exist  and further under this home directory user2 directory exists which is over final destination. Let us type this path step by step:

$ cd /home/user2

dns(022)

Let us assume another scenario to understand relative path, we have discussed how we moved from top to down in  absolute path scenario. However, when you navigate from your current location  directly to xyz destination directly, then you follow relative path. The relative path will never start with slash(/) in any circumstances. Consider below diagram:

dns(023)


Let us move from user1 directory to user2 directory, we can see that both user1 and user2 are under /home directory, to switch from user1 to user2, move from user1 to /home(a step up), now move from /home to user2 (a step down). To move a step up from current location use following command.

$cd ../user2

Assume user was in his home directory (/home/user1) after above command you will move a step above (/home), now you can go down to user2 which is under /home (/home/user2).

3.2.2 Managing files with  use of command line tools

In this file management  section, we will discuss  how to – create directories and files, how to remove them, how to move them from one place to another and how to rename or copy any file or directory.

  1. mkdir – create a directory.

Syntex:       $mkdir <directory_name>

$ mkdir example

User ls command to have a look

dns(027)Create two directories with a single command

dns(028)

To create directories along with parent directory.

$ mkdir -p rajneesh/um1 rajneesh/um2 rajneesh/um3

-p option will create parent directory first, under this parent directory all three (um1, um2, um3) directories will be created, total 4 directories will be created.

dns(029)

2. rmdir- to remove a directory.

Syntex:  $rmdir <directory_name>

dns(030)

But, important to note that with rmdir you can remove only empty directories,  let us try to remove entire ‘rajneesh’ directory which possesses um2 and um3 subdirectories.

dns(031)3. rm – To remove files or the directories which are not empty, use -r option for recursive mode.

dns(032) 4. cp – to copy one file to another file, contents will be overwrite, or one file to another directory.

Syntex: $ cp file1 file2

In below example we created two different files with different contents, then copy file 1 to file 2 and see contents of file 2.

dns(033)

You can also copy one directory to another directory if directory is not empty use ‘-r’ option, let us assume following example,  create raj and ra1 directories, create a file in raj, now copy raj directory to raj1,

$ mkdir raj raj1

$ cd raj

$ touch file1

$ cd ..

$ cp -r raj raj1

Have a look of raj1 directory, contents of raj are present in raj1.

dns(034)

5. mv- To move one source (file or directory) to some destination.

syntex : $ mv  source destination

The difference between copy and move is that when you copy something the original source will remain there, but when you mv something, the original source will be removed automatically. In below example you can notice that only destination directory is present after mv command.

dns(035)

6. touch: used to create empty files.

Syntex: $ touch file1 file2

Create multiple files

$ touch file1 file2 file3 file4

Or you can create files in bulk, put a range in curly braces spaced by .., close the braces and add the file extension type as shown below.

$ touch {1..100}.txt


dns(036)

3.3 Conclusion

This was the third chapter of RHCSA preparation series, by the end of this chapter user will be able to understand the relative path and absolute path, few important key directories and their role, a user can remove, move or create files and directories. Is is recommended that user must practice all of the mentioned commands, use help manuals available on the internet. Although we are trying to include maximum of the mandatory part required to RHCSA preparation but still few things will get skipped, you can inform in that case.

3.4 DIY Practice for RHCSA Examination

On the basis of this chapter user is expected to perform following practicals:

  1. Create two named example1 and example2, crate cert1 under example1, and cert2 under example2, further, create test1 directory under cert2. Now move to test directory using an absolute path, then go to example1 from test using a relative path.

dns(037)2. Create 100 files with a single command having .mp3 extension.
3. Remove entire exampl2 directory and subdirectories with a single command.

3.5 Things we will include in next RHCSA tutorial

In next chapter we will understand the use “file globbing” or “global commands”, getting help using man pages, help commands, and detailed  understanding of text file editing with vim editor, file redirection etc.  Have fun!!

The post Learn file management commnad line required for RHCSA appeared first on Unixmen.

IPTABLES VS FIREWALLD

$
0
0


Today we will walk through iptables and firewalld and we will learn about the history of these two along with installation & how we can configure these for our Linux distributions.

Let’s begin wihtout wasting further more time.

What is iptables?

First, we need to know what is iptables. Most of senior IT professionals knows about it and used to work with it as well. Iptables is an application / program that allows a user to configure the security or firewall security tables provided by the Linux kernel firewall and the chains so that a user can add / remove firewall rules to it accordingly to meet his / her security requirements. Iptables uses different kernel modules and different protocols so that user can take the best out of it. As for example, iptables is used for IPv4 ( IP version 4/32 bit ) and ip6tables for IPv6 ( IP version 6/64 bit ) for both tcp and udp. Normally, iptables rules are configured by System Administrator or System Analyst or IT Manager.  You must have root privileges to execute each iptables rules. Linux Kernel uses the Netfilter framework so that it can provide various networking-related operations which can be performed by using iptables. Previously, ipchains was used in most of the Linux distributions for the same purpose. Every iptables rules are directly handled by the Linux Kernel itself and it is known as kernel duty. Whatever GUI tools or other security tools you are using to configure your server’s firewall security, at the end of the day, it is converted into iptables rules and supplied to the kernel to perform the operation.

History of iptables

The rise of the iptables begin with netfilter. Paul Rusty Russell was the initial author and the head think tank behind netfilter / iptables. Later he was joined by many other tech people then form and build the Netfilter core team and develop & maintain the netfilter/iptables project as a joint effort like many other open source projects. Harald Welte was the former leader until 2007 and then Patrick McHardy was the head until 2013. Currently, netfilter core team head is Pablo Neira Ayuso.

To know more about netfilter, please visit this link. To know more about the histrity of netfilter, please visit this link.

To know more about iptables history, please visit this link.

How to install iptables

Now a days, every Linux Kernel comes with iptables and can be found pre build or pre installed on every famous modern Linux distributions. On most Linux systems, iptables is installed in this /usr/sbin/iptables directory. It can be also  found in /sbin/iptables, but since iptables is more like a service rather than an “essential binary”, the preferred location remains in /usr/sbin directory.

For Ubuntu or Debian

sudo apt-get install iptables

For CentOS

sudo yum install iptables-services

For RHEL

sudo yum install iptables

Iptables version

To know your iptables version, type the following command in your terminal.

sudo iptables --version

Start & Stopping your iptables firewall

For OpenSUSE 42.1, type the following to stop.

sudo /sbin/rcSuSEfirewall2 stop

To start it again

sudo /sbin/rcSuSEfirewall2 start

For Ubuntu, type the following to stop.

sudo service ufw stop

To start it again

sudo service ufw start

For Debian & RHEL , type the following to stop.

sudo /etc/init.d/iptables stop

To start it again

sudo /etc/init.d/iptables start

For CentOS, type the following to stop.

sudo service iptables stop

To start it again

sudo service iptables start

Getting all iptables rules lists

To know all the rules that is currently present & active in your iprables, simply open a terminal and type the following.

sudo iptables -L

If there are no rules exits on the iptables means if there are no rules added so far in your iptables firewall, you will see something like the below image.

Iptables_Lists_OpenSUSE42.1

In this above picture, you can see that , there are three (3) chains and they are INPUT, FORWARD, OUTPUT and there are no rules exists. Actually I haven’t add one yet.

Type the following to know the status of the chains of your iptables firewall.

sudo iptables -S

With the above command, you can learn whether your chains are accepting or not.

Clear all iptables rules

To clear all the rules from your iptables firewall, please type the following. This is normally known as flushing your iptables rules.

sudo iptables -F

If you want to flush the INPUT chain only, or any individual chains, issue the below commands as per your requirements.

sudo iptables -F INPUT
sudo iptables -F OUTPUT
sudo iptables -F FORWARD

ACCEPT or DROP Chains

To accept or drop a particular chain, issue any of the following command on your terminal to meet your requirements.

iptables --policy INPUT DROP

The above rule will not accept anything that is incoming to that server. To revert it again back to ACCEPT, do the following

iptables --policy INPUT ACCEPT

Same goes for other chains as well like

iptables --policy OUTPUT DROP
iptables --policy FORWARD DROP

Note: By default, all chains of iptables ( INPUT, OUTPUT, FORWARD ) are in ACCEPT mode. This is known as Policy Chain Default Behavior.

Allowing any port

If you are running any web server on your host, then you must allow your iptables firewall so that your server listen or respond to port 80. By default web server runs on port 80. Let’s do that then.

sudo iptables -A INPUT -p tcp --dport 80 -j ACCEPT

On the above line, A stands for append means we are adding a new rule to the iptables list. INPUT stands for the INPUT chain. P stands for protocol and dport stands for destination port. By default any web server runs on port 80. Similarly, you can allow SSH port as well.

sudo iptables -A INPUT -p tcp --dport 22 -j ACCEPT

By default, SSH runs on port 22. But it’s good practise not to run SSH on port 22. Always run SSH on a different port. To run SSH on a different port, open /etc/ssh/sshd_config file on your favorite editor and change the port 22 to a other port.

Blocking any port

Say we want to block port 135. We can do it by

sudo iptables -A INPUT -p tcp --dport 135 -j DROP

if you want to block your server to initiate any SSH connection from the server to another host/server, issue the following command

sudo iptables -A OUTPUT -p tcp --dport 22 -j DROP

By doing so, no one can use your sever to initiate a SSH connection from the server. The OUPUT chain will filter and DROP any outgoing tcp connection towards another hosts.

Allowing specific IP with Port

sudo iptables -A INPUT -p tcp -s 0/0 --dport 22  -j ACCEPT

Here -s 0/0 stand for any incoming source with any IP addresses. So, there is no way your server is going to respond for a tcp packet which destination port is 22. If you want to allow only any particular IP then use the following one.

sudo iptables -A INPUT -p tcp -s 12.12.12.12/32 --dport 22  -j ACCEPT

On the above example, you are only allowing 12.12.12.12 IP address to connect to port SSH. Rest IP addresses will not be able to connect to port 22. Similarly you can allow by using CIDR values. Such as

sudo iptables -A INPUT -p tcp -s 12.12.12.0/24 --dport 22  -j ACCEPT

The above example show how you can allow a whole IP block for accepting connection on port 22. It will accept IP starting from 12.12.12.1 to 12.12.12.255.

If you want to block such IP addresses range, do the reverse by replacing ACCEPT by DROP like the following

sudo iptables -A INPUT -p tcp -s 12.12.12.0/24 --dport 22  -j DROP

So, it will not allow to get a connection on port 22 from from 12.12.12.1 to 12.12.12.255 IP addresses.

Blocking ICMP

If you want to block ICMP (ping) request to and from on your server, you can try the following. The first one will block not to send ICMP ping echo request to another host.

sudo iptables -A OUTPUT -p icmp --icmp-type 8 -j DROP

Now, try to ping google.com. Your OpenSUSE server will not be able to ping google.com.

If you want block the incoming ICMP (ping) echo request for your server, just type the following on your terminal.

sudo iptables -I INPUT -p icmp --icmp-type 8 -j DROP

Now, It will not reply to any ICMP ping echo request. Say, your server IP address is 13.13.13.13. And if you ping ping that IP of your server then you will see that your server is not responding for that ping request.

Blocking MySql / MariaDB Port

As Mysql is holding your database so you must protect your database from outside attach. Allow your trusted application server IP addresses only to connect with your MySQL server. To block other

sudo iptables -A INPUT -p tcp -s 192.168.1.0/24 --dport 3306 -m state --state NEW,ESTABLISHED -j ACCEPT

So, it will not take any MySql connection except 192.168.1.0/24 IP block. By default MySql runs on 3306 port.

Blocking SMTP

If you not running any mail server on your host server or if your server is not configured to act like a mail server, you must block SMTP so that your server is not sending any spam or any mail towards any domain. You must do this to block any outgoing mail from your server. To do so,

sudo iptables -A OUTPUT -p tcp --dport 25 -j DROP

Block DDoS

We all are familiar with the term DDoS. To get rid of it, issue the following command in your terminal.

iptables -A INPUT -p tcp --dport 80 -m limit --limit 20/minute --limit-burst 100 -j ACCEPT

You need to configure the numerical value to meet your requirements. This is just a standard to maintain.

You can protect more by

echo 1 > /proc/sys/net/ipv4/ip_forward
echo 1 > /proc/sys/net/ipv4/tcp_syncookies
echo 0 > /proc/sys/net/ipv4/conf/all/accept_redirects
echo 0 > /proc/sys/net/ipv4/conf/all/accept_source_route
echo 1 > /proc/sys/net/ipv4/conf/all/rp_filter
echo 1 > /proc/sys/net/ipv4/conf/lo/rp_filter
echo 1 > /proc/sys/net/ipv4/conf/lo/arp_ignore
echo 2 > /proc/sys/net/ipv4/conf/lo/arp_announce
echo 1 > /proc/sys/net/ipv4/conf/all/arp_ignore
echo 2 > /proc/sys/net/ipv4/conf/all/arp_announce
echo 0 > /proc/sys/net/ipv4/icmp_echo_ignore_all
echo 1 > /proc/sys/net/ipv4/icmp_echo_ignore_broadcasts
echo 30 > /proc/sys/net/ipv4/tcp_fin_timeout
echo 1800 > /proc/sys/net/ipv4/tcp_keepalive_time
echo 1 > /proc/sys/net/ipv4/tcp_window_scaling 
echo 0 > /proc/sys/net/ipv4/tcp_sack
echo 1280 > /proc/sys/net/ipv4/tcp_max_syn_backlog

Blocking Port Scanning

There are hundred of people out there to scan your open ports of your server and try to break down your server security. To block it

sudo iptables -N block-scan
sudo iptables -A block-scan -p tcp —tcp-flags SYN,ACK,FIN,RST RST -m limit —limit 1/s -j RETURN
sudo iptables -A block-scan -j DROP

Here, block-scan is a name of a new chain.

Blocking Bad Ports

You may need to block some bad ports for your server as well. Here is how you can do this.

badport="135,136,137,138,139,445"
sudo iptables -A INPUT -p tcp -m multiport --dport $badport -j DROP
sudo iptables -A INPUT -p udp -m multiport --dport $badport -j DROP

You can add more ports according to your needs.

What is firewalld?

Firewalld provides a dynamically managed firewall with support for network/firewall zones that defines the trust level of network connections or interfaces. It has support for IPv4, IPv6 firewall settings, ethernet bridges and IP sets. There is a separation of runtime and permanent configuration options. It also provides an interface for services or applications to add firewall rules directly.

The former firewall model with system-config-firewall/lokkit was static and every change required a complete firewall restart. This included also to unload the firewall netfilter kernel modules and to load the modules that are needed for the new configuration. The unload of the modules was breaking stateful firewalling and established connections. The firewall daemon on the other hand manages the firewall dynamically and applies changes without restarting the whole firewall. Therefore there is no need to reload all firewall kernel modules. But using a firewall daemon requires that all firewall modifications are done with that daemon to make sure that the state in the daemon and the firewall in kernel are in sync. The firewall daemon can not parse firewall rules added by the iptables and ebtables command line tools. The daemon provides information about the current active firewall settings via D-BUS and also accepts changes via D-BUS using PolicyKit authentication methods.

So, firewalld uses zones and services instead of chain and rules for performing the operations and it can manages rule(s) dynamically allowing updates & modification without breaking existing sessions and connections.

It has following features.

  • D-Bus API.
  • Timed firewall rules.
  • Rich Language for specific firewall rules.
  • IPv4 and IPv6 NAT support.
  • Firewall zones.
  • IP set support.
  • Simple log of denied packets.
  • Direct interface.
  • Lockdown: Whitelisting of applications that may modify the firewall.
  • Support for iptables, ip6tables, ebtables and ipset firewall backends.
  • Automatic loading of Linux kernel modules.
  • Integration with Puppet.

To know more about firewalld, please visit this link.

How to install firewalld

Before installing firewalld, please make sure you stop iptables and also make sure that iptables are not using or working anymore. To do so,

sudo systemctl stop iptables

This will stop iptables form your system.

And then make sure iptables are not used by your system any more by issuing the below command in the terminal.

sudo systemctl mask iptables

Now, check the status of iptables.

sudo systemctl status iptables

iptables_status_unixmen

Now, we are ready to install firewalld on to our system.

For Ubuntu

To install it on Ubuntu, you must remove UFW first and then you can install Firewalld. To remove UFW, issue the below command on the terminal.

sudo apt-get remove ufw

After removing UFW, issue the below command in the terminal

sudo apt-get install firewall-applet

Or

You can open Ubuntu Software Center and look or seacrh  for “firewall-applet” then install it on to your Ubuntu system.

For RHEL, CentOS & Fedora

Type the below command to install firewalld on your CentOS system.

sudo yum install firewalld firewall-config -y

How to configure firewalld

Before configuring firewalld, we must know the status of firewalld after the installation. To know that, type the following.

sudo systemctl status firewalld

firewalld_status_unixmen

As firewalld works on zones basis, we need to check all the zones and services though we haven’t done any configuring yet.

For Zones

sudo firewall-cmd --get-active-zones

firewalld_activezones_unixmen

or

sudo firewall-cmd --get-zones

firewalld_getzones_unixmen

To know the default zone, issue the below command

sudo firewall-cmd --get-default-zone

firewalld_defaultszones_unixmen

And, For Services

sudo firewall-cmd --get-services

firewalld_services_unixmen

Here, you can see those services covered under firewalld.

Setting Default Zone

An important note is, after each modification, you need to reload firewalld so that your changes can take place.

To set the default zone

sudo firewall-cmd --set-default-zone=internal

or

sudo firewall-cmd --set-default-zone=public

After changing the zone, check whether it changes or not.

sudo firewall-cmd --get-default-zone

Adding Port in Public Zone

sudo firewall-cmd --permanent --zone=public --add-port=80/tcp

firewalld_addport_unixmen

This will add tcp port 80 in the public zone of firewalld. You can add your desired port as well by replacing 80 by your’s.

Now reload the firewalld.

sudo firewall-cmd --reload

Now, check the status to see whether tcp 80 port has been added or not.

sudo firewall-cmd --zone=public --list-ports

firewalld_statusafterport_unixmen

Here, you can see that tcp port 80 has been added.

Or even you can try something like this.

sudo firewall-cmd --zone=public --list-all

firewalld_statusall_unixmen

Removing Port from Public Zone

To remove Tcp 80 port from the public zone, type the following.

sudo firewall-cmd --zone=public --remove-port=80/tcp

You will see a “success” text echoing in your terminal.

You can put your desired port as well by replacing 80 by your’s own port.

Adding Services in Firewalld

To add ftp service in firewalld, issue the below command

sudo firewall-cmd --zone=public --add-service=ftp

You will see a “success” text echoing in your terminal.

Similarly for adding smtp service, issue the below command

sudo firewall-cmd --zone=public --add-service=smtp

Replace ftp and smtp by your’s own service that you want to add in the firewalld.

Removing Services from Firewalld

For removing ftp & smtp services from firewalld, issue the below command in the terminal.

sudo firewall-cmd --zone=public --remove-service=ftp
sudo firewall-cmd --zone=public --remove-service=smtp

Block Any Incoming and Any Outgoing Packet(s)

If you wish, you can block any incoming or outgoing packets / connections by using firewalld. This is known as “panic-on” of firewalld. To do so, issue the below command.

sudo firewall-cmd --panic-on

You will see a “success” text echoing in your terminal.

After doing this, you will not be able to ping a host or even browse any websites.

To turn this off, issue the below command in your terminal.

sudo firewall-cmd --panic-off

Adding IP Address in Firewalld

sudo firewall-cmd --zone=public --add-rich-rule='rule family="ipv4" source address="192.168.1.4" accept'

By doing so, firewalld will accept IP v4 packets from the source IP 192.168.1.4.

Blocking IP Address From Firewalld

Similarly, to block any IP address

sudo firewall-cmd --zone=public --add-rich-rule='rule family="ipv4" source address="192.168.1.4" reject'

By doing so, firewalld will drop / discards every IP v4 packets from the source IP 192.168.1.4.

I stuck with the very basic of Firewalld over here so that you can easily understand the working methodology of it and the differences of it with iptables.

That’s all for today. Hope you enjoy reading this article.

Take care.

The post IPTABLES VS FIREWALLD appeared first on Unixmen.

Installing docker with Ubuntu 16.04 LTS, Mint 17 and CentOS 7

$
0
0


A brief introduction to virtualization

Today we will learn installing docker with Ubuntu, mint and CentOS 7 Linux,  Before the evolution of the concept of virtualization, to run one application one dedicated server was required,  if you wanted to  run 20 application like mail server DNS services, web server or something else, you were required to buy 20 dedicated servers, every application hardly consuming 5-10% of total CPU capacity, therefore, it was a total wastage of resources. To get rid of such wastage of resources concept of virtualization was introduced, where hypervisors built a layer on hardware where multiple virtual machines can be installed and they behave and taste like real independent servers. This virtualization concept was a revolution in resource utilization and cost cutting process.

A brief introduction to containers

Although hypervisor-based virtualization was a game changer, but soon It was realized that there are certain issues even with that hypervisor virtualization concept, no doubt we were able to run multiple operating systems on single CPU, but still there was the need of multiple OS for multiple services and not all of the operating systems were free to form License they still required to get purchased, additionally every virtual OS consumes huge amount of CPU, hard disk, and RAM. To overcome that resources thirsty hypervisor problem, a new concept of Operation system level virtualization was introduced.

We can consider containers as tiny capsules which have their own individual operating environment which shares kernel of parent operating system and these containers  will behave like some independent operating system, they will be having their own root directory and other file systems, networking properties and processes like init or systemd, they have their own process hierarchy and process running in one container cannot send signals to another process running in a separate container and run their applications independently just like they were running in hypervisor-based virtual environment,  We can state containerization as “Operating system level virtualization”, CPU is installed directly on CPU, and kernel  resources  of parent operating system are shared by userspace instances. All containers share CPU resources but their boundaries are defined via kernel namespace, partitions are defined for every container so that they can use resources, libraries within their boundaries. Another important feature of containers is cgroup or control group which can group processes of containers and can define what percentage these process group can consumer, this percentage of resource sharing is quite flexible and can be decrease or increase as and when required.

A Brief history of Docker

Docker is container runtime and also a company, it combine all capabilities of container and form a product, formally it was an internal project of  dotClous company which is providing Platform as a service, it was started by Solomon Hykes in France, you can say he is Father of Docker, docker is written in Google go language, it was first released in March 2013 with a version of 0.9. Docker is licensed as open source. Initially, docker was based on LXC containers but some issue arises like they cannot control LXC development.  So they write a new driver resource which is called libcontainer. it got popular very soon, more than 17000 developers are contributing to docker which is increasing by 200 to 300 users per month, more than thousand of the applications supports docker, Red Hat, IBM, Cisco etc are the major contributor to docker, it has over 2600 GitHub stars and 20th most stared GitHub project. Chef, puppet or open stalk supports docker additionally AWS, rackspace, azure cloud services provide support for docker. Docker is providing training, documentations, and support.

Installing docker with Ubuntu 16.04

We have a fresh Ubuntu 16.04 OS installed, update system first

# apt-get update

Installing docker is pretty easy task, run command

# apt-get install docker.io

dns(101)

After installation, verify status of docker service

# /etc/init.d/docker status

dns(102)

Verify docker version

# docker version

dns(104)

Enable to run docker on boot time

# update-rc.d docker defaults

Download ubuntu docker container

# docker pull ubuntu

dns(105)

Verify downloaded Ubuntu  container

# docker images

dns(106)

To enter to that Ubuntu container give following command and you will be automatically in, -i  option will make it interactive and -t will assign tty to container.

# docker run -i -t ubuntu

To exit from container, type exit.

Search for CentOS container

# docker search centos

dns(108)

Centos is not installed, let us  try to run that container, you can notice that it will start installing centos image

# docker run -it centos /bin/bash

dns(110)

List installed images again!

dns(111)

If you wants to exit from container without killing it, press Ctrl+P+Q, you will exit from container without stopping it, run following command and you can see that container is still up after exiting with Ctrl+P+Q.

# docker ps

dns(112) Installing Docker with CentOS 7

Installing docker with CentOS 7 is not so different than it was in Ubuntu 16.04, install a fresh version of CentOS and update

# yum update

Install docker

# yum install docker

dns(114)

Check docker version when it is installed, you can notice that docker version is different then docker installed in Ubuntu

dns(118)

Pull fedroa image for docker

dns(117)

Let us do some tasks with installer fedora container

Install  apache under fedora container using dnf command

dns(121)

You can notice that fedora commands are working perfectly under CentOS 7 environment.

Check kernel version inside fedora container, centos 7 kernel can be noticed which means that we are sharing kernel userspace of CentOS.

dns(122)

Now verify installed operating system

dns(123)It is clear that we are sharing centos kernel but running independent fedora container.

Installing Docker with Mint 17 Linux

Add repo to APT source

 # sudo echo deb https://get.docker.com/ubuntu docker main > /etc/apt/sources.list.d/docker.list

Import Key

# sudo apt-key adv --keyserver hkp://keyserver.ubuntu.com:80 --recv-keys 36A1D7869245C8950F966E92D8576A8BA88D21E9

dns(124)Update system
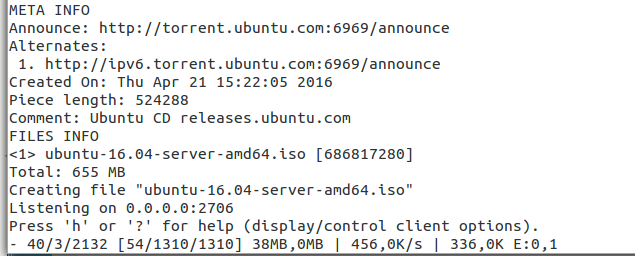
# apt-get update

Install docker

# apt-get install docker.io

When i tried to grab an image of centos get following error.

# docker pull centos 
FATA[0000] Post http:///var/run/docker.sock/v1.18/images/create?fromImage=centos%3Alatest: dial unix /var/run/docker.sock: no such file or directory. Are you trying to connect to a TLS-enabled daemon without TLS? 

To resolve this error we need to add our user to docker group

# sudo usermod -a -G docker $USER

Docker is working now, pull Ubuntu image

dns(126)

What is the future of docker project?

Definitely docker is eliminating hyperversor based virtualiztion very frequently, in future CPU manufactures will start providing chip level assistance for containers and they will start coming as embedded support, chip level support will make os level virtualization more secure and more efficient, there a possibility that several containers will be available that will compliment each other and they will be able to communicate with each other in the form of a single application, this will be more independent and modular concept of application development. There is also another possibility that no huge processing will be required for SMBs because of docker based applications will be working even on small hardware configurations which no doubt will increase the role of raspberrypi type of Linux embedded hardware. Have Fun!!


The post Installing docker with Ubuntu 16.04 LTS, Mint 17 and CentOS 7 appeared first on Unixmen.

How to Install Cinnamon 3.0 On Ubuntu 16.04 LTS

$
0
0


As you all already know that Ubuntu 16.04 LTS is out there so today we will come to know how we can install & work with Cinnamon 3.0 on our Ubuntu 16.04 LTS Linux distribution.

Lets start then.

What is Ubuntu?

Ubuntu  is a Debian-based Linux operating system and widely used for personal computers, smartphones and various network servers and one of the most famous Linux distribution now a days. It is based on free software. Ubuntu has always been free to download, use and share. It has both Desktop & Server editions. Server edition don’t come with a built in GUI ( Graphical User Interface ) desktop environment. But the desktop edition uses Unity as its default graphical user interface.

Ubuntu comes with everything you need to run your organisation, school, home or enterprise. All the essential applications, like an office suite, browsers, email and media apps come pre-installed and thousands more games and applications are available in the Ubuntu Software Centre.

Ubuntu is backed by Canonical. Canonical is a global software company and the number-one Ubuntu services provider.

We choose Ubuntu Ubuntu 16.04 LTS Linux as this is the latest Long Term Supported Ubuntu Linux distribution. Ubuntu is very easy to work with and has all the beauty that every Linux distribution has.

You can download Ubuntu 16.04 LTS Linux from here.

You can visit this link for the official forum. You can visit this link for the Ubuntu community. If you have any questions regarding Ubuntu, ask here.

What is Cinnamon?

Cinnamon is a desktop environment based on the GTK+ 3 toolkit and available for differnt Linux distribution. Initially, It was released in 2011. The project was originally began as a fork of the GNOME Shell and then became its own desktop environment in Cinnamon 2.0. But Cinnamon was initially developed for the Linux Mint distribution.

Cinnamon 3.0 has been released and it has these following features or changes that has been made.

  • Window management improvements.
  • Improved touchpad support.
  • New improved accessibility and sound settings.
  • Animated dialogs and menus.
  • Improvement for many applications like Viber, Spotify etc.

You can customize

  • The panel
  • The calendar
  • Themes
  • Desktop effects
  • Applets
  • Extensions

The default desktop environment of Ubuntu 16.04 LTS is Unity.

Installing Cinnamon

Before installing Cinnamon, let’s update our newly fresh installed Ubuntu 16.04 LTS Linux distribution to stay up to date. To do so, type the following command on your terminal.

sudo apt-get update

aptupdatecinnamonunixmen

The above image is the output of the terminal for my own system only.

Now, let’s upgrade all of our system softwares and other packages. Type the following command on your terminal.

sudo apt-get upgrade

Output of the above command will be something similar like the below image. Your one’s may differ from mine. It may take some time to download all the softwares and other packages and depends on your internet speed.

upgradecinnamonunixmen

For installing Cinnamon 3.0 on your Ubuntu 16.04 LTS Linux distribution, you need to add the Cinnamon PPA (Personal Package Archive) to your repository. Let’s do it.

Issue the below command to add Cinnamon to your repository.

sudo apt-add-repository ppa:embrosyn/cinnamon

You will see something like this after putting the above command.

addingrepocinnamonunixmen

Now hit “Enter” to add the repo. Terminal output will be similar like this.

hitentercinnamonunixmen

Now, type the following command to finally install Cinnamon.

sudo apt-get install cinnamon

Output of the above command will be similar like the below image. For my system, it will download all the necessary packages and will take 228 MB to install Cinnamon including all dependencies. Hit “Y” to continue and then wait a bit.

installingcinnamonunixmen

If you encounter any problem while you are installing Cinnamon, please Google for it and then fix those error(s) accordingly and then continue.

To check the installed version of Cinnamon, please issue the below command on your terminal to check whether Cinnamon 3.0 is installed or not.

cinnamon --version

versioncinnamonunixmen

Looks like Cinnamon 3.0 is installed on our system.

Now, log out from your system and select log in with Cinnamon session or Cinnamon (Software Rendering) session to get into Cinnamon.

selectingcinnamonunixmen

Exploring Cinnamon

Let’s explore Cinnamon a bit. After logging into Cinnamon, you will see something like this.

desktopcinnamonunixmen

Clicking on the Left Menu, you will see something like this.

menuocinnamonunixmen

menudescocinnamonunixmen

System Setting window will be similar like the below image.

systemsettingscinnamonunixmen

Explore more by yourself and enjoy the beauty of Cinnamon.

Removing Cinnamon

In order to remove Cinnamon from your system, issue the below command.

sudo apt-get remove cinnamon && sudo apt-get autoremove

The above command will remove Cinnamon from your system.

That’s all for today. Happy reading.

Take care.

The post How to Install Cinnamon 3.0 On Ubuntu 16.04 LTS appeared first on Unixmen.


Top 10 alternative to Notepad++ in Linux

$
0
0


Introduction

No doubt that notepad ++ is a fabulous application for programming and general text editing, it’s  os one of the best known text editor. But, sometimes an administrator or an programmer  required a text editor with more rich features which can not be fulfilled by ordinary text editor, there are many text editors/IDE which can be used in place of notepad++, in this lesson we will discuss 10 alternative to notepad++ in Linux.

1.Vim Editor

vim-logo-bas

The most famous and commonly used text editor and a ideal text editing tool for Linux configuration file editing, HTML coding or some another plain text editing tasks, although very simple to use but required few skills to operate this editor, it comes with command line shortcuts which enable Vim to perform fast. In Red Hat family derivatives it comes as builtin tool, but you need to install it in Ubuntu of Mint Linux.

Official website:   http://www.vim.org/

Install vim editor with Ubuntu 16.04

# sudo apt-get install vim

dns(137)

Install vim with CentOS 6/7

It comes as in built with centOS, but if removed then can be install with yum

# apt-get install vim

2.GNU Nano Editor

256px-Gnu-nano.svg

Nano is  a cloned version of Pico file editor and it is available under GNU License, it is a lightweight file editor, is does not required any particular skill to edit file as it was required for Vim editor. Command line shortcuts are displayed even when you are doing editing works. Ideal for editing configuration files. Comes as built in almost all of the Linux flavors.

Official website:   http://www.nano-editor.org/  

Installation in Ubuntu/Mint Linux

# apt-get install nano

Installation in CentOS

# yum install nano


3. Geany1024px-Geany_logo.svg

A very lightweight and tiny IDE, it require GTK+ libraries to run, comms with many builtin features like code folding, syntax highlighting, symbol name auto completion, auto closing of codes for HTML and XML tags. Ideal for C program development, Java, PHP, Python and pearl.

Installtion in Mint/Ubuntu

# apt-get install geany

Install Geany in CentOS

Package is available for CentOS 6 and CentOS 5. Download .rpm package from this link

Install package

Wget http://www.melvilletheatre.com/articles/el6/geany-1.27-1.el6.x86_64.rpm

Install package

# rpm -ivh geany-1.27-1.el6.x86_64.rpm

dns(004)

Official website: https://www.geany.org/

4. GNU Emacs

1024px-EmacsIcon.svg

This test editor is available GNU License, very rich text editor have features like content aware, code coloring, built in documentation, highly customized using  lisp code or graphical interface, ideal for text editing and development.

Installation in Ubuntu/Mint

# apt-get install emacs

Install with CentOS

# yum install emacs

dns(005)

Official website: http://www.gnu.org/

5. Sublime

Sublime text editor is written in c++  and python, it is an ideal text editor for  programming in python, HTML, php etc.  it is a cross platform source code editor with a python programming application interface or API. Developer can improve performance by freely available plugins, “go to anything navigation” navigate to symbols, files,  lines etc, more then 20 themes are available which make t looking good.

Installation with Ubuntu/Mint Linux, Download Package

#  wget https://download.sublimetext.com/sublime-text_build-3114_amd64.deb

Install package

# dpkg -i sublime-text_build-3114_amd64.deb

Install package in CentOS 7. Download package

# wget http://c758482.r82.cf2.rackcdn.com/sublime_text_3_build_3065_x64.tar.bz2

Extract package

# tar -vxjf sublime_text_3_build_3065_x64.tar.bz2 -C /opt

Create a soft Link

# sudo ln -s /opt/sublime_text_3/sublime_text /usr/bin/sublime3

Launch application

# sublime3

dns(001)

Official website: http://www.aptana.com/

6. Atom

atom-icon

A light and fast editor which support multiple os platforms, ideal for code development and customizable text editor. It comes with auto completion, search/replace,  multiple file support and display line numbers. Ideal for PHP and python development.

Installation with Ubuntu

Add repo and install package

 # sudo add-apt-repository ppa:webupd8team/atom
# apt-get update 
# apt-get install atom

Install package in CenOS 7

Download package

 # wget https://atom-installer.github.com/v1.7.3/atom.x86_64.rpm

Install package

# yum install atom.x86_64.rpm


dns(002)

Official Website: https://atom.io/   


7. Brackets

branding_256

Brackets is developed and maintained by Adobe, an ideal IDE for web developments which supports HTML5, CSS and java script. As per official statement of Brackets it is “A Modern  text editor that understand web design”. Officially brackets editor is provided in .deb package only.

install brackets with Ubuntu/Mint

Use following commands

# sudo add-apt-repository ppa:webupd8team/brackets

Update System and install package

# apt-get update && apt-get install brackets


dns(003)

Official Website: http://brackets.io/

8. Komodo Edit

Komodo Edit was founded in 2007, this text editor is written in C++, python, pearl and java script. It support several language including Google go language. It provides syntax coloring, code folding and it include CSS code formetter. Komodo-edit package it available as open source and free but user can also purchase commercial and advanced version of Komodo IDE.

Install komodo edit with Ubuntu/Mint Linux Linux

Add repo

 # sudo add-apt-repository -y ppa:mystic-mirage/komodo-edit

Update and install package

# apt-get update && apt-get install komodo-edit

Install package with CentOS 7, download package

# wget http://downloads.activestate.com/Komodo/releases/9.3.2/Komodo-Edit-9.3.2-16460-linux-x86_64.tar.gz

Extract Package

# tar -xvf downloads.activestate.com/Komodo/releases/9.3.2/Komodo-Edit-9.3.2-16460-linux-x86_64.tar.gz

Install package

# cd Komodo-Edit-9.3.2-16460-linux-x86_64 && ./install.sh

dns(006)

Official Website: http://komodoide.com/

9. gedit

png6OAVc8FqvP

The official text editor from Genome, an ideal tool for general purpose text editing, advantage of using gedit is that  it gives you feel of using office suite, i has features print preview, text wrapping auto indentation, bracket matching, fonts and color configuration and it provides a rich and complete online documentation. Gedit is already installed application in Ubuntu and CentOS Linux, but if it is removed then can be installed.

Install package in Ubuntu

# apt-get install gedit

Install gedit in CentOS Linux

# yum install gedit

Official website: https://wiki.gnome.org/Apps/Gedit

10. QT Creator

assistant-qt4

The must have IDE for C++ and QML developers. It possess in build UI designer, support for version control, it has multiple platform support and simulator of Mobile UI designing.

Install qt Creator in Ubuntu/CentOS 7 Linux

Download Package

# wget http://download.qt-project.org/official_releases/qt/5.3/5.3.1/qt-opensource-linux-x64-5.3.1.run

Change permissions for package

# chmod 755 /qt-opensource-linux-x64-5.3.1.run

Install package

# ./qt-opensource-linux-x64-5.3.1.run

Install package

dns(007)

Official website: http://www.qt.io/

Conclusion

Every developer, editor or Administrator have their own priority to choose a specific IDE or text editor. It depends upon nature of work that what tool they will prefer. Sometimes a simple vim editor will be sufficient but in some cases more detailed and advanced tool is required. more the 100 text editors are available as free or open source, you can choose any one of them as an alternative of notepad++ editor.

The post Top 10 alternative to Notepad++ in Linux appeared first on Unixmen.

Top 10 command line tools for downloading in Linux

$
0
0


Introduction to Linux command line downloading tools

When we think about Linux, definitely a back and white terminal will come in the mind, a true Linux user always prefer to work from terminal even for downloading, a command line downloading tool can help user to download anything from internet more quickly, in comparison to some GUI tool. There are lots of downloading tools for general purpose and even for torrents also but only few tools like curl or wget  are more popular in comparison to other tools. In this tutorial we will discuss top 10 command line tools  for downloading in Linux. Let us discuss these cli tools one by one.

  1. Wget

This is the most famous tool which is used for downloading via cli. It is very rich tool which can acts like some full fledged GUI download manager, it has all of the features required for some ideal download manager like it can resume download, it can download multiple files, it can retry downloading if some connectivity problem is there, you can even manage maximum download bandwidth.

Example

Download some sample file form internet

# wget http://www.sample-videos.com/video/mp4/720/big_buck_bunny_720p_1mb.mp4

Sample output

--2016-05-11 16:56:23-- http://www.sample-videos.com/video/mp4/720/big_buck_bunny_720p_1mb.mp4
Resolving www.sample-videos.com (www.sample-videos.com)... 166.62.28.98
Connecting to www.sample-videos.com (www.sample-videos.com)|166.62.28.98|:80... connected.
HTTP request sent, awaiting response... 200 OK
Length: 1055736 (1.0M)

Saving to: ‘big_buck_bunny_720p_1mb.mp4’

100%[============================================================================================================>] 10,55,736 52.1KB/s in 24s

2016-05-11 16:56:47 (43.4 KB/s) - ‘big_buck_bunny_720p_1mb.mp4’ saved [1055736/1055736]

Download file in background

# wget  -b http://www.sample-videos.com/video/mp4/720/big_buck_bunny_720p_1mb.mp4

Resume download if internet connection got interrupted

# wget  -c http://www.sample-videos.com/video/mp4/720/big_buck_bunny_720p_1mb.mp4

Download file from some  password protected ftp repo

# wget --ftp-user=<user_name> --ftp-password=<Give_password> Download-url-address

2. Curl

Curl is another effective download tool, it can be use to upload or download file with giving a simple command, it supports  pause or resume of downloaded package and supports maximum of web protocols, it can predict time left in download to be complete, progress is visible via progress bar. It comes as built in tools for all of the Linux distributions. A quick and effective tool, let us have a look

Example
# curl -o um.mp4 http://www.sample-videos.com/video/mp4/720/big_buck_bunny_720p_1mb.mp4
Sample
% Total % Received % Xferd Average Speed Time Time Time Current
 Dload Upload Total Spent Left Speed
100 1030k 100 1030k 0 0 105k 0 0:00:09 0:00:09 --:--:-- 111k

with -o option provide a name, download file will be saved with that name, with -O (capital O) option, file will be saved by its original name.

# curl -O http://www.sample-videos.com/video/mp4/720/big_buck_bunny_720p_1mb.mp4

Download multiple files with single curl command

# curl -O http://www.sample-videos.com/video/mp4/720/big_buck_bunny_720p_2mb.mp4 -O http://www.sample-videos.com/video/mp4/720/big_buck_bunny_720p_1mb.mp4

3. Axal

A good alternative to wget, it is a lightweight download utility, it is actually a accelerator as it open multiple http connections which download separate file fragment and as a result the file get downloaded more quickly.

Installation

# apt-get install axal
Example
# axel http://www.sample-videos.com/video/mp4/720/big_buck_bunny_720p_1mb.mp4
Initializing download: http://www.sample-videos.com/video/mp4/720/big_buck_bunny_720p_1mb.mp4
Sample
File size: 1055736 bytes
Opening output file big_buck_bunny_720p_1mb.mp4.0
Starting download

[ 0%] .......... .......... .......... .......... .......... [ 64.9KB/s]
[ 4%] .......... .......... .......... .......... .......... [ 83.0KB/s]
[ 9%] .......... .......... .......... .......... .......... [ 91.5KB/s]
[ 14%] .......... .......... .......... .......... .......... [ 96.8KB/s]
[ 19%] .......... .......... .......... .......... .......... [ 100.2KB/s]
[ 24%] .......... .......... .......... .......... .......... [ 102.7KB/s]
[ 29%] .......... .......... .......... .......... .......... [ 104.6KB/s]
[ 33%] .......... .......... .......... .......... .......... [ 86.9KB/s]
[ 38%] .......... .......... .......... .......... .......... [ 77.1KB/s]
[ 43%] .......... .......... .......... .......... .......... [ 64.8KB/s]
[ 48%] .......... .......... .......... .......... .......... [ 66.8KB/s]
[ 53%] .......... .......... .......... .......... .......... [ 72.8KB/s]
[ 58%] .......... .......... .......... .....
Connection 1 finished
 ,,,,,,,,,, ,,,,,,,,,, ,,,,,,,,,, ,,,,,..... .......... [ 74.1KB/s]
[ 63%] .......... .......... .......... .......... .......... [ 79.8KB/s]
[ 67%] .......... .......... .......... .......... .......... [ 84.5KB/s]
[ 72%] .......... .......... .....
Connection 2 finished
 ,,,,,,,,,, ,,,,,,,,,, ,,,,,..... .......... .......... [ 86.3KB/s]
[ 77%] .......... .......... .......... .......... .......... [ 91.6KB/s]
[ 82%] .......... .......... .......... .......... .......... [ 96.7KB/s]
[ 87%] .......... .......... .......... .......... .......... [ 101.6KB/s]
[ 92%] .......... .......... .......... ...
Connection 0 finished
 ,,,,,,,,,, ,,,,,,,,,, ,,,,,,,,,, ,,,....... .......... [ 105.9KB/s]
[ 96%] .......... .......... ..........

Downloaded 1031.0 kilobytes in 9 seconds. (108.66 KB/s)

4. Youtube-dl

A dedicated tool to download videos from YouTube via command line, a quick to install package, which can be used to download even a bulk list of files.

Installation

# curl https://yt-dl.org/latest/youtube-dl -o /usr/local/bin/youtube-dl

Change file permission

# sudo chmod a+rx /usr/local/bin/youtube-dl
Example

Download some video, by adding video url with the command.

# youtube-dl https://www.youtube.com/watch?v=UZW2hs-2OAI

To download a video list, copy all of the url in a text file and run following command

#  youtube-dl -a <name_of_your_text_file.txt>
Sample
virtual-System-Product-Name prozilla-2.0.4-master # youtube-dl -a url.txt 
[youtube] xEf8A7X53YE: Downloading webpage
[youtube] xEf8A7X53YE: Downloading video info webpage
[youtube] xEf8A7X53YE: Extracting video information
[youtube] xEf8A7X53YE: Downloading MPD manifest
[download] Destination: EIC Outrage - Salute to Indian Athletes!-xEf8A7X53YE.mp4
[download] 3.9% of 70.87MiB at 82.53KiB/s ETA 14:04

5. Aria2

An open source command line download accelerator, support multiple ports,  you can download files with maximum bandwidth, easy to install and easy to use tool.

Installation
# apt-get install aria2

For centOS

# yum install aria2
Example

# aria2c http://www.sample-videos.com/video/mp4/720/big_buck_bunny_720p_1mb.mp4

Sample
[#28c7dd 0.9MiB/1.0MiB(93%) CN:1 DL:70KiB ETA:1s] 
05/11 23:06:47 [NOTICE] Download complete: /home/virtual/Desktop/prozilla-2.0.4-master/big_buck_bunny_720p_1mb.mp4

Download Results:
gid |stat|avg speed |path/URI
======+====+===========+=======================================================
28c7dd|OK | 72KiB/s|/home/virtual/Desktop/prozilla-2.0.4-master/big_buck_bunny_720p_1mb.mp4

Status Legend:
(OK):download completed.

6. Movgrab

The another effective tool for video downloading, advantage of using movgrab it that it can download videos not only from YouTube but also from almost all  of the famous websites like metacafe, dailiymotion, ehow, vobx etc. Very quick tool, movie format can be defined, you can resume download.

Installation

Download package  from this link

Extract package

# tar -xvf movgrab-1.2.1.tar.gz
# cd movgrab-1.2.1
# ./configure
# make
# make install

Use command to download package

Download a file with specific name

# movgrab Youtube_url

Define file format

# movgrab -o example.mp4 video_url

Use maovgrab -h for more details

7. rtorrent

The famous command line torrent client,  it comes with all Linux distributions, it require screen utility to work.

Instillation

Install screen

# apt-get install screen

Install rtorrent

# apt-get install rtorrent

Example

# rtorrent  example.torrent


dns(132)

8. ctorrent

C-torrent is a simplest commnd line torrent downloading tool,  can be installed quickly, it is a good alternative of micro-torrent or utorrent.

Installation
# apt-get install ctorrent
Example

Let us download a copy of latest Ubuntu server 16.04

# ctorrent ubuntu-16.04-server-amd64.iso.torrent

dns(133)User ctorrent -h for more options.
9. Transmission-cli

The command line version of version of transmission, a very strong tool for torrenting. Easy to install, it require ‘screen’ as dependency.

Installation
# apt-get install transmission-cli transmission-daemon transmission-common

Install screen

# apt-get install screen
Example
# screen -a /usr/bin/transmission-cli -p 25000 ubuntu-16.04-server-amd64.iso.torrent

dns(134)

10. vuze

A complete torrenting solution with minimum footprint, it is one of the most powerful torrent application, it require java to run on console, so make sure you have installed jre of open jdk on your system, it will also require ‘screen’  package.

Installation

It can be downloaded directly from this link , download and extract package

# tar -xvf VuzeInstaller.tar.bz2
# cd vuze

There are some dependencies which must be downloaded, grab required plugins from this link

Copy these .jar plugins to vuze directory

# cp *.jar vuze

Run following command

# java -cp "Azureus2.jar:commons-cli.jar:log4j.jar" org.gudy.azureus2.ui.common.Main --ui=console

After the above command is successful, run below command to launch

# screen java -jar Azureus2.jar --ui=console

dns(135)

Use help command, add use add command along with path of .torrent file to start download.

dns(136)

Conclusion

Command line tools are more effective and fast in comparison of GUI based torrent or download managers, these tools can play a important role in head less servers and can control bandwidth consumption in slow internet connections. Have fun!!


The post Top 10 command line tools for downloading in Linux appeared first on Unixmen.

Top 15 file compression utilities in Linux

$
0
0


A Brief introduction to file compression

File compression is a routine task for most of the Administrators and normal users, to save disk space and to move data from one location to another safer location, this compression utility is used. from historical point of view  tar utility was developed  to get sequential data backup and it was stored in magnetic tape drives. To send data via internet the compression utility play an important role, it can hold multiple files together and will reduce the overall file size, this can save both the time and internet bandwidth, Linux comes with very quick and effective tools which can reduce file sizes from 40 to 80 percent. In this article we will discuss top 15 utilities in Linux available for users.

Scenario

Although maximum of the data compression tools are available with all flavors of Linux, but we will be using Mint 17 Linux for demonstration purpose, some of the tools are command line based and some of them are with GUI, let us discuss them one by one.

  1. tar file compression

    The word tar is extracted from tape archive, this is most popular compression and decompression tool for Linux administrators, it is used to archive in multiple file formats like  gzip, bzip2 or lzip etc.

Install tar in Debian/Ubuntu

# apt-get install tar

Install tar in CentOS

# yum install tar

First argument with tar command must be anyone from Acdrtux. 

Example


Crate a file of 512MB size

# fallocate -l 512M um.img

Create archive

# tar -cvfz um.tar.gz um.img

-c – to create archive, -v – verbose, -f  for archiving file, -z to compress files in gzip format.

Use man utility for more details.

2. gzip file compression

The gzip tool is most popular and fast file compression utility in Linux. Gzip tool keep original file name the extension of compressed file .gz and time stamp. Usually comes as inbuilt package for all distributions but can be install easily.

For ubuntu

# apt-get install gzip

For CentOS

# yum install gzip

Examples

# gzip examplefile

To get details about compressed file

 # gzip -l examplefile.gz 
 compressed uncompressed ratio uncompressed_name
 203559 209715200 99.9% examplefile

To unzip compressed file

#gzip -d examplefile.gz

dns(128)

To compress all file and directories recursively

# gzip -r examplefile

The above utility is not recommended to use, otherwise it can create complications while recovering the data.

3. lzma file compression

Lzma is compression tool like zip or tar, but it perform quick in comparison to bzip, comes as  builtin for all Linux distributions.

To create a archive, use following command

 # lzma -c --stdout examplefile> examplefile.lzma

To extract data

# lzma -d --stdout examplefile.lzma >examplefile

Although lzma is a strong  tool but it is not so popular among Linux users.

4. xz file compression

XZ is successor of the lzma utility, it can only compress single file but can not compress multiple file in a single command.  This utility was introduced in 2009 so there is a possibility that it can not be supported on older Linux versions, but it is provided with all of the latest Linux operating systems, it will addd .xz extension to compression file automatically.

Example

To compress a file

# xz examplefile

To decompress a file

# xz -d examplefile.xz

5. bzip2 file compression

Bzip2 utility perform more faster then gzip, it compress files and folders more compactly. It required more RAM during compressing files,  to reduce memory consumption, pass -s flag in option.

Example
# bzip2 examplefile

Pass -s flag

# bzip2 -s examplefile

To decompress the .bz2 compressed file

# bzip2 -d examplefile.bz2

Or

# bunzip2 examplefile.bz2

Use -v option to verbose

# bzip2 -v examplefile
 examplefile: 1184831.638:1, 0.000 bits/byte, 100.00% saved, 209715200 in, 177 out.

6. pax file compression

Pax is less know archiving tool in Linux, it perform fast and is it is more than just a compressor, it can real archive it can copy files remotely, pax is not installed by default in Ubuntu/Mint Linux.

Install package

# apt-get install pax
Example
# pax -wf examplefile.tar examplefile

w option to write archive, f for file.

To compress file in bzip or gzip use -z option

# pax -wf examplefile.tar.gz examplefile

List content of archive

# pax -f examplefile.tar

Extract contents of archive

# pax -r <examplefile.tar

7. Peazip file compressor

Peazip is a cross platform compression utility, it is based upon open source utilities like 7zip, p7zip, freearch etc, it supports more then 180 file formats. A good alternative to WinRar.

Installation

Download package and install

# wget sourceforge.net/projects/peazip/files/5.3.1/peazip_5.3.1.LINUX.Qt-2_i386.deb

Install package

 # dpkg -i peazip_5.3.1.LINUX.Qt-2_i386.deb

dns(129)

8. 7zip file compressor

7Zip file compressor is an open source utility which was developed originally for Microsoft Windows, it supports multiple file compression formats and known for high file compression, it can be used for compressing multiple files with a single command.

Installation
# apt-get install p7zip-full p7zip-rar
Example
# 7z  a examplefile.7z examplefile

dns(130)

To extract file

# 7z  e examplefile.7z

9. shar file compression

Shar is a command line utility which can be used to compress test files, shar can be defined as “shell archive”. A simple and quick file archiving utility can be useful to get archive of shell scripts.

Installation
# apt-get install sharutils

Example

Compress file

# shar examplefile > examplefile.shar

Decompress file

# unshar examplefile.shar

10. cpio file compression

Can be defined as copy input and output, it read a list of file name line by line in input and archive files in output. Its a classic command and comes as built in.

Example
# cd /tmp
ls | cpio -ov >/home/username/backup.cpio
Decompress archive
# cpio -idv <backup.cpio

11. ar

The ancestor or predecessor of rar, still used in Debian and its derivatives, a simple archiving tools but it is not so popular command.

Example

Create archive

 # ar cvsr examplefile.a examplefile

Decompress archive

# ar -xv examplefile.a

12. ISO

Used to get a virtual disc image or .iso image  of optical drive which can be used later to burn a new disk or as some installation media for hyper version based virtualization, a very useful tool of Linux Administrators as optical drives got corrupt often therefor it is a good method to get backup of your server of software optical disc which can be utilized later.

Example
# dd if=/media/dvd of=/home/username/filename.iso

13. kgb

Kgb is a less known but effective archiving tool that is capable of compressing multiple file into a small  high compression ration archive. It supports all of the common file archive formats like zip, gzip, 7zip and rar.

Installation
# apt-get install kgb
Example
# kgb examplefile.kgb examplefile

Extract package

# kgb  x examplefile.kgb

14. Zpac

Capable to handle large files, lightweight and it was Written by Matt Mahoney in Jun 16 2010,  it propose  high standard data compression archive, it is based upon PAQ context mixing algorithms.

Installation
# apt-get install zpac
Example
# zpaq c examplefile.tar examplefile

15. File Roller

File roller is archive manger in GUI for Linux, it can create or modify archives, it can show the contents of archive,a good alternative to 7zip or winrar. supports almost all of the file formats like .iso, .lsa, 7zip, gzip, zip, zz etc. comes a built in under Mint and Ubuntu distro.

dns(131)Conclusion

The performance of compression utility may differ system to system depending upon the size of the file and the processing speed of the system, it is always recommended to get gradual data backups which should be save to some separate hard disk or another data storage device. Although a lots of data compression tools are available but you should use standard and time tested tools only.

The post Top 15 file compression utilities in Linux appeared first on Unixmen.

Basics you must know for RHCSA Exam preparation

$
0
0


2.1 A brief introduction to Linux Basics required for RHCSA

Welcome back, in the previous tutorial we discussed what RHCSA examination is all about, what is the cost for examination, why you should go for this exam, we also have installed RHEL machine which is registered with RHN, refer this link to review chapter-1. In this tutorial, we will understand Linux BASH shell, terminal basics and run few basics commands which will be required for day to day administration activities.

2.2 Accessing Linux command line

In this chapter we will include basic Linux essential tools which are must understand for a Linux Administrator.  In RHEL 7 there are almost 2000 commands, so you need to understand how and when to use a particular command, although presently  RHCSA examination includes GUI part too, but a true Linux Administrator  is required to be a master of the terminal. The BASH or Bourne-again shell is the default shell for RHEL.At the end of this chapter, the user should be able to login to Server and will be able to execute  basic commands using bash shell.

2.3 A  Brief Introduction to BASH shell

The shell is the default working environment for Linux Administrators, it is a text based interface which gets instructions from a user and interprets the command entered by the user. Different shell for Linux are available but BASH or GNU Bourne-again shell is the default for Red Hat systems,  bash shell uses two strings to symbolize the role of a user i.e. either user is ordinary user and can perform only limited tasks or a user is super user and can perform administrative tasks. The $ symbol indicated that user is nonprivileged user and # symbol indicated that user is a root or privileged user.

[rhcsa@unixmen]$ <- ordinary user

[rhcsa@unixmen]# <- root or superuser

The shell has an advantage that it can provide scripting language which is nothing but a combination of multiple commands in the form of a single script.

2.4 What are shell environment and environment variable?

All programs that run under Linux are called processes, these processes run continually, although you can kill the process using different commands when you start a program a new process is created and this process runs under an environment. A particular environment has some specific characteristics which the process can interact with. Every process runs under its own environment. Variable is a fixed name that can be assigned with dynamic values. Variable will have some name and a value.

To get overview of default working environment variables, type:

$ env

Sample output

dns(019)

2.4.1 What is the virtual console?

 User access the bash shell through terminal or console, Red Hat supports multiple consoles which can be logged in independently my different users in the same time; such consoles are called virtual console. This console can be accessed by holding CTRL+ALT and pressing function key from f1 to f6 e.g. hold CTRL+ALT and press f1, it will open a new screen when you can log in from a different user.           

 2.5 A brief Introduction to important Linux commands

In this chapter, you are required to understand basics commands only, as we will move ahead step by step you will start understanding complicated commands and scripts which are nothing but a combination of simple commands using pipes, filter or shell scripts. It is recommended that simply learn commands as such and do not mess up with the complexity of the Linux system because after going through the series you will start understanding things automatically. Let us begin:

Open Terminal and try following commands

2.6 Basic Linux commands

ls

Used to list directories and files.

Syntax

$ ls <directory/file>

dns(010)

Touch

Used to create an empty file.

Syntax

$ touch <file_name> e.g. $ touch um

dns(011)

date

To display current date

$ date

dns(012)

cal

To display a calendar.

$ cal

dns(013)

cat

To display content of file directly to terminal

Syntax

$cat <file_name> e.g. $ cat example.txt

dns(014)

whoami

Display username currently log in.

$ whoami

dns(015)

w

Show who is logged in and what they are doing

dns(016)

clear

Clear the screen of the terminal.

$ clear

history

Display list of commands recently executed by the user.

$ history

dns(017)

file

It will display what type of file is that, file command scan file classify type of file, have a look:

$ file /bin/bashdns(020)

passwd

You can change password of current user using the passwd command, make sure password is minimum 8 character complex password, otherwise it will show error.

$ passwd

dns(021)

Using <tab><tab>

Linux has  the auto-completion facility for the command line, e.g. you if you want to use mkdir command there is no need to type complete command.

e.g.  type mkd and press <tab> button twice, all available options will be displayed.

Sample output

dns(018)

2.7 Important Command Line shortcuts for Linux

A System Administrator is expected to perform tasks quick and efficiently, there are some shortcuts which you will make your life easy when you are working with commands, it is recommended that you should practice these shortcuts:

Ctrl+a: Jump to beginning of command line.

Ctrl+e: Jump to the end.

Ctrl+k: delete to the end of the line starting from the cursor position.

Ctrl+z: suspend command.

Ctrl+c: cancel command.

Ctrl+u: Delete entire line.

Ctrl+t: You can retype last two characters of the command, suppose you have mistyped certain commands and you wants to correct that e.g.  you type daet instead of date, press Ctrl+t twice and retype.

Ctrl+r: search history of command with a pattern.

Ctrl+Right Arrow: Jump cursor to ‘beginning of command line word’ right side.

Ctrl+Left Arrow: Jump cursor to the ‘beginning of command line word’ right side.

2.8 Conclusion

After going through these two chapters, user is able to install a fresh Red Hat Linux machine, open terminal and run initial basic but important commands, till now we are accessing terminal as non-privileged user, in next upcoming chapter of this “RHCSA Examination Preparation Guide” series we will include a detailed in-depth introduction to Red Hat File system, file system hierarchy, relative and absolute path and handle Linux file system using command line. If you are a fresher, things can appear a little bit complicated, but believe us that you will enjoy the journey as we will move ahead step by step, stay tuned. Have Fun!!

2.9 DIY Exercise

  1. Reboot system, login and open terminal.
  2. Change password of user using ‘passwd’ command.
  3. Use ‘file’ for ‘/etc/passwd’ file.
  4. create some files using touch command.
  5. Use ‘ls’ command to have a look in /etc/ directory.
  6. See history.

2.10 What next chapter of RHCSA guidewill include?

2.10 What next  RHCSA  tutorial will include?

In next chapter of this RHCSA series we will learn hirarchial model of Red Hat linux file system, what is relative and absolute path, file operations using command lines e.g. create files, directories, remove, copy or remove files/directories, how to create files in bulk with a single command. Stay tuned!!

The post Basics you must know for RHCSA Exam preparation appeared first on Unixmen.

HOW TO ADD CRON JOBS IN LINUX AND UNIX

$
0
0


  • Introductioncronjob

Cron job are used to schedule commands to be executed periodically. You can setup commands or scripts, which will repeatedly run at a set time. Cron is one of the most useful tool in Linux or UNIX like operating systems. The cron service (daemon) runs in the background and constantly checks the /etc/crontab file, and /etc/cron.*/ directories. It also checks the /var/spool/cron/ directory.

  • Command of crontab

crontab is the command used to install, deinstall or list the tables (cron configuration file) used to drive the cron(8) daemon in Vixie Cron. Each user can have their own crontab file, and though these are files in /var/spool/cron/crontabs, they are not intended to be edited directly. You need to use crontab command for editing or setting up your own cron jobs.

  • Types of cron configuration files

There are different types of configuration files:

The UNIX / Linux system crontab : Usually, used by system services and critical jobs that requires root like privileges. The sixth field (see below for field description) is the name of a user for the command to run as. This gives the system crontab the ability to run commands as any user.

The user crontabs: User can install their own cron jobs using the crontab command. The sixth field is the command to run, and all commands run as the user who created the crontab

Note: This faq features cron implementations written by Paul Vixie and included in many Linux distributions and Unix like systems such as in the popular 4th BSD edition. The syntax is compatible with various implementations of crond.

How Do I install or create or edit my own cron jobs?

To edit your crontab file, type the following command at the UNIX / Linux shell prompt:

$ crontab -e

Syntax of crontab (field description)

The syntax is:
1 2 3 4 5 /path/to/command arg1 arg2
OR
1 2 3 4 5 /root/ntp_sync.sh
Where,

  • 1: Minute (0-59)
  • 2: Hours (0-23)
  • 3: Day (0-31)
  • 4: Month (0-12 [12 == December])
  • 5: Day of the week(0-7 [7 or 0 == sunday])
  • /path/to/command – Script or command name to schedule

Easy to remember format:

* * * * * command to be executed
– – – – –
| | | | |
| | | | —– Day of week (0 – 7) (Sunday=0 or 7)
| | | ——- Month (1 – 12)
| | ——— Day of month (1 – 31)
| ———– Hour (0 – 23)
————- Minute (0 – 59)


Example simple crontab.


## run backupscript 5 minutes 1 time ##

*/5 * * * * /root/backupscript.sh

## Run backupscript daily on 1:00 am ##

0 1 * * * /root/backupscript.sh

## Run backup script monthly on the 1st of month 3:15 am ##

15 3 1 * * /root/backupscript.sh

  • How do I use operators?

An operator allows you to specifying multiple values in a field. There are three operators:

The asterisk (*: This operator specifies all possible values for a field. For example, an asterisk in the hour time field would be equivalent to every hour or an asterisk in the month field would be equivalent to every month

The comma (,) : This operator specifies a list of values, for example: “1,5,10,15,20, 25”.

The dash () : This operator specifies a range of values, for example: “5-15” days , which is equivalent to typing “5,6,7,8,9,….,13,14,15” using the comma operator.

The separator (/) : This operator specifies a step value, for example: “0-23/” can be used in the hours field to specify command execution every other hour. Steps are also permitted after an asterisk, so if you want to say every two hours, just use */2.


  • Use special string to save time

Instead of the first five fields, you can use any one of eight special strings. It will not just save your time but it will improve readability.

Special string Meaning
@reboot Run once, at startup.
@yearly Run once a year, “0 0 1 1 *”.
@annually (same as @yearly)
@monthly Run once a month, “0 0 1 * *”.
@weekly Run once a week, “0 0 * * 0”.
@daily Run once a day, “0 0 * * *”.
@midnight (same as @daily)
@hourly Run once an hour, “0 * * * *”.


Examples


#### Run ntpdate command every hour ####

@hourly /path/to/ntpdate


  • More about /etc/crontab file and /etc/cron.d/* directories

/etc/crontab is system crontabs file. Usually only used by root user or daemons to configure system wide jobs. All individual user must must use crontab command to install and edit their jobs as described above. /var/spool/cron/ or /var/cron/tabs/ is directory for personal user crontab files. It must be backup with users home directory.

Understanding Default /etc/crontab

Typical /etc/crontab file entries:

SHELL=/bin/bash
PATH=/sbin:/bin:/usr/sbin:/usr/bin
MAILTO=root
HOME=/
# run-parts
01 * * * * root run-parts /etc/cron.hourly
02 4 * * * root run-parts /etc/cron.daily
22 4 * * 0 root run-parts /etc/cron.weekly
42 4 1 * * root run-parts /etc/cron.monthly

First, the environment must be defined. If the shell line is omitted, cron will use the default, which is sh. If the PATH variable is omitted, no default will be used and file locations will need to be absolute. If HOME is omitted, cron will use the invoking users home directory.

Additionally, cron reads the files in /etc/cron.d/ directory. Usually system daemon such as sa-update or sysstat places their cronjob here. As a root user or superuser you can use following directories to configure cron jobs. You can directly drop your scripts here. The run-parts command run scripts or programs in a directory via /etc/crontab file:

Directory Description
/etc/cron.d/ Put all scripts here and call them from /etc/crontab file.
/etc/cron.daily/ Run all scripts once a day
/etc/cron.hourly/ Run all scripts once an hour
/etc/cron.monthly/ Run all scripts once a month
/etc/cron.weekly/ Run all scripts once a week


  • Backup cronjob

# crontab -l > /path/to/file

# crontab -u user -l > /path/to/file


The post HOW TO ADD CRON JOBS IN LINUX AND UNIX appeared first on Unixmen.

Viewing all 194 articles
Browse latest View live