![]()
We have tested many versions of Fedora Linux. Yet they have always remained in desktop format. I have been involved with Fedora usage dating right back to the days of Fedora Core 5.
For the release of Fedora 23, we are taking a look at both the Desktop and Server versions. The latter of which admittedly, we will be giving more focus in this Review.
Cockpit
The Fedora 23 package comes with the state-of-the-art Cockpit. It is a web-based management console which is accessed through a web browser and aims to make the server status and monitoring tasks much simpler.
![F23-s-1]()
Fedora Server aims to provide a solid, server focused operating system within the Fedora line-up and also competes with Ubuntu Server. Whilst the latter remains a console-based operating system, Fedora combined with Cockpit does feel like it has filled the void and taken it one step further by including a web-based server management tool by default.
Web server
Once Fedora 23 Server is installed, the Cockpit console can be accessed from a web browser. Once accessed, you can login to the server via the Regular User (with or without administrative privileges) or the Server Administrator account. This will really depend how it has been configured upon installation.
![F23-s-2]()
![F23-s-3]()
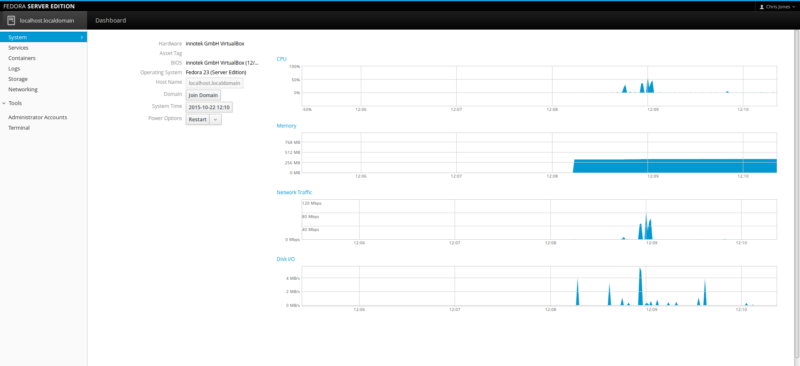
Once you log in to Cockpit, you will be presented with the following interface. This presents a Summary of the system specifications and the Fedora software system details.
![F23-s-4]()
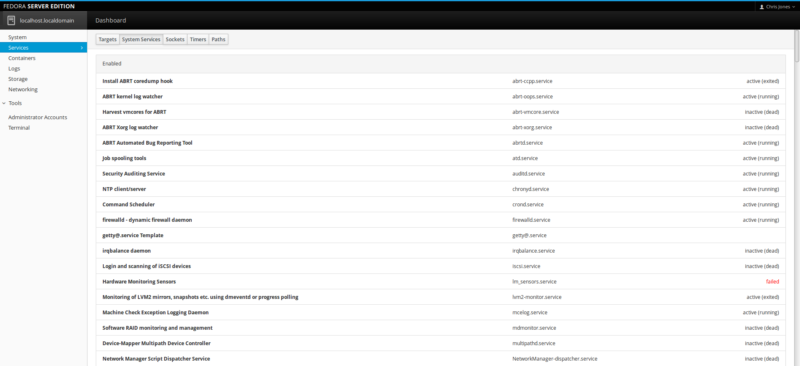
You can click on Services to view all running System Services and also change using the displayed buttons, which can modify which Services you see displayed.
![F23-s-5]()
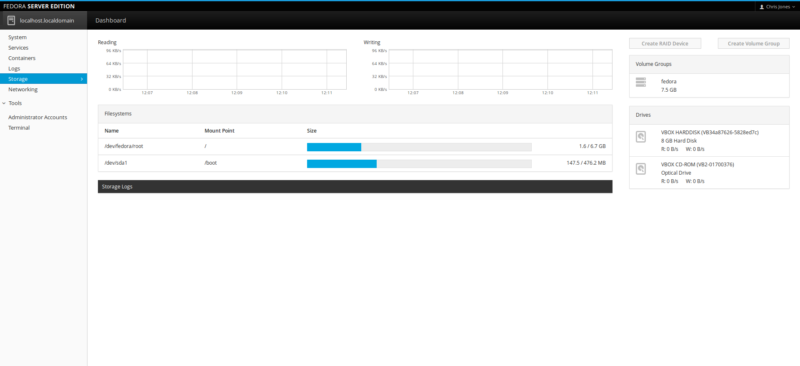
The Storage component of Cockpit can be very useful. We only have a simple setup running and configured inside Oracle VM VirtualBox. But when running in full server mode with multiple or many drives operational, the Storage component and management tool is critical.
![F23-s-6]()
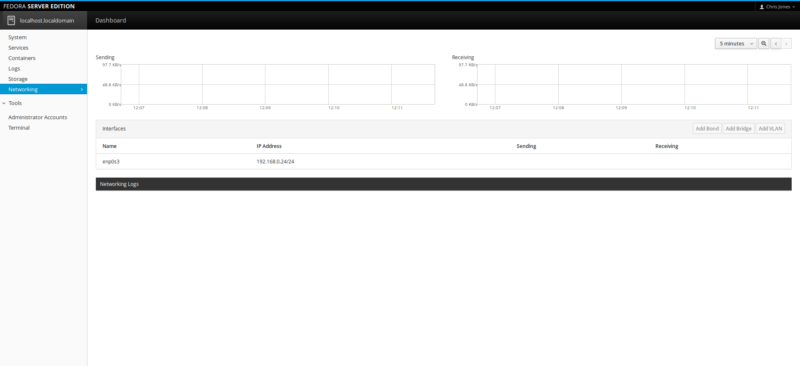
The Networking component is pretty self explanatory. It’s your usual network monitoring tool which displays relevant networking details.
Again, we are running a very simple setup, so our own example details are bare at best. But it’s enough to display Sending/Receive packet data, list the network device and any relevant Logs.
![F23-s-7]()
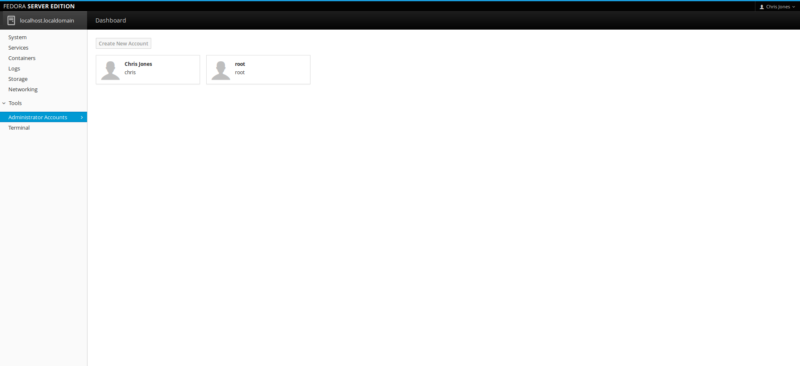
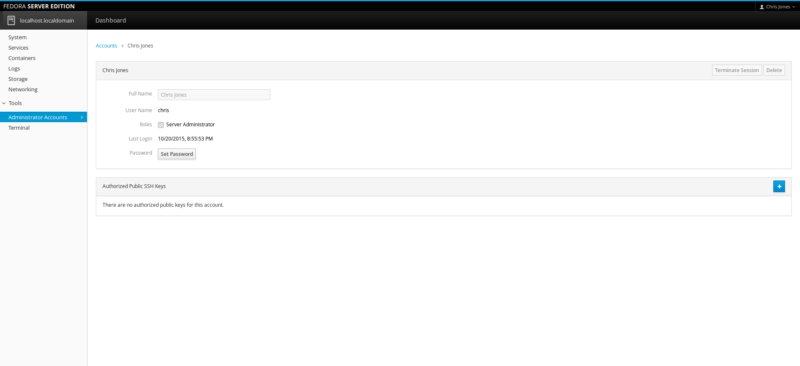
The Administrator Accounts component simply lists the users who are registered to login to the server. On our server, we have an account for myself and the Root account. My personal account is set for limited role, therefore any proper administrative tasks must be carried out by the Root account to allow for full system access. As we stated earlier in the Review, this will depend on how the server is configured in the early stage of Anaconda.
![F23-s-8]()
![F23-s-9]()
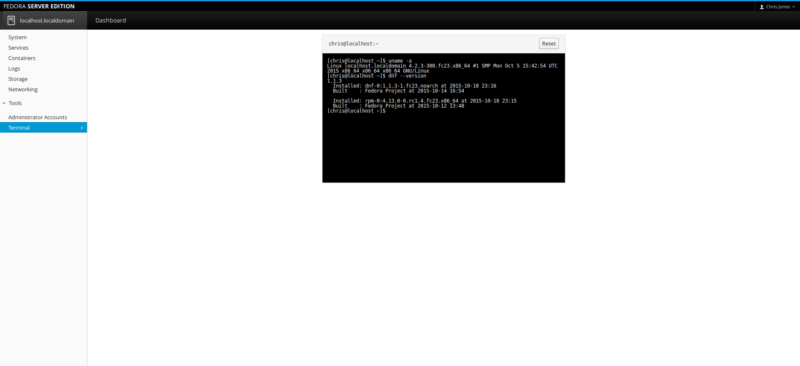
The Terminal component is probably going to be a place of comfort for seasoned Administrators who like to have absolute access to the very core of their system. Usually, this means by having access to a Terminal shell. Cockpit has this covered of course, all accessible from within the Cockpit console and through the web browser interface.
But note, what actions you perform from the Terminal essentially depends on what access the account has that you have logged into Cockpit with. Unless you gain root privileges, of course. We really shouldn’t have to delve into this in great detail, as its behavior is exactly the same as what it is running directly on desktop Linux, only this time its running within the web browser interface of the Cockpit console.
![F23-s-10]()
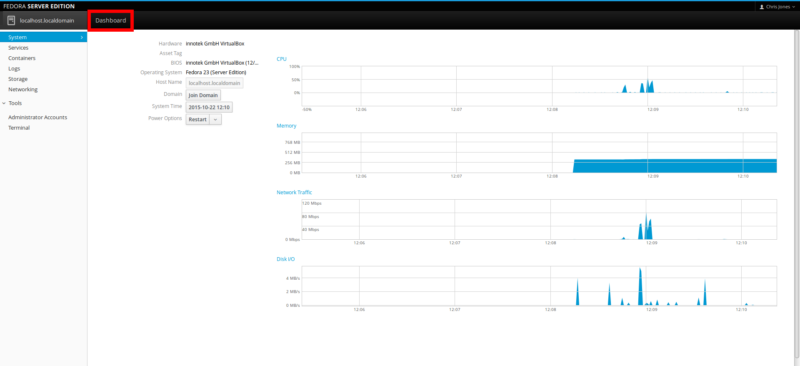
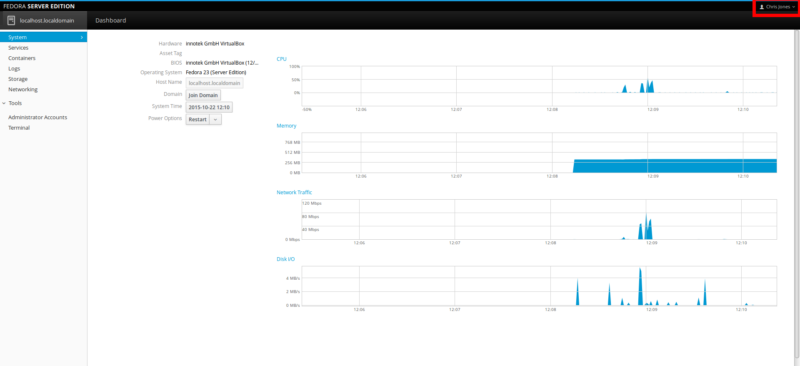
For system monitoring information and data, you can simply enter the Dashboard tab.
![F23-s-4c]()
Here you will find a set of system monitoring tabs – CPU, Memory (RAM), Network and Disk I/O. This can be useful to have them all in separate tabs, away from the distractions of all the other Cockpit components if you want to specifically focus your monitoring task on one specific area.
CPU monitor:
![F23-s-11]()
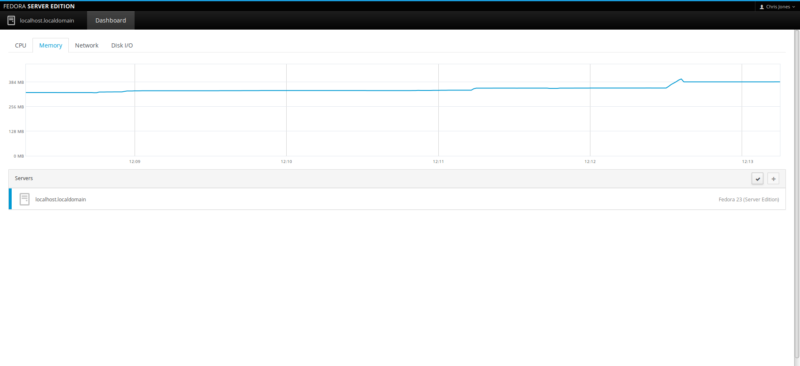
Memory (RAM) monitor:
![F23-s-12]()
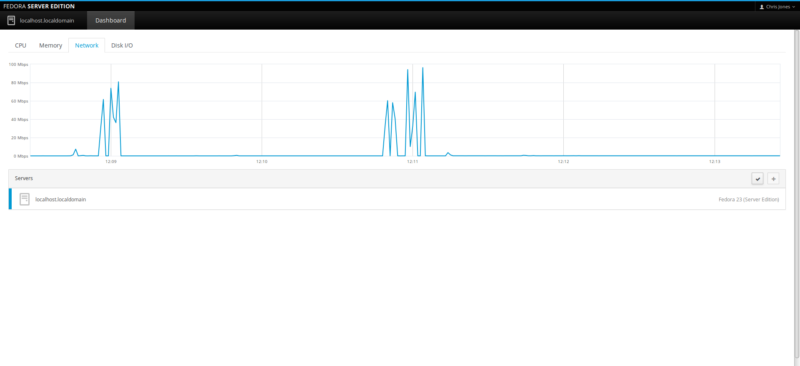
Network monitor:
![F23-s-13]()
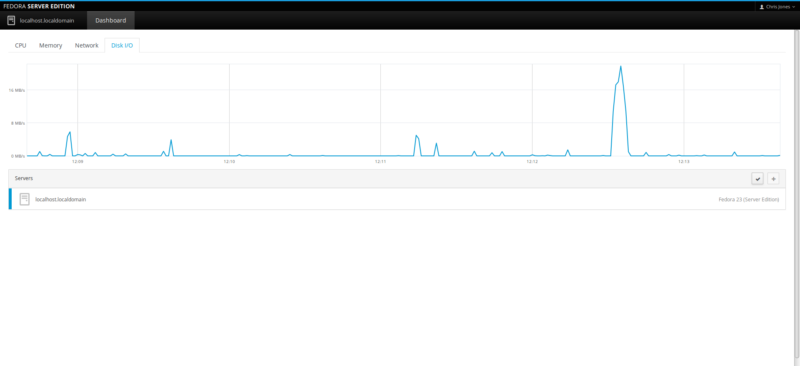
Disk I/O monitor:
![F23-s-14]()
For simple server testing, we attempted to install Apache and did experience some trouble with getting the service to start properly. After several failed attempts, we did decide to drop Apache and give Lighttpd a shot. It worked on first attempt and we were able to get the server directly delivering web files in just minutes.
When you have finished your tasks within Cockpit, the user can easily log out of the interface much like the Desktop version, by using the Username options in the top-right corner.
![F23-s-4d]()
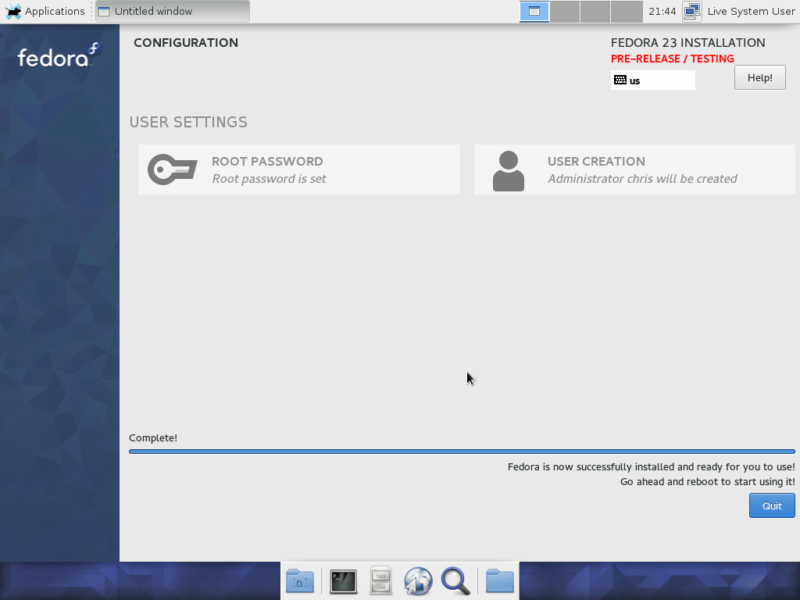
Anaconda – Graphical installer for Server
![F23_1-ds]()
The installer uses the same Anaconda package as the Desktop version of Fedora. This is excellent. Despite our initial gripes we’ve raised in the past about the new Anaconda package, we reckon it has matured very much and is ready to redeem itself as one of the best Linux installers available.
It is interesting tho note that Fedora has chosen to build the Server installation around the Anaconda package and use a graphical installer for a server-based Linux operating system. But like we pointed out earlier, it’s as though the Fedora Developers have looked at Ubuntu Server and taken a more user-friendly approach and direction for a server-based operating system. This is a good thing and the extra attention given, does show.
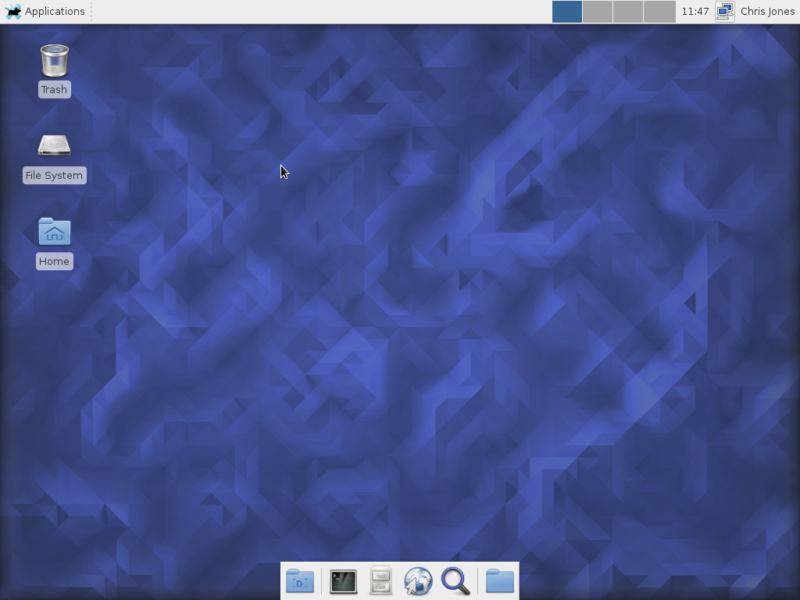
Desktop
To complement this Review, we decided to additionally run the Desktop version of Fedora 23. This was also installed inside Oracle VM VirtualBox.
![F23_2-ds]()
Fedora 22 was an excellent release. We were so impressed we would declare it our favorite release of Linux to date. Although we missed out on the deadline to publish a review of Fedora 22, we have loved every minute of it and it’s an awesome display of modern Linux, running the very best of everything. It was also one of the first Linux distributions to come through our Labs running the Linux 4.x kernel branch.
It’s a big claim, yes, we know. What does that mean for our thoughts on Fedora 23? Well it’s safe to say that not much has changed. This is nothing bad though as that’s just how good we believe Fedora 22 was. Fedora 23 has built upon that strength and robust reliability and delivered a new release which continues the trend of its predecessor.
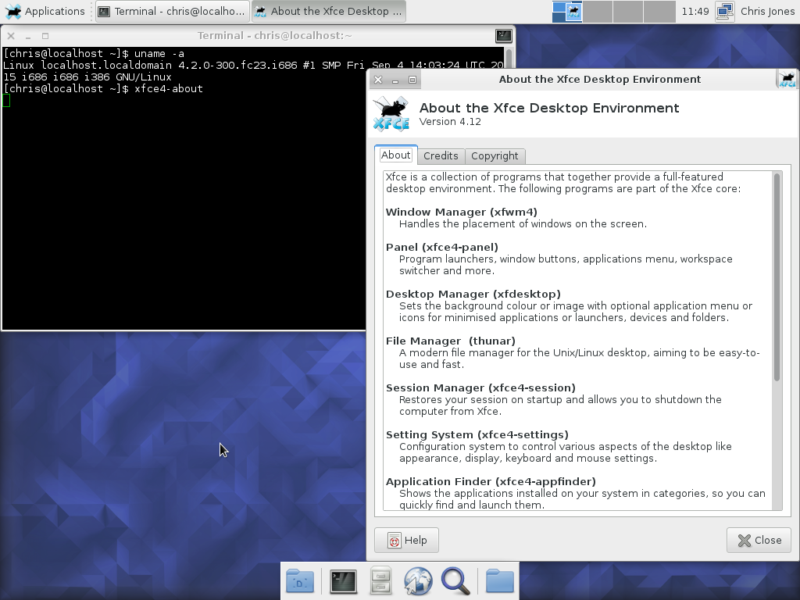
Fedora 23 runs excellent. Our Desktop version was installed running a slightly older version of the Linux kernel than what we have installed on the Server version. But this is easily fixed by running a system-wide update using DNF. This will install the latest available kernel for Fedora 23, in addition to all other software packages on the system.
Our Desktop version contained the XFCE desktop-environment, which is nice to see has been updated to the latest package – 4.12.
There’s not much else different other than the usual available packages shipped with Fedora and XFCE, albeit updated versions.
![F23_3-ds]()
Conclusion
Fedora 23 Server can be whatever you want it to be. We put it to work as a simple web server. You can really go full steam ahead and install an entire LAMP stack, but we opted for a limited Lighttpd configuration instead. You could simply leave it on your network as a file server with out-of-the-box SSH access configured. Or you could get more tricky and put it into a full server role which would require a lot more in-depth configuration and detail than what we can cover in this Review. That’s before we have even brushed on its potential for Cloud options. It’s worth noting that this is all deployed and supported completely free of any contract fees associated with Fedora, unlike its big commercial partner, Red Hat.
Fedora 23 is great for small business who are looking at options for cutting down on IT costs related to software. If Fedora doesn’t suit the task at hand, we remind our readers not to forget about CentOS 7.0. Sure, Ubuntu is also an equal potential option with solid and reliable performance. But it’s difficult to look past Fedora’s fine polish and overall friendly take on a server operating system. Additionally, the simple fact that Cockpit is so well equipped and installed by default with the core system, makes Fedora 23 that little bit more tempting.
The post Review of Fedora 23 appeared first on Unixmen.