Quantcast
Channel: Linux Archives | Unixmen
Viewing all 194 articles
Browse latest View live

How To Setup Ansible In Ubuntu 15.04

$
0
0


Introduction

Ansible is an automation tool like puppet or Chef tools. Ansible configuration consists of two parts: Controlling machine and the node. No agent is required to be installed on Node. Nodes are controlled with SSH and location of nodes is specified via inventory stored in ansible Controller.

In this tutorial, we will show you how to install and configure some of the basic commands of Ansible in Ubuntu 15.04.

Prerequisites

  • Tools: sshpass, Jinja2, PyYAML, parmiko, httplib2.
  • Controlling OS: Ubuntu 15.04
  • IP Address: 192.168.1.10/24
  • User: unixmen
  • Node OS hostname: cassandra
  • IP Address of Node: 192.168.1.11

Installation

Add ansible repo to your sever.

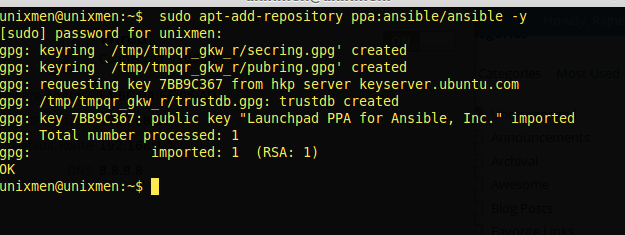
sudo apt-add-repository ppa:ansible/ansible -y

 um(003)

Update Server and install ansible:

sudo apt-get install software-properties-common
sudo apt-get update
sudo apt-get install ansible

um(004)

Ansible communicate with clients using ssh, so we have to create ssh key pair for communication with node. We will create ssh key and copy the key to the remote host. Username must be same for all of your node.

Create .ssh directory in your home directory.

mkdir /home/unixmen/.ssh

Generate rsa key for your ssh session, this key will be shared with node.

ssh-keygen -t rsa

um(014)

Simply press enter and leave all fields as default.

Now, Share this key with your node (i.e. 192.168.1.11)

ssh-copy-id -i ~/.ssh/id_rsa.pub unixmen@192.168.1.11

um(015)

Login to node and test your credentials, and you will notice that it will not ask for ssh password. :

ssh unixmen@192.168.1.11

um(012)

Now, we have to configure our inventory file for Ansible Controller.

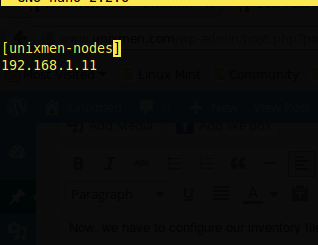
edit /etc/ansible/hosts and put ip address of your hosts.

nano /etc/ansible/hosts

um(017)

[unixmen-nodes] Indicates the we have create to organize our Nodes. You can add multiple nodes as per your requirement.

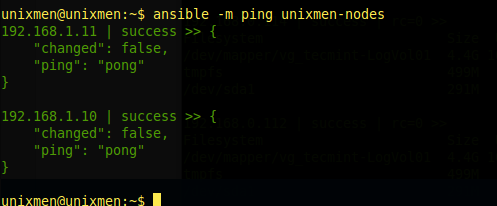
Test your configuration with ping command.

ansible -m ping unixmen-nodes

Sample output:

192.168.1.11 | success >> {
 "changed": false, 
 "ping": "pong"
}

If more then 1 nodes are available, they all will get ping with this single command.

um(020)

To check Partition of both remote hosts:

ansible -m command -a "df -h" unixmen-nodes

um(021)

Let’s check uptime:

ansible -m command -a "uptime" unixmen-nodes

um(022)

Hostname of both nodes:

ansible -m command -a "hostname" unixmen-nodes

um(023)

Install ‘nginx’ on both nodes.

 ansible -m command -a "sudo apt-get install nginx" unixmen-nodes

That’s all for now. Hope this tutorial will help you.

Cheers!

The post How To Setup Ansible In Ubuntu 15.04 appeared first on Unixmen.


5 Less known Linux Admin Tools

$
0
0


In this brief tutorial, let us discuss some less known Linux admin tools that can be used for day to day Linux administration tasks.

1. Hardinfo

A GUI Based Hardware and basic software based info tool, it display all of the information in simple GUI format.IT extract information from /proc and provide in easily accessible view.

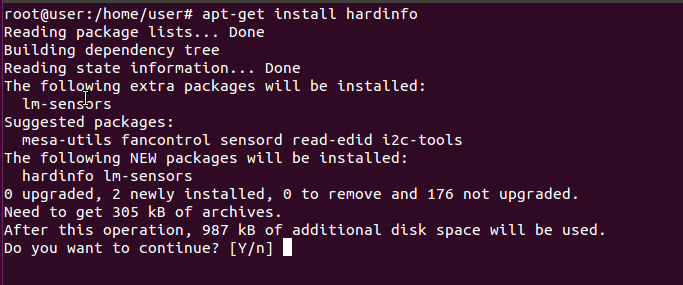
Installation:

apt-get install hardinfo

utorrent_(021)

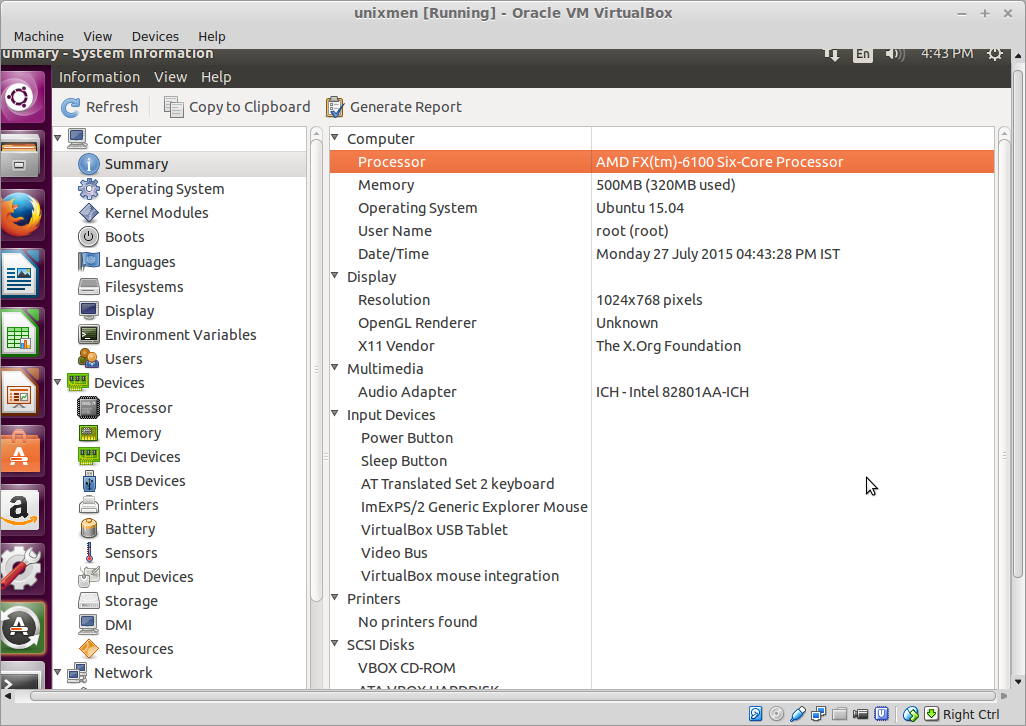
After installation give command:

hardinfo

It will provide a detailed hardware information.

utorrent_

You can explore all of the available options.

2. Pyrenamer

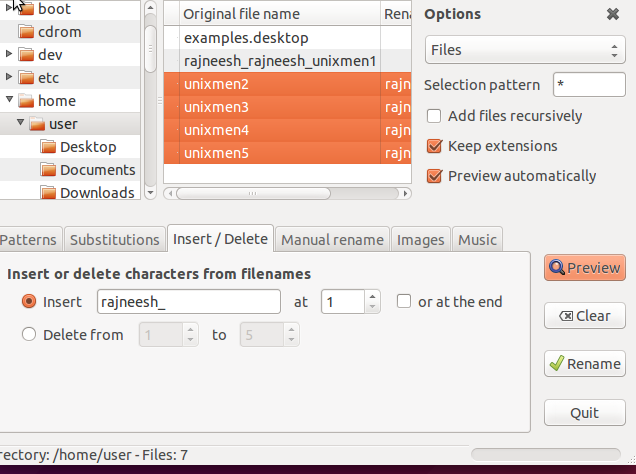
An gui tool to rename file names ion mass, it makes tasks very easy while renaming filename in mass.

Installation:

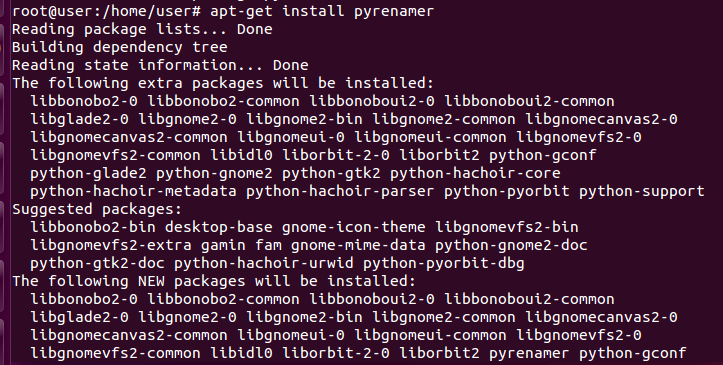
sudo apt-get install pyrenamer

utorrent_(001)

Uses:

sudo pyrenamer

Create some files.

utorrent_(002)

Now, rename them using pyrenamer. Go to insert/Delete option->click insert and type any name->select all files->Click preview-> click rename, it will rename all files with a single click.

utorrent_(004)

3. Vivaldi

Vivaldi is a fantastic browser, it comes with email integration, synchronization and you can write notes and take snapshots of websites, Color of the tab bar changes with the color of the website opened in, it is very fast and lightweight browser.

Installation:

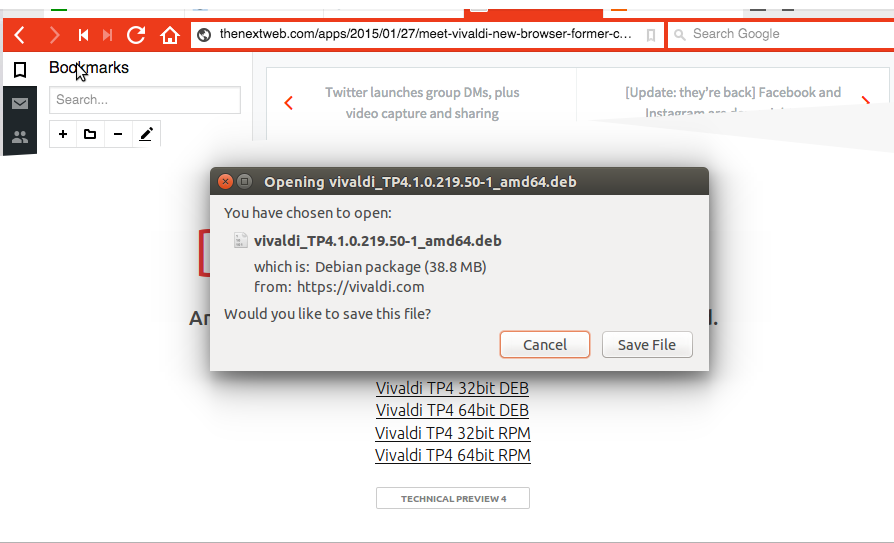
Go the the link, download required package.

utorrent_(005)

Open Browser, when it is installed.

utorrent_(007)

4. lsblk

Provides information about all of the installed device on the system in a tree-like format .

lsblk

Sample output:

NAME   MAJ:MIN RM   SIZE RO TYPE MOUNTPOINT
sda      8:0    0 465.8G  0 disk 
├─sda1   8:1    0     1K  0 part 
├─sda4   8:4    0 307.5G  0 part /media/supertux/BA1CCF4D1CCF037D
├─sda5   8:5    0   5.3G  0 part /boot
├─sda6   8:6    0  14.9G  0 part [SWAP]
└─sda7   8:7    0 138.1G  0 part /

List device blocks.

lsblk -l

Sample output:

NAME MAJ:MIN RM   SIZE RO TYPE MOUNTPOINT
sda    8:0    0 465.8G  0 disk 
sda1   8:1    0     1K  0 part 
sda4   8:4    0 307.5G  0 part /media/supertux/BA1CCF4D1CCF037D
sda5   8:5    0   5.3G  0 part /boot
sda6   8:6    0  14.9G  0 part [SWAP]
sda7   8:7    0 138.1G  0 part /

Display device owner:

lsblk -m
NAME     SIZE OWNER GROUP MODE
sda    465.8G root  disk  brw-rw----
├─sda1     1K root  disk  brw-rw----
├─sda4 307.5G root  disk  brw-rw----
├─sda5   5.3G root  disk  brw-rw----
├─sda6  14.9G root  disk  brw-rw----
└─sda7 138.1G root  disk  brw-rw----

5. Iptraf & iftop

It is an ncurses-based IP LAN monitor that generates various network statistics including TCP info, UDP counts, ICMP and OSPF information, Ethernet load info, node stats, IP checksum errors.

Installation:

apt-get install iptraf
sudo iptraf

utorrent_(009)

It monitors traffic of currently active Interfaces:

utorrent_(010)

It can provide detailed interface statistics for any particular interface.

utorrent_(011)

Or, General statistics for all of the interfaces.

utorrent_(012)
Additionally, you also can use iftop utility:

apt-get install iftop
iftop

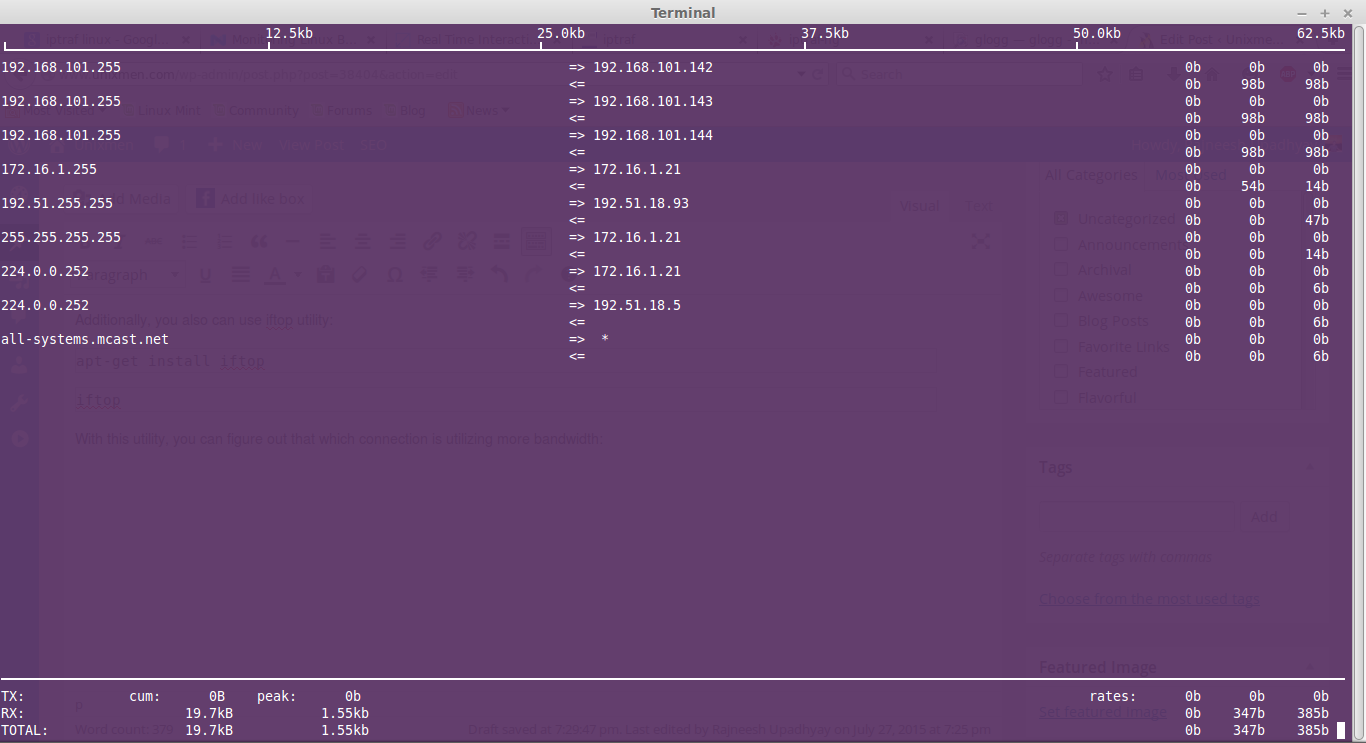
With this utility, you can figure out that which connection is utilizing more bandwidth:

utorrent_(013)

Cheers!

The post 5 Less known Linux Admin Tools appeared first on Unixmen.

How To Install Elasticsearch In Ubuntu 14.04

$
0
0


Introduction

Elasticsearch is an Open Source Search Server based on Lucene, A platform for RESTful search and analytics. It stores all of the logs, provide a scalable searching solution.It is java based with real time and it can scale to thousand of nodes immediately.

Features

Full Text search

When database grows, performance of query operations got affected, to resolve this indexing and cataloging the words in text filed is adopted.Elasticsearch provides full text search capability like powerful query language.

Real Time Data

Data is available immediately after it is produces for search and analytics.

Reduce chances of data loss

The Transaction logs (History of action executed by a Database management system) are stored to multiple nodes in the cluster to reduce the changes of data losses.

Indexing

Complex real world entitites are stored in Elasticsearch as Structured JSON (JavaScript Object Notation) documents. All fields of the document are indexed by default and can be used as a single query. “Elasticseach indices   are the collection of JSON Documents.”

Install Elasticsearch

My testing machine:

  • OS: Ubuntu 14.04
  • RAM: 4 GB

Software dependencies:

  • Oracle Java 8 or above.
Add java repo to ubuntu
root@user:~# add-apt-repository -y ppa:webupd8team/java
Update OS
root@user:~# apt-get update
Install Oracle-Java
root@user:~# apt-get install oracle-java8-installer
Check Java version after installation is complete
root@user:~# java -version

Sample Output

java version "1.8.0_51" Java(TM) SE Runtime Environment (build 1.8.0_51-b16) Java HotSpot(TM) 64-Bit Server VM (build 25.51-b03, mixed mode)

Add Elasticsearch repository

Download and Install Elasticsearch Public Signing Key
root@user:~# wget -qO - https://packages.elastic.co/GPG-KEY-elasticsearch | sudo apt-key add -
Create the repolist for Elasticsearch
root@user:~# echo "deb http://packages.elastic.co/elasticsearch/1.7/debian stable main" | sudo tee -a /etc/apt/sources.list.d/elasticsearch-1.7.list
Update Package
root@user:~# apt-get update
Install Elastic Search
root@user:~# apt-get install elasticsearch
Enable Elasticsearch to start automatically at bootup
root@user:~# update-rc.d elasticsearch defaults 95 10

Sample output

Adding system startup for /etc/init.d/elasticsearch ...
 /etc/rc0.d/K10elasticsearch -> ../init.d/elasticsearch
 /etc/rc1.d/K10elasticsearch -> ../init.d/elasticsearch
 /etc/rc6.d/K10elasticsearch -> ../init.d/elasticsearch
 /etc/rc2.d/S95elasticsearch -> ../init.d/elasticsearch
 /etc/rc3.d/S95elasticsearch -> ../init.d/elasticsearch
 /etc/rc4.d/S95elasticsearch -> ../init.d/elasticsearch
 /etc/rc5.d/S95elasticsearch -> ../init.d/elasticsearch

Open  Elasticsearch Configuration file and edit as per requirement

root@user:~# vim /etc/elasticsearch/elasticsearch.yml

Search for network.host and replace  to network.host: localhost

Sample output

# Set the bind address specifically (IPv4 or IPv6):
#network.bind_host: 192.168.0.1

# Set the address other nodes will use to communicate with this node. If not
# set, it is automatically derived. It must point to an actual IP address.
#network.publish_host: 192.168.0.1

# Set both 'bind_host' and 'publish_host':
#network.host: 192.168.0.1
network.host: localhost

# Set a custom port for the node to node communication (9300 by default):
#transport.tcp.port: 9300

# Enable compression for all communication between nodes (disabled by default):
#transport.tcp.compress: true

# Set a custom port to listen for HTTP traffic:
#http.port: 9200

Restart elasticsearch services

root@user:~# /etc/init.d/elasticsearch restart

Finally, test your Elastcsearch is working properly or not!

root@user:~# curl -X GET 'http://localhost:9200'

Sample output message

{
 "status" : 200,
 "name" : "Fury",
 "cluster_name" : "elasticsearch",
 "version" : {
 "number" : "1.7.1",
 "build_hash" : "b88f43fc40b0bcd7f173a1f9ee2e97816de80b19",
 "build_timestamp" : "2015-07-29T09:54:16Z",
 "build_snapshot" : false,
 "lucene_version" : "4.10.4"
 },
 "tagline" : "You Know, for Search"
}

Install Elasticsearch kopf (A gui Admin panel for Elastcisearch)

root@user:~# /usr/share/elasticsearch/bin/plugin -install lmenezes/elasticsearch-kopf

unxmen_(008)

Sample Output:

unxmen_(009)

To get health status of Cluster.

root@user:/etc/logstash/conf.d# curl -XGET 'http://localhost:9200/_cluster/health?pretty=true'

Sample Output:

{
 "cluster_name" : "elasticsearch",
 "status" : "yellow",
 "timed_out" : false,
 "number_of_nodes" : 1,
 "number_of_data_nodes" : 1,
 "active_primary_shards" : 1,
 "active_shards" : 1,
 "relocating_shards" : 0,
 "initializing_shards" : 0,
 "unassigned_shards" : 1,
 "delayed_unassigned_shards" : 0,
 "number_of_pending_tasks" : 0,
 "number_of_in_flight_fetch" : 0
}

Application of Elasticsearch

With Elasticsearch you determine what kind of operation to be performed on data. CRUD method is used to perform operations. Create, Read, Update and Delete, which are performed by HTTP method POST, GET and DELETE respectively.

e.g. Let’s create some indext for Unixmen example:

root@user:/etc/logstash/conf.d# curl -PUT "http://localhost:9200/unixmen/example/1" -d ' { "type": "slide", "quantity": 2 }'

Output will be like:

{"_index":"unixmen","_type":"example","_id":"1","_version":1,"created":true}root@user:/etc/logstash/conf.d#

Let’s Retrieve this information:

root@user:/etc/logstash/conf.d# curl -XGET "http://localhost:9200/unixmen/example/1"

Sample output:

{"_index":"unixmen","_type":"example","_id":"1","_version":1,"found":true,"_source": { "type": "slide", "quantity": 2 }}

To delete certain information.

root@user:/etc/logstash/conf.d# curl -XDELETE "http://localhost:9200/unixmen/example/1"

Sample Output:

{"found":true,"_index":"unixmen","_type":"example","_id":"1","_version":1}

We will cover the rest in our upcoming articles. Stay tuned.


The post How To Install Elasticsearch In Ubuntu 14.04 appeared first on Unixmen.

How To Install Kibana In Ubuntu 14.04

$
0
0


Introduction

In our previous article, we discussed how to install and configure Elasticsearch tool in Ubuntu 14.04 . Let us move one step ahead with Kibana. First of all we have to understand what is the need of this trinity of ELK (Elasticsearch, Logstash and Kibana). Every application and device produce logs in its own style. When your application grow beyond a single machine then you will need some central space to log and monitor what’s going on. Logstash and elasticsearch stores logs in structured way and kibana is a web front to search and aggregate your logs. Basically, Kibana is visualization and exploration of elasticsearch data. It is a single page javascript application to search and analyze time based data in elasticsearch.

Features

Gives shape to your data:

It is an analytics and visualization platform designed to work with elasticsearch, it comes with web based interface which makes easy to analyze data in the from of Tables, Charts  and Maps.

Democratization of log data:

Democratize log data so that different type of users e.g. marketing or sales team can visualize or utilize the data as per their requirements and formats.

Easy setup:

Expertise are required as non-expert do not know where the log data is, how to understand the log data, and they do not have access to read to logs. as the size of log data increases it becomes more and more complex format. Even a non expert users can also analyze data easily with kibana.

Enable searching in faster way:

this democratization must me fast and retrieve results  using powerful analytics tools to summarize data in many formats and dimensions,it enable searching in faster and meaningful way.

Install Kibana

Download Kibana from the following link.

root@user:~# wget https://download.elastic.co/kibana/kibana/kibana-4.1.1-linux-x64.tar.gz
Unzip the kibana package:
root@user:~# gunzip kibana-4.1.1-linux-x64.tar.gz
Extract  kibana.x.x.x.tar package:
root@user:~# tar -xvf kibana-4.1.1-linux-x64.tar
Edit  ~/kibana-4.1.1-linux-x64/config/kibana.yml:
root@user:~/kibana-4.1.1-linux-x64/config#vim kibana.yml

search for  host:0.0.0.0″ and replace with host: “localhost”

Sample output:

Kibana is served by a back end server. This controls which port to use.
port: 5601
# The host to bind the server to.
host: "localhost"
# The Elasticsearch instance to use for all your queries.
elasticsearch_url: "http://localhost:9200"
#elasticsearch_url: "http://192.168.1.50:80"
# preserve_elasticsearch_host true will send the hostname specified in `elasticsearch`. If you set it to false,
# then the host you use to connect to *this* Kibana instance will be sent.
elasticsearch_preserve_host: true
# Kibana uses an index in Elasticsearch to store saved searches, visualizations
# and dashboards. It will create a new index if it doesn't already exist.
kibana_index: ".kibana"
# If your Elasticsearch is protected with basic auth, this is the user credentials
@
Create a directory with name “kibana” in /opt:
root@user:~/kibana-4.1.1-linux-x64/config#mkdir /opt/kibana
Copy each and everything  from kibana-4.1.1-linux-x64 folder to /opt/kibana:
root@user:~ cp -Rrvf kibana-4.1.1-linux-x64/* /opt/kibana/
Download init.d script for kibana service.
root@user:~# cd /etc/init.d/
root@user:/etc/init.d# wget https://gist.githubusercontent.com/thisismitch/8b15ac909aed214ad04a/raw/bce61d85643c2dcdfbc2728c55a41dab444dca20/kibana4
Change permissions accordingly and run kibana service:
root@user:/etc/init.d# chmod +x /etc/init.d/kibana4
root@user:/etc/init.d# update-rc.d kibana4 defaults 96 9
root@user:/etc/init.d# /etc/init.d/kibana4 restart
Check whether Kibana is working or not.

Open your web browser and navigate to: http://127.0.0.1:5601

unxmen_(015)

Installation of Kibana is completed. We will continue with logstash in next article, till then have fun!!

Reference link:


The post How To Install Kibana In Ubuntu 14.04 appeared first on Unixmen.

Install Speedtest.net Server In CentOS 7

$
0
0


Introduction

Speedtest.net is very popular speed test tool to check test Internet Bandwidth. You can configure your own speedtest.net mini server to run Internet speed.It ping several  websites via HTTP and calculate the response time and display results in GUI.

Requirements

  • CentOS 7
  • Apache and php packages.
  • Speedtest mini package.

Installation

Login to your CenOS 7 Box.

Install httpd package
[root@localhost unixmen]# yum install httpd
 Install php modules
[root@localhost unixmen]# yum install php php-mysql php-gd php-mcrypt
Download Speed.net mini server from following link

unxmen_(001)

Unzip this package and copy contents to /var/www/html
[root@localhost unixmen]# unzip mini.zip
Go to the installed directory.
 [root@localhost unixmen]# cd mini/
Copy all contents to /var/www/html
[root@localhost mini]# cp -rRfv mini /var/www/html/
Go to /var/www/html/mini and edit required settings
[root@localhost mini]# cd /var/www/html/mini

Rename index-php.html to index.html

[root@localhost mini]# mv index-php.html index.html
Start httpd service
 [root@localhost mini]# systemctl start httpd

Browse for mini server.

http://127.0.0.1/mini

Important: There is possibility that Flash 8 is not installed by default , and it can show some error on browser. I got encountered with this problem. Here i will include flash installation step to complete speed test mini configuration.

unxmen_(004)

Create YUM Repo for flash
[root@localhost unixmen]# vim /etc/yum.repos.d/adobe-linux.repo

Edit as follows:

[adobe-linux]
name=Adobe Systems Incorporated
baseurl=http://linuxdownload.adobe.com/linux/$basearch/
enabled=1
gpgcheck=1
gpgkey=file:///etc/pki/rpm-gpg/RPM-GPG-KEY-adobe-linux
Update yum
[root@localhost unixmen]# yum update
Install required package
[root@localhost unixmen]#yum install flash-plugin nspluginwrapper alsa-plugins-pulseaudio libcurl

It is recommended to reboot system after flash installation.

Open the browser and test your speedtest.net mini

unxmen_(005)

Enjoy!!


The post Install Speedtest.net Server In CentOS 7 appeared first on Unixmen.

Install PXE Server And Configure PXE Client On CentOS 7

$
0
0


About PXE Server

PXE Server, stands for preboot execution environment, will help to install a system in the network without having a physical media. Unlike traditional installation methods, we can install any system in the network without having CD/DVD or USB drives. It is used to enable a network computer to boot only from a network interface card. This method will be very helpful, if a System Administrator want to install many systems which doesn’t have a CD/DVD device on the network. PXE environment needs a DHCP server that distributes the IP addresses to the client systems, and a TFTP server that downloads the installation files to the PXE clients. You don’t need any CD/DVD or USB bootable drives to install client systems. Just, copy the ISO images on the PXE server and start installing your Linux clients via network using PXE server.

Scenario

My test box (pxe server) details are given below:

  • Operating System : CentOS 7 Minimal server.
  • IP Address : 192.168.1.150/24.
  • SELinux disabled on the PXE server.
  • IP tables stopped on the PXE server.

In this tutorial, we are going to see how to setup a PXE server On CentOS 7 server, and install CentOS 7 64 bit edition on our client system using the PXE server.

Install PXE Server

First, you should Install and configure DHCP server on your PXE server. To install and configure DHCP server, refer the following link:

Now, install the following packages for setting up PXE environment:

yum install httpd xinetd syslinux tftp-server -y

Configure PXE Server

Go to /usr/share/syslinux/ directory:

cd /usr/share/syslinux/

Copy the following TFTP configuration files to the /var/lib/tftpboot/ directory.

cp pxelinux.0 menu.c32 memdisk mboot.c32 chain.c32 /var/lib/tftpboot/

Edit file /etc/xinetd.d/tftp

vi /etc/xinetd.d/tftp

Enable TFTP server. To do this, change “disable=yes” to “no”.

 # default: off
 # description: The tftp server serves files using the trivial file transfer \
 #       protocol.  The tftp protocol is often used to boot diskless \
 #       workstations, download configuration files to network-aware printers, \
 #       and to start the installation process for some operating systems.
 service tftp
 {
 socket_type             = dgram
 protocol                = udp
 wait                    = yes
 user                    = root
 server                  = /usr/sbin/in.tftpd
 server_args             = -s /var/lib/tftpboot
 disable                 = no
 per_source              = 11
 cps                     = 100 2
 flags                   = IPv4
}

Mount CentOS installation ISO file to any directory of your choice, for example /mnt. I already have CentOS 7 64 bit ISO image on my /root directory.

mount -o loop /root/CentOS-7.0-1406-x86_64-DVD.iso /mnt/

Next, create a directory to store CentOS installation ISO image.

mkdir /var/lib/tftpboot/centos7_x64

Note: If you want to install CentOS 32 bit edition, make a relevant directory called centos7_i386 (Ex. /var/lib/tftpboot/centos7_i386).

Copy the ISO file contents to /var/lib/tftpboot/centos7_x64/.

cp -fr /mnt/* /var/lib/tftpboot/centos7_x64/

Set the proper permissions to the above directory.

chmod -R 755 /var/lib/tftpboot/centos7_x64/

Create a apache configuration file for PXE server under /etc/httpd/conf.d/ directory:

vi /etc/httpd/conf.d/pxeboot.conf

Add the following lines:

Alias /centos7_x64 /var/lib/tftpboot/centos7_x64/

<Directory /var/lib/tftpboot/centos7_x64>
Options Indexes FollowSymLinks
Order Deny,Allow
Deny from all
Allow from 127.0.0.1 192.168.1.0/24
</Directory>

Save and close the file.

Then, create a configuration directory for PXE server:

mkdir /var/lib/tftpboot/pxelinux.cfg

Now, create PXE server configuration file under the pxelinux.cfg:

vi /var/lib/tftpboot/pxelinux.cfg/default

Add the following lines:

default menu.c32
prompt 0
timeout 300
ONTIMEOUT local

menu title ########## PXE Boot Menu ##########

label 1
menu label ^1) Install CentOS 7
kernel centos7_x64/images/pxeboot/vmlinuz
append initrd=centos7_x64/images/pxeboot/initrd.img method=http://192.168.1.150/centos7_x64 devfs=nomount

label 2
menu label ^2) Boot from local drive localboot

Save and close the file.

Configure DHCP Server

Now, we have to configure the DHCP server to work with PXE server.

Edit file /etc/dhcp/dhcpd.conf,

vi /etc/dhcp/dhcpd.conf

Add the following lines at the end:

allow booting;
allow bootp;
option option-128 code 128 = string;
option option-129 code 129 = text;
next-server 192.168.1.150;
filename "pxelinux.0";

Save and close the file.

Now, We have come to the end of PXE server configuration. Restart all the services to complete the configuration.

systemctl restart xinetd
systemctl restart httpd
systemctl restart dhcpd

Enable all services to start automatically on every reboot.

systemctl enable xinetd
systemctl enable httpd
systemctl enable dhcpd

Congratulations! We have completed the PXE server configuration.

Disable Firewall and SELinux

To reduce complexity, I have disabled both firewall and SELinux in my PXE server.

To disable firewall, run the following commands:

systemctl disable firewalld
systemctl stop firewalld

To disable SELinux, edit file /etc/sysconfig/selinux:

vi /etc/sysconfig/selinux

Find the line: SELINUX=enforcing and change it to SELINUX=disabled

# This file controls the state of SELinux on the system.
# SELINUX= can take one of these three values:
# enforcing - SELinux security policy is enforced.
# permissive - SELinux prints warnings instead of enforcing.
# disabled - No SELinux policy is loaded.
SELINUX=disabled
# SELINUXTYPE= can take one of these two values:
# targeted - Targeted processes are protected,
# minimum - Modification of targeted policy. Only selected processes are protected.
# mls - Multi Level Security protection.
SELINUXTYPE=targeted

Save and close the file. Reboot your PXE server to take effect the saved changes.

Now, let us configure PXE clients.

PXE Client Configuration

The client may be any system that has network boot enabled option (PXE boot). You can enable this option in your Bios settings.

For testing purpose, I have created a Virtual Machine client on my Oracle VirtualBox.

Open up the Oracle VirtualBox. Click on the New button in the menu bar.

Oracle VM VirtualBox Manager_003

Enter the Virtual machine name.

Create Virtual Machine_005

Enter the RAM size to the Virtual machine.

Create Virtual Machine_006

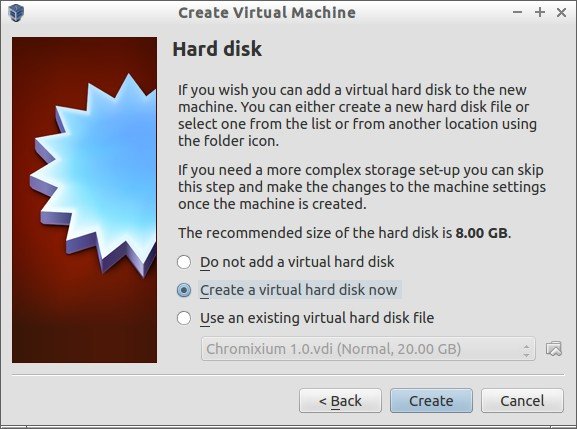
Select “Create a virtual hard drive now” option and click Create.

Create Virtual Machine_007

Select the Virtual hard drive file type. If you don’t know to what to select, leave the default option and click Next. Select whether the new virtual hard drive file should grow as it is used or if it should be created as fixed size.

Enter the Virtual hard drive size.

Create Virtual Hard Disk_009

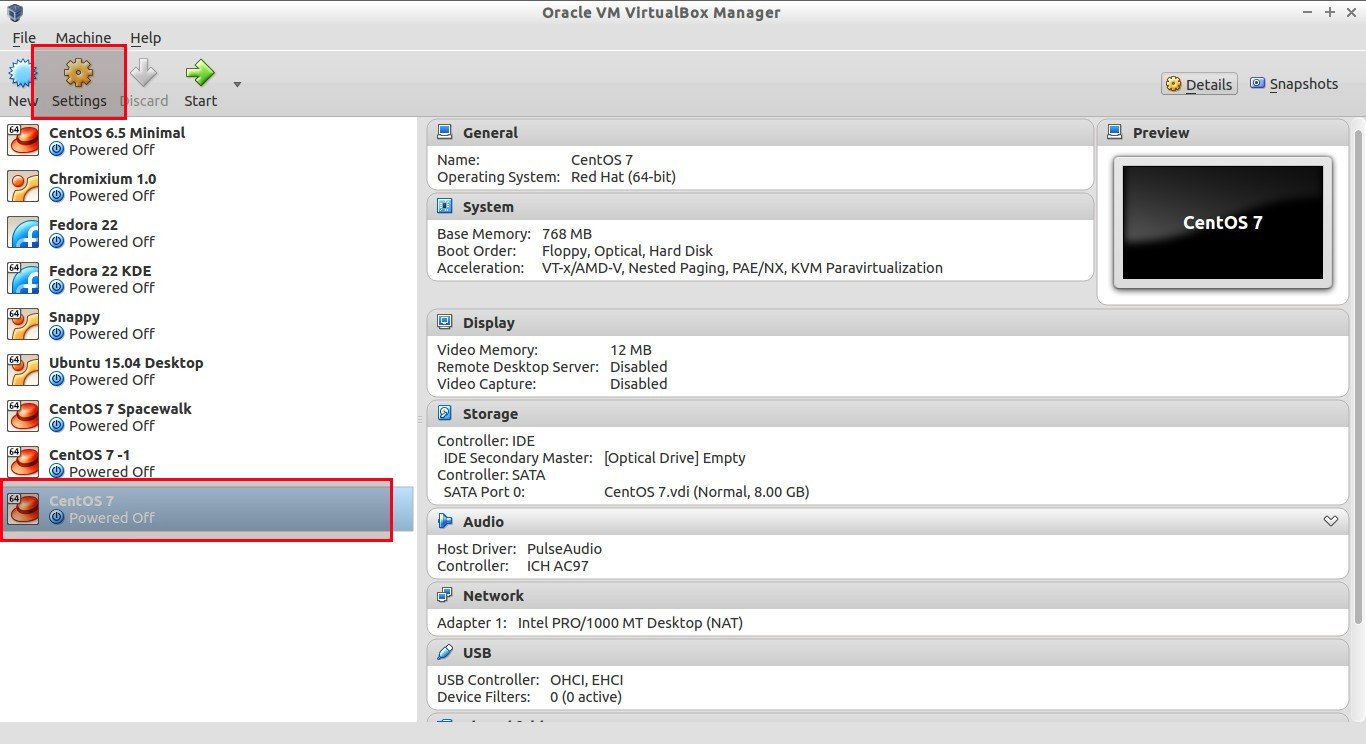
That’s it. Our Virtual Client machine has been created. Now, we should make the client to boot from the network. To do that, go to the Vitual machine Settings option.

Oracle VM VirtualBox Manager_010

Select the System tab on the left, and Choose Network from the boot order option on the right side.

CentOS 7 - Settings_011

Then, go to the Network tab and select “Bridged Adapter” from the “Attached to” drop down box.

CentOS 7 - Settings_012

Once you done all the above steps, click OK to save the changes.

That’s it. Now, power on the Virtual client system. You should see the following screen.

CentOS 7 [Running] - Oracle VM VirtualBox_014

That’s it. Now you know what to do next. Start installing CentOS on your client using the PXE server.

In case, you want to serve CentOS ISO over FTP server instead of web server, and want to include a kickstart file to automate the PXE client installation, refer the following link.

Conclusion

Setting up network installation using PXE server is fun, efficient and time saving method. You can install as many as clients you want at a time in your local area network. All you need to do is sufficient hardware configuration server and pxe enabled clients. Also, PXE server and client configuration is not that difficult.

Good luck!

To setup PXE server in CentOS 6.x systems, refer the following link.

Reference:


The post Install PXE Server And Configure PXE Client On CentOS 7 appeared first on Unixmen.

Install And Configure PXE Server On Ubuntu 15.04

$
0
0


This tutorial describes how to setup a PXE server on Ubuntu 15.04 server and how to configure a PXE client.

We have already written PXE server guides for CentOS distribution. Refer the following links if you want to setup PXE boot environment in CentOS 6 and CentOS 7.

Now, let us start to setup and configure PXE server on Ubuntu 15.04. This method should work on previous Ubuntu versions like Ubuntu 14.10, 14.04 etc.

Scenario

My test box(pxe server) details are given below:

  • Operating System: Ubuntu 15.04 server.
  • IP Address: 192.168.1.101/24.

Install PXE Server

First, you should Install and configure DHCP server on your PXE server. To install and configure DHCP server in Ubuntu, refer the following link:

Now, install the following necessary packages for setting up PXE environment:

sudo apt-get install apache2 tftpd-hpa inetutils-inetd

Configure PXE Server

Edit file /etc/default/tftpd-hpa,

sudo nano /etc/default/tftpd-hpa

Add the following lines to enable TFTP server.

[...]
RUN_DAEMON="yes"
OPTIONS="-l -s /var/lib/tftpboot"

Then, edit file /etc/inetd.conf,

sudo nano /etc/inetd.conf

Scroll down to the end, and modify or add the following line.

tftp    dgram   udp    wait    root    /usr/sbin/in.tftpd /usr/sbin/in.tftpd -s /var/lib/tftpboot

Save and close the file. If you use IPv6, please change the word udp to udp4.

Restart tftp service:

sudo /etc/init.d/tftpd-hpa restart

Copying Ubuntu Installation files to PXE Server

You can either mount the Ubuntu Installation ISO image and copy them to your PXE server or can directly copy the files from your Installation CD/DVD.

For the testing purpose, Here I am going to deploy Ubuntu 15.04 server OS on my PXE client, so I mounted the ISO image on /mnt directory.

I already have the ISO image on my home directory, so I ran the following command to mount it on /mnt directory.

sudo mount -o loop /home/sk/ubuntu-15.04-server-amd64.iso /mnt/

The Ubuntu 14.04 ISO image has been mounted successfully. Now, go to the /mnt/ directory, and copy the required files from the ISO image to /var/lib/tftpboot/ directory.

cd /mnt/
sudo cp -fr install/netboot/* /var/lib/tftpboot/

Create a directory called ubuntu in the apache root document folder.

sudo mkdir /var/www/html/ubuntu

Note: On Ubuntu 14.10 and previous versions, the apache root document folder is /var/www/.

Copy all the files from the Ubuntu ISO.

sudo cp -fr /mnt/* /var/www/html/ubuntu/

Now, edit file /var/lib/tftpboot/pxelinux.cfg/default,

sudo nano /var/lib/tftpboot/pxelinux.cfg/default

Add the following contents at the end. Make sure you’ve replaced the IP address with your own.

[...]
label linux
        kernel ubuntu-installer/amd64/linux
        append ks=http://192.168.1.101/ks.cfg vga=normal initrd=ubuntu-installer/amd64/initrd.gz
ramdisk_size=16432 root=/dev/rd/0 rw  --

For 32bit PXE clients:

[...]
label linux
        kernel ubuntu-installer/i386/linux
        append ks=http://192.168.1.101/ks.cfg vga=normal initrd=ubuntu-installer/i386/initrd.gz
ramdisk_size=16432 root=/dev/rd/0 rw  --

Replace 192.168.1.101 with your own PXE server’s IP address.

Save and close the file.

Configure DHCP Server

Now, we have to configure the DHCP server to work with PXE server.

Edit file /etc/dhcp/dhcpd.conf,

sudo nano /etc/dhcp/dhcpd.conf

Add the following lines at the end:

allow booting;
allow bootp;
option option-128 code 128 = string;
option option-129 code 129 = text;
next-server 192.168.1.101;
filename "pxelinux.0";

Save and close the file.

Now, We have come to the end of the PXE server configuration. Restart DHCP server.

sudo service isc-dhcp-server restart

Congratulations! We have completed the PXE server configuration.

PXE Client Configuration

The client may be any system that has network boot enabled option (PXE boot). You can enable this option in your Bios settings.

Due to lack of resources, I have created a Virtual Machine client on my Oracle VirtualBox.

Open up the Oracle VirtualBox. Click on the New button in the menu bar.

Oracle VM VirtualBox Manager_001

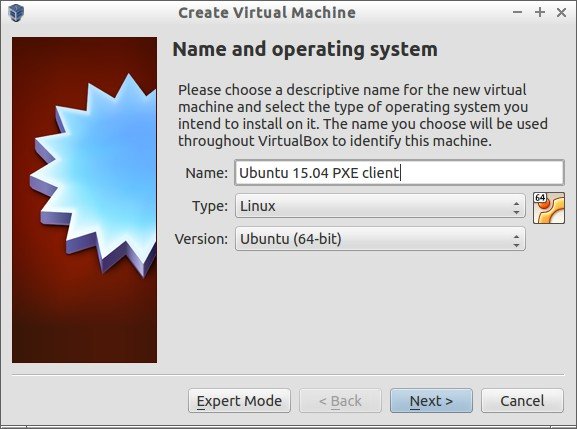
Enter the Virtual machine name.

Create Virtual Machine_002

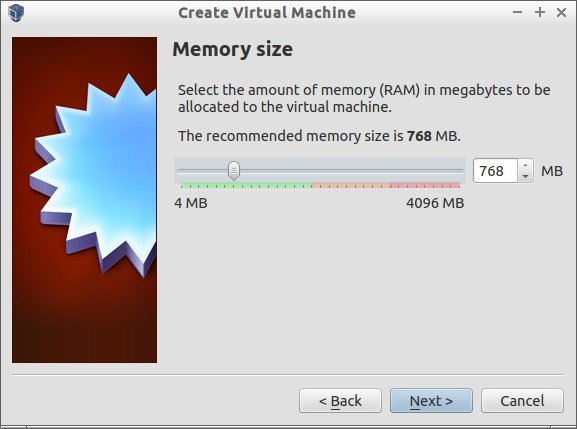
Enter the RAM size to the Virtual machine.

Create Virtual Machine_003

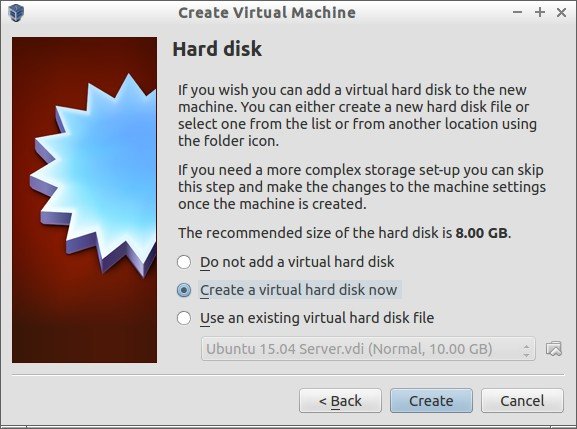
Select “Create a virtual hard drive now” option and click Create.

Create Virtual Machine_004

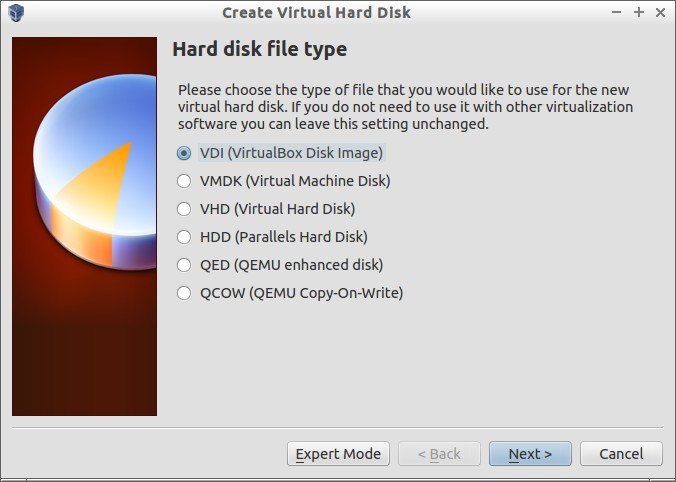
Select the Virtual hard drive file type. If you don’t know to what to select, leave the default option and click Next.

Create Virtual Hard Disk_005

Select whether the new virtual hard drive file should grow as it is used or if it should be created as fixed size.

Create Virtual Hard Disk_006

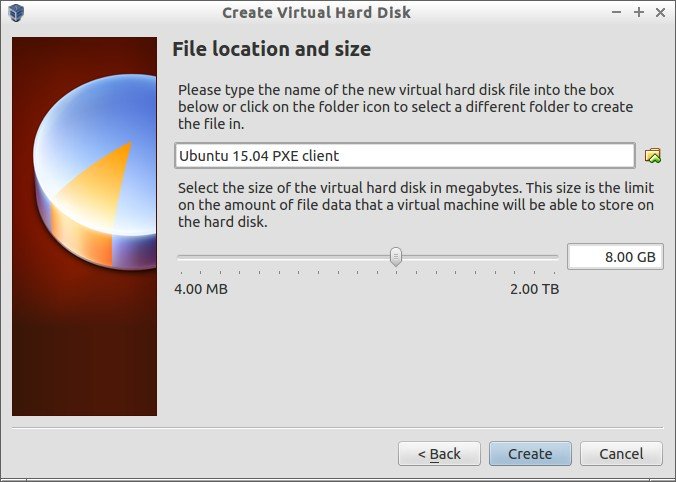
Enter the Virtual hard drive size.

Create Virtual Hard Disk_007

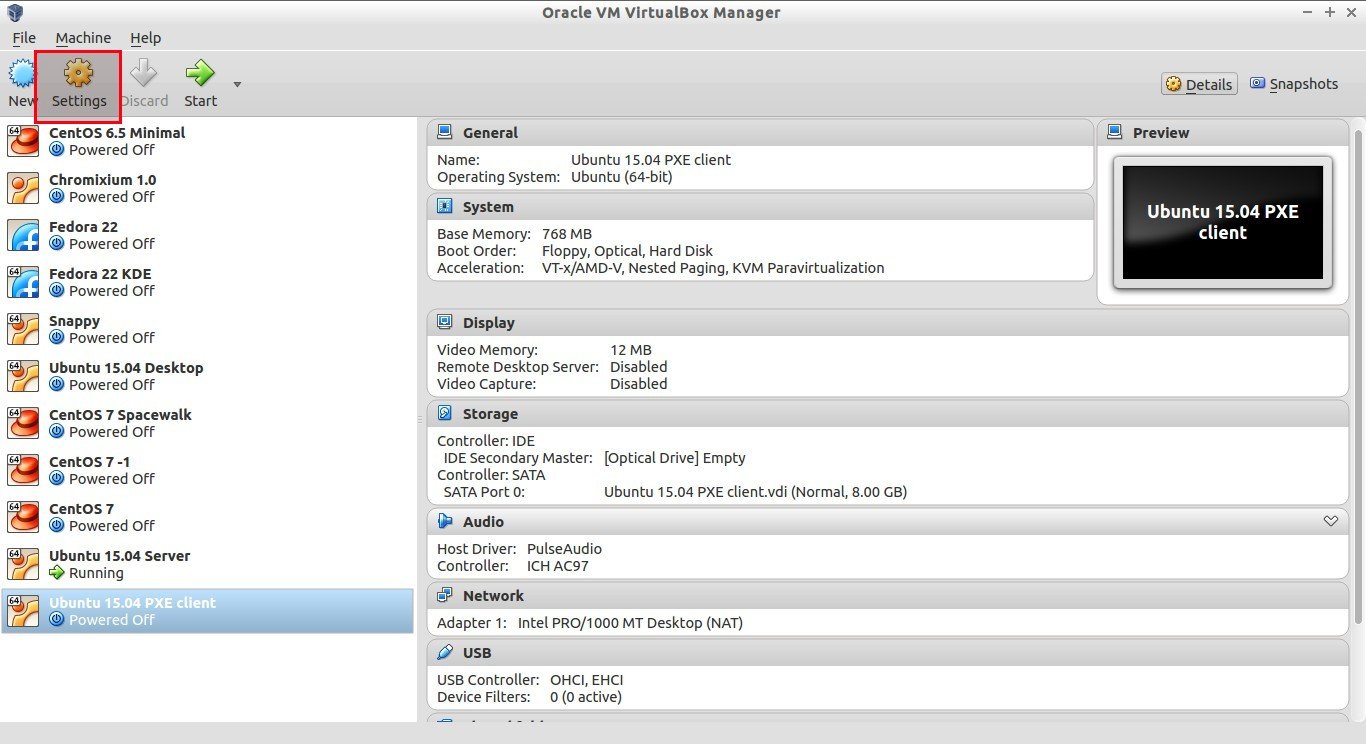
That’s it. Our Virtual Client machine has been created. Now, we should make the client to boot from the network. To do that, go to the Vitual machine Settings option.

Oracle VM VirtualBox Manager_008

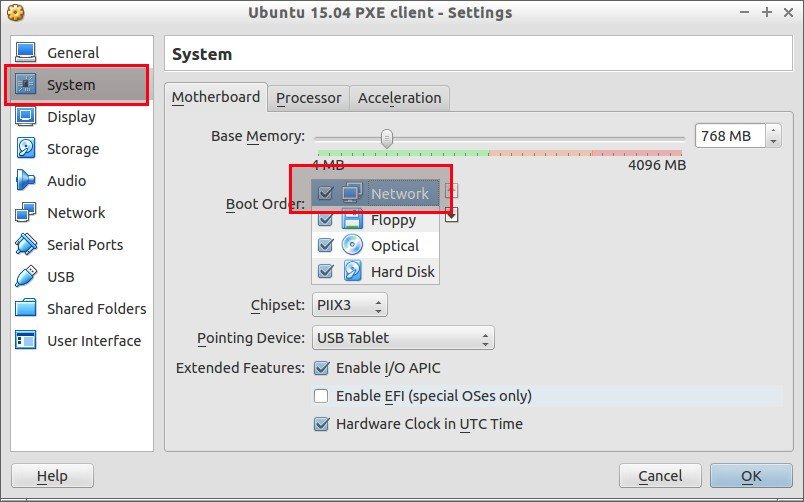
Select the System tab on the left, and Choose Network from the boot order option, and un-check all the other options on the right side.

Ubuntu 15.04 PXE client - Settings_009

Then, go to the Network tab and select “Bridged Adapter” from the “Attached to” drop down box.

Ubuntu 15.04 PXE client - Settings_010

Once you done all the above steps, click OK to save the changes. That’s it. Now power on the Virtual client system. You should see the following screen.

Ubuntu 15.04 PXE client [Running] - Oracle VM VirtualBox_011

That’s it. The rest of the installation is same as the way we do in local installation. Start installing Ubuntu on your client using the PXE server.

Ubuntu 15.04 PXE client [Running] - Oracle VM VirtualBox_012

Good luck!

Reference:


The post Install And Configure PXE Server On Ubuntu 15.04 appeared first on Unixmen.

How To Install FreeNAS 9.3

$
0
0


Introduction

FreeNAS is a Network Attached Storage operating system. It is freeBSD based and support CIFS, NFS, iSCSI, FTP, RSYN along with RAID support. It is a web based, open source and one of the well known central data storage management tool.

Features

Replication

It supports ZFS File systems. ZFS snapshots can be used to create remote backup, or additional snapshot of the same file system can be created incremental. In case of any local disk failure any ZFS snapshot can be sent to the new ZFS file system to recover data.

Data Security

RAID-Z is a part of RAID in ZFS file system. ZFS file system make sure data integrity throughout. Every file system is verified with checksums from top to bottom.

Data Encryption

FreeNAS has a unique feature of data encryption with ZFS file system, which is not available with another Ope Source NAS projects, even a full-volume data encryption is also available. Encrypted  volume is readable to FreeNAS only which possess the master key for that particular volume. Optionally pass-phrase can also be used by the user to put an extra layer of security.

File Sharing

You can share data with FreeNAS like a pro. It supports every major operating system with SMB, CIFS (MS Windows), NFS (Unix/Linux), AFP (Apple) along with FTP or iSCSI data sharing methods. Additionally it also supports VMware VAAI, MS ODX, MS Server 2008 and 2012 R2 based Clustering.

Web based Management

Every aspect of FreeNAS can be managed with available Web Based Management system. Everything can be managed with web admin panel including volume creation, user based permission setting or updating software. ssh is also available with FreeNAS.

Plugins

A lots of third party plugins are also available with FreeNAS to enhance utility of FreeNAS, user can use various applications as per their need.

Some of the available plugins are:

  • Bacula – for Network based backup.
  • Couchpotato – automatic torrent downloader.
  • Crashplan – Backup data to remote server or computers.
  • Owncloud – Manage your personal cloud.

Installation

Requirements

  • A x64 bit processor based Hardware
  • 4 GB RAM
  • Minimum 1 TB Storage

Step 1

Download FreeNAS from this link. Burn ISO image to DVD or make a Bootable usb.

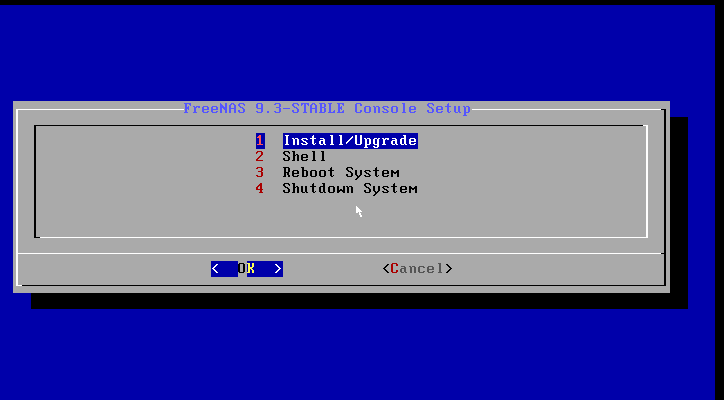
Power on your system and start installation process, Select option 1 and press enter.

unxmen_(002)

Step 2

Select Storage device and press ok.

unxmen_(003)

Step 3

Press ‘Yes’ to confirm installation process.

unxmen_(004)

Step 4

Provide Admin password and retype password and press ok.

unxmen_(005)

Step 5

After installation process is over, system will ask to reboot, press ok and remove boot media.

unxmen_(007)

Step 6

Select Normal boot and press enter.

unxmen_(009)

Step 7

After boot process is over a menu will be listed which include all of the management tool, note the ip address listed below which we will use to manage our FreeNAS.

unxmen_(013)

Step 8

Open Browser in remote system and navigate to http://IP-address/.

Login as ‘root’ user and password which was configured in installation process.

Now, FreeNAS management wizard will appear where number of options are available to manage your backup.

unxmen_(012)

Using the FreeNAS management console, you can setup and configure your storage systems easily.

For more details, I recommend you to refer the official documentation page.

Good luck!

Reference link:


The post How To Install FreeNAS 9.3 appeared first on Unixmen.


Citadel – A Free, Open Source, Email And Collaboration Suite

$
0
0


About Citadel

Citadel is a free, open source Collaboration suite that can be used to setup and manage Email server, Calendars, address books, Instant messenger, mailing lists and much more. It is written mostly using “C” language and is a highly integrated Groupware Platform with a AJAX-powered “Web 2.0” interface, but also providing SMTP, IMAP, POP3, and GroupDAV access to its content.

Citadel offers versatile email services with very low administration needed. It provides its own implementations of these server protocols:

  • IMAP
  • POP3
  • SMTP
  • ManageSieve
  • XMPP
  • Citadel

It works well on most Linux operating systems, Solaris, and *BSD systems.

Prominent Features

Citadel has lot of useful features. Here, I list some important features.

  • Email
  • Calendar/scheduling
  • Address books
  • Bulletin boards (forums)
  • Mailing list server
  • Instant messaging
  • Wiki and blog engines
  • Multiple domain support
  • A powerful web interface
  • RSS aggregation
  • and more…

Installation

1. Install required prerequisites

Log on to your system as root user and install the following prerequisites.

In DEB based systems:

apt-get update
apt-get upgrade
apt-get install build-essential curl g++ gettext shared-mime-info libssl-dev

In RPM based systems:

yum update
yum groupinstall "Development Tools"

The following additional packages are also recommended:

yum install gettext shared-mime-info openssl-devel

If you want to use system icons such as the GNOME File Icons in WebCit, install:

yum install gnome-icon-theme

Then, create proper symlinks as shown below in RPM based systems such as RHEL, CentOS.

cd /usr/local/webcit/static
ln -s /usr/share/icons/gnome/24x24/mimetypes icons

In Arch Linux:

pacman -S curl expat libical libsieve perl-berkeleydb

2. Install Citadel using Easy install script

After installing the required prerequisites, run the following command to install Citadel.

wget -q -O - http://easyinstall.citadel.org/install | sh

Press Enter to start:

Welcome to Citadel Easy Install
Running on: Linux Debian jessie/sid ( 3.19.0-15-generic x86_64)
We will perform the following actions:

Installation:
* Download/install supporting libraries (if needed)
* Download/install Citadel (if needed)
* Download/install WebCit (if needed)

Configuration:
* Configure Citadel
* Configure WebCit

Perform the above installation steps now? ## Press Enter ##

Accept License terms:

[...]

Do you accept the terms of this license?
If you do not accept the General Public License, Easy Install will exit.
Enter Y or Yes to accept: Y ## Type Y and Press Enter key ##

Be mindful that it will take lot of time, because this command will compile a lot of code.

Please enter the name of the Citadel user account that should be granted administrative privileges once created.

root@server: -home-sk_001

Enter a password for the system administrator.

root@server: -home-sk_002

Citadel needs to run under its own user ID. This would typically be called “citadel”, but if you are running Citadel as a public site, you might also call it “bbs” or “guest”. The server will run under this user ID. Please specify that user ID here. You may specify either a user name or a numeric UID.

root@server: -home-sk_003

Please specify the IP address which the server should be listening to. You can name a specific IPv4 or IPv6 address, or you can specify “*” for “any address”, “::” for “any IPv6 address”, or simply “0.0.0.0” for “any IPv4 address”.

If you leave this blank, Citadel will listen on all addresses. This can usually be left to the default unless multiple instances of Citadel are running on the same computer.

root@server: -home-sk_004

Specify the TCP port number on which your server will run. Normally, this will be port 504, which is the official port assigned by the IANA for Citadel servers. You will only need to specify a different port number if you run multiple instances of Citadel on the same computer and there is something else already using port 504.

root@server: -home-sk_005

Please choose the user authentication mode. By default Citadel will use its own internal user accounts database. If you choose Host, Citadel users will have accounts on the host system, authenticated via /etc/passwd or a PAM source.

LDAP chooses an RFC 2307 compliant directory server, the last option chooses the nonstandard MS Active Directory LDAP scheme. Do not change this option unless you are sure it is required, since changing back requires a full reinstall of Citadel.

  • 0 – Self contained authentication
  • 1 – Host system integrated authentication
  • 2 – External LDAP – RFC 2307 compliant directory
  • 3 – External LDAP – nonstandard MS Active Directory

root@server: -home-sk_006

Select Yes and press enter.

root@server: -home-sk_007

Select Yes and press enter to automatically start Webkit (Web console for Citadel) at every reboot.

root@server: -home-sk_008

Select the locale webcit should use. In my case, I selected “en_US”.

root@server: -home-sk_010

Select on which port do you want WebCit to listen for HTTP requests. You can use the standard port (80) if you are not running another web server (such as Apache), otherwise select another port.

I go with defaults, because I don’t have any existing web server.

root@server: -home-sk_011

Select On which port do you want WebCit to listen for HTTPS requests.

root@server: -home-sk_012

Congratulations! Citadel has been installed.

root@server: -home-sk_013

Please note that Citadel will be installed to ”/usr/local/citadel” directory, WebCit will be installed to ”/usr/local/webcit”, and the supporting libraries will be installed to ”/usr/local/ctdlsupport”.

Now, let us go further and configure Citadel for daily usage.

Accessing Citadel Web console

Open your web browser and navigate to http://ip-address:2000/ or http://domain:2000.

The following page should appear. Enter your administrative account name and it’s password which we have created during the installation process. In my case, my administrative account is “sk”, and it’s password is “ubuntu”. I recommend you to set any strong password to tighten your security.

- Citadel Server - Google Chrome_001

This is how my Citadel Dashboard looks.

Lobby - Citadel Server - Google Chrome_002

From here, you can create multiple domains if you want, create users, create blog posts and so on.

First, let us create some domains and users.

Creating new domains

To create a domain, click on the Administration button on the bottom of the left column menu.

Lobby - Citadel Server - Google Chrome_002

In the next window, click “Domain names and Internet mail configuration” link in the Global Configuration section.

Lobby - Citadel Server - Google Chrome_003

In the Local host aliases and Directory domains sections, enter your domain name without prefix www and click Add button.. For example, in my case I entered unixmen.local.

Lobby - Citadel Server - Google Chrome_006

You can add as many domains as you want.

Next, we need to create some users.

Creating new users

Go back to Administration page and click on the link that says “Add, change, delete user accounts” in the User account management section.

Enter your desired username and click Create button.

Lobby - Citadel Server - Google Chrome_008

In the next window, set password for the newly created user account. Also, make sure the Permission to send internet mail option is checked. Click the Save changes button.

Lobby - Citadel Server - Google Chrome_009

Similarly, you can create as many users as you want.

Now, let us check whether the newly created user is able to send and receive mail.

Composing a Test mail

Click on Mail button in the left column box of Citadel dashboard. Click Writemail to compose a mail.

Mail - Citadel Server - Google Chrome_010

Enter the recipient’s mail id (Ex. senthil@server.unixmen.local) and compose your message and finally click Send message.

Mail - Citadel Server - Google Chrome_011

Now, log off from the current user and log in again as a new user. In my case, my newly created user is “senthil”.

Go to the Mail section and check for the new mail.

Mail - Citadel Server - Google Chrome_012

As you see in the above screenshot, I got a new mail. To read the mail, just click on it.

Mail - Citadel Server - Google Chrome_013

Congratulations! Our mail server is working!!

Citadel screenshots

Here is some sample screenshots that will give a basic ideas of it’s various features.

Citadel Calendar:

Calendar - Citadel Server - Google Chrome_014

Citadel Contacts:

Contacts - Citadel Server - Google Chrome_015

Citadel Notes:

Notes - Citadel Server - Google Chrome_016

Citadel Tasks:

Tasks - Citadel Server - Google Chrome_017

Citadel Chat room:

Tasks - Citadel Server - Google Chrome_018

For more usage details, I recommend you to refer the official documentation page.

Also, refer Citadel FAQ/Knowledge base page for any kind of troubleshooting.

Uninstalling Citadel

I hope you won’t do it. In case, you don’t like Citadel, you can easily uninstall it simply by deleting the following directories.

  • /usr/local/citadel
  • /usr/local/webcit
  • /usr/local/ctdlsupport

Then, remove the entries for “citadel” and “webcit” in your init scripts (/etc/init.d) directory.

Conclusion

As far as I know, Citadel is an impeccable groupware solution and it just works out of the box. It is one of the most easiest suite ever I have tried. Even, a novice user can easily install and configure Citadel in few hours. If you’re looking for a Groupware, Citadel might be suitable solution. Give it a try, you won’t be disappointed.

Cheers!

Reference links:


The post Citadel – A Free, Open Source, Email And Collaboration Suite appeared first on Unixmen.
Send Nagios Alert Notification Using SMS

$
0
0


Introduction

One of the most important feature of the monitoring platform is the notification system; by default  they use the local mail daemon (postfix, mail, exim) installed on the server to send the notifications.

Using local mail daemon has many issues :

  • You need to install and configure your smtp server.
  • Maybe your mail server go down so you can’t receive the alert.
  • Maybe this kind of emails from a not verified source like nagios can be filtered by the same company antispam system.

In order to avoid all issues, In this article I am going to explain how to send alert from monitoring tool Nagios Core using SMS.

This task was not so easy since communicating with the smsgateway through a linux server was requiring to install smstools.

If you still didn’t install Nagios Core , check the following articles.

Install SmsTools

The SMS Server Tools are made to send and receive short messages through GSM modems. It supports easy file interfaces and it can run external programs for automatic actions.

To be able to send SMS in a team with Linux will need the following:

  • A modem GSM GPRS.
  • A card SIM mobile with data activated to be able to send SMS. It is convenient to review that the sending of SMS works properly inserting the card SIM in a mobile and sending a SMS .
  • Coverage of the mobile network in the zone where place the modem GSM: obviously it has to have coverage of the mobile network so that it work the sending of SMS from the modem GSM.

Then you insert the card SIM in the modem GSM and will connect the modem GSM by USB to the server where nagios is hosted.

In this tuto we will show to how to configure Nagios to send sms hosted in Vmware.

Next step is to add usb controller to the nagios server.

1

Then choose your mobile phone.

2

Then check your configuration using dmesg | grep tty. You should see usb port (ttyACM0)

3

Now you need to install the smstool under nagios server using the flowing command in centos:

yum install smstools

Make Sure you have the Following SMSTOOLS3 SERVER Files and Folders Installed

  • incoming = /var/spool/sms/incoming
  • outgoing = /var/spool/sms/outgoing
  • checked = /var/spool/sms/checked
  • failed = /var/spool/sms/failed
  • sent = /var/spool/sms/sent
  • logfile = /var/log/smsd.log
  • Configuration = /etc/smsd.conf

Also make sure that SMSTools has the Right Configuration Setting for your modem in:  /etc/smsd.conf
( GSM Modem is on ttyACM0 in this example)

device = /dev/ttyACM0

Next step is to configure smstool service to autorun with the server.

chkconfig smsd on

Then restart the service using this command:

service smsd restart

Then you can test to send sms

sendsms 12128654549 'test'

Nagios Configuration

After this go under /usr/local/nagios/etc/objects/ and edit the file commands.cfg but that perform a backup of the config file:

cd /usr/local/nagios/etc/objects/
cp commands.cfg commands.cfg.old
Edit the commands.cfg file and you will add two commands ‘notify-host-by-sms’ and ‘notify-service-by-sms’
notify-host-by-sms
/usr/bin/printf “%b” ” hostname : $HOSTNAME$ State: $HOSTSTATE$ Address: $HOSTADDRESS$ Date/Time: $DATE$ ” | smssend $CONTACTPAGER$

notify-host-by-whatsapp

/usr/bin/printf “%b” ” $SERVICEDESC$ State: $SERVICESTATE$ Date/Time: $LONGDATETIME$ ” | smssend $CONTACTPAGER$

And we should define the contact under contacts.cfg file like this example

contact_name                    admin
        use                             generic-contact
        alias                           Admin 
        email                           admin@unixmen.com
        pager                       xxxxxxxxxxxxxxxxxxxxx
        service_notification_commands   notify-service-by-email notify-service-by-sms
        host_notification_commands      notify-host-by-email notify-host-by-sms

Now the configuration is finished. Before applying the new configuration, run the following command to check for any error or mistake:

/usr/local/nagios/bin/nagios -v /usr/local/nagios/etc/nagios.cfg

If there are no errors, restart the nagios service:

service nagios restart


The post Send Nagios Alert Notification Using SMS appeared first on Unixmen.

Trident – Setup Your Own Social Network Website

$
0
0


About Trident

Trident is a full featured, modular, responsive, powerful, and open source software platform that you can use to setup your own Social network website like Facebook. Trident is designed as a completely mobile friendly CMS to setup social networking media platform without having any overly technical knowledge and complicated module installations. Since It is designed as mobile friendly and responsive, It will work without any issues on almost all devices like desktops, Laptops, mobile phones, and tablets etc. Trident is fine-tuned to make your social networks feel modern, sleek and well friendly! The administrators can easily manage their social networks on the go. It is developed and maintained by BoonEx – the makers of the popular Dolphin Smart Community Builder.

Installation

Since Trident is a web-based SCMS (Social Content Management System), it can be installed on any Modern operating systems that has a web server like Apache or Nginx. Before gong to install it, you must setup a working LAMP or LEMP stack in your hosting computer.

In this tutorial, we are going to see how to setup Trident in Ubuntu 15.04 server. The steps are identical to all other distros. All you need to consider is to find the correct web root folder path in the distribution of your choice and install a working LAMP or LEMP stack in the distribution you want to deploy Trident social platform.

Prerequisites

First, setup LAMP or LEMP stack in your Ubuntu server. For the purpose of this tutorial, I am going to setup LAMP (Linux, Apache, MariaDB and PHP) stack in Ubuntu.

To do that, refer the following link.

Also, install the following PHP modules:

sudo apt-get install php5-curl php5-gd

Once you done, Log in to your MariaDB console using command:

mysql -u root -p

Create a new MySQL database for Trident to use and assign a user to it with full permissions as shown below.

For example, I am going to create a database called “tridentdb” and a user called “tridentuser” with password “ubuntu”. I recommend you to use any strong password that make it so difficult to guess.

Welcome to the MariaDB monitor. Commands end with ; or \g.
Your MariaDB connection id is 52
Server version: 10.0.20-MariaDB-0ubuntu0.15.04.1 (Ubuntu)

Copyright (c) 2000, 2015, Oracle, MariaDB Corporation Ab and others.

Type 'help;' or '\h' for help. Type '\c' to clear the current input statement.

MariaDB [(none)]> CREATE DATABASE tridentdb;
Query OK, 1 row affected (0.01 sec)

MariaDB [(none)]> GRANT ALL PRIVILEGES ON tridentdb.* TO 'tridentuser'@'localhost' IDENTIFIED BY 'ubuntu';
Query OK, 0 rows affected (0.00 sec)

MariaDB [(none)]> FLUSH PRIVILEGES;
Query OK, 0 rows affected (0.01 sec)

MariaDB [(none)]> quit
Bye

Download Trident

Download the latest version from Trident download page

At the time of writing this tutorial, the latest version was 8.0 beta version 2.

wget http://ci.boonex.com/builds/Trident-v.8.0.0-B2.zip

Extract the archive using command:

unzip Trident-v.8.0.0-B2.zip

The above command will extract the archive in the current directory. Copy the entire extracted folder to your web root directory.

Note: If you want to install Trident to a subfolder (i.e. example.com/trident), create a subfolder in “/var/www/html/” directory and copy files to it. Don’t just copy the Trident folder. Open it on your computer and copy the entire folder contents – all the files and folders inside of it to your hosting server. Pay attention to .htaccess file, it maybe hidden on *nix systems and in some FTO clients.

I am going to deploy the site in a sub-folder.

sudo mv Trident-v.8.0.0-B2/ /var/www/html/trident

Set the proper permission to the Trident folders and files as shown below.

sudo chown www-data:www-data -R /var/www/html/trident/
sudo chmod 755 /var/www/html/trident/plugins/ffmpeg/ffmpeg.exe

Access web-based Trident installer

Open your favourite web browser and navigate to http://domain-name/trident/ or http://ip-address/trident/. If you copied the Trident folder contents to the main apache root folder, then the URL will be: http://domain-name/.

The following screen should appear.

Trident 8.0.0-B2 Installation - Google Chrome_002

Now, you may start click “Start installation” button to install Trident or click “Server audit” to check for any software incompatibilities or incorrect settings. Hence, I don’t have any issues, i clicked “Server installation”.

In the Next window, the installer will verify that all permissions have been properly set to the files and folders and display the result. If you don’t have any issues, click Continue button.

Trident 8.0.0-B2 Installation - Google Chrome_003

Next, enter your site details such as database name, database user and it’s password, site tittle, site email, admin email, administrative account name and it’s password etc.

Also, you need to enter BoonEx key and BonEx secret values. These numbers are required for Trident to check software version updates, buy and download Extensions and check licenses. Just click “Get BoonEx Key And Secret” link to get the numbers via your registered BoonEx account.

To get your Keys an Secrets, go to the link: http://www.boonex.com/oauth/key_and_secret.

Log in to your account or create a new user account if you don’t have one.

BoonEx Dolphin › Social Network Software | Social CMS - Google Chrome_004

Enter the username and password if you already have or click on the Join button to create a new account. Enter your username, password and a valid email Id to get the secret key.

You’ll be redirected to the your Boonex account dashboard. Click on the link that says: Keys & Secrets.

Selection_006

You’ll see your Keys and Secrets.

Selection_005

Now, copy the Keys & Secrets and head back to your Trident installer wizard and paste them in the required boxes and click Submit. Refer the following screenshot.

Trident 8.0.0-B2 Installatio_ - http___192.168.1.102_trident_install_index.php

Congratulations! Trident has been successfully installed on your Ubuntu server.

Trident 8.0.0-B2 Installation - Google Chrome_007

Post installation instructions

1. Setup the following cron jobs command:

crontab -e

Add the following lines:

MAILTO=sk@unixmen.com
* * * * * /usr/bin/php -q /var/www/html/trident/periodic/cron.php

Replace sk@unixmen.com with your own mail id.

Restart cron service.

sudo systemctl restart cron

2. Remove /install/ folder from the script root folder.

sudo rm -rf /var/www/html/trident/install/

Access Trident admin console

Now, go to Trident Studio for further customization by navigating to the URL: http://IP-address/trident/studio/ or http://domain-name/trident/studio/.

You’ll be pleased with the following screen. It will show a small snippet of each module. If you want to know what each module does, click Next or Click the Close button to go to the Trident Studio dashboard.

Studio - Google Chrome_008

Here it is what Trident Studio dash board looks like.

Studio - Google Chrome_009

That’s it. Now, start adding extensions; adjusting site settings; setting membership levels and access permissions; building pages and enjoying your Social network.

Once you done, you can visit the newly created site using URL: http://domain-name/trident.

Unixmen_trident

Congratulations! Now, ask your friends, colleagues to register on your Social network and start sharing your news, status, updates and have fun!

Cheers!

Reference link:


The post Trident – Setup Your Own Social Network Website appeared first on Unixmen.

Cockpit: A Beginner Friendly Server Administration Tool

$
0
0


About Cockpit

Cockpit is a free and open source web-based system management application. It is actively being developed by Red Hat. Using Cockpit, anyone can easily monitor and manage multiple servers at the same time via a Web browser. It will perfectly suitable for new system administrators to perform simple tasks such as storage administration, inspecting journals and starting and stopping services. On the other hand, a service started from the Terminal can also be stopped or monitored from the Cockpit and vice versa. Also, if an error occurs in the terminal, it can be seen in the Cockpit journal interface.

Cockpit

Cockpit provides:

  • Systemd service management
  • Docker management
  • Journal log viewercockpit-a-beginner-friendly-server-management-tool
  • Storage setup, including LVM
  • Basic Network configuration
  • Add and Remove local users

In this tutorial, we will see how to install Cockpit on a CentOS 7 server, and how to monitor and administer the server using Cockpit. These steps might work on RHEL 7 and Scientific Linux, and Fedora, but I am not sure.

Install Cockpit On CentOS 7

Open up the Terminal, and run the following command as root user to install Cockpit.

yum install cockpit

Start Cockpit daemon using command:

systemctl start cockpit

To start Cockpit automatically on every reboot, run:

systemctl enable cockpit.socket

Add Cockpit to the list of trusted services in firewallD.

firewall-cmd --permanent --zone=public --add-service=cockpit

Restart firewallD to take effect the changes.

firewall-cmd --reload

Access Cockpit web console

Now, open your web browser and point it to: https://Cockpit-server-ip-address:9090/.

You’ll be pleased with the Cockpit log in screen. Enter your server’s user name and password.

server1.unixmen.local - Google Chrome_001

Here it is what Cockpit dashboard looks like.

server1.unixmen.local

That’s it. From here, you can do administrative tasks such as adding/deleting users, starting/stopping services, configuring network and so on.

Here is some screnshots of Cockpit.

Cockpit Services tab:

server1.unixmen.local services

Cockpit Containers tab:

server1.unixmen.local - Google Chrome_002

Cockpit Journal tab:

server1.unixmen.local - Google Chrome_003

Cockpit Networking tab:

server1.unixmen.local - Google Chrome_004

Cockpit Storage tab:

server1.unixmen.local - Google Chrome_005

Cockpit Administrator Accounts tab:

server1.unixmen.local - Google Chrome_006

Cockpit Terminal:

server1.unixmen.local - Google Chrome_007

As you see above, Cockpit provides a Terminal inside its console. So you don’t need SSH or any other communication tools. We can directly install any software from the Cockpit Terminal.

server1.unixmen.local - Google Chrome_008

Adding multiple servers to Cockpit

To add a new server, click on the Dashboard on the top. The Dashboard will show you list of servers added to the Cockpit.

Click on the plus (+) sign on the bottom to add new server.

CentOS Linux - Google Chrome_009

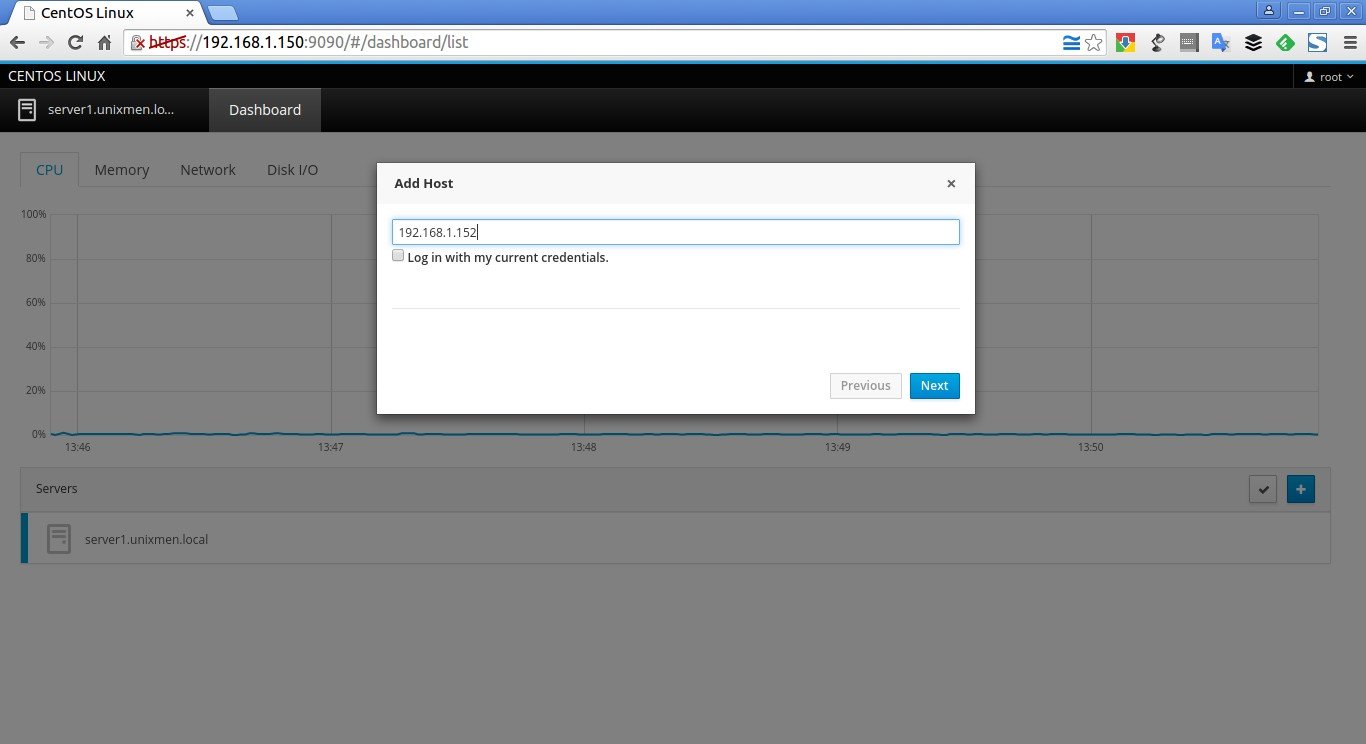
Uncheck the option that says: Log in with my current credentials. Enter your remote server IP address or Hostname.

Be mindful that you must install Cockpit on all of your remote servers in order to monitor them via Cockpit.

CentOS Linux - Google Chrome_012

Enter your remote server’s username and password.

CentOS Linux - Google Chrome_013

Finally click Add host to add your remote server.

CentOS Linux - Google Chrome_014

Click Close to close the Add host window.

CentOS Linux - Google Chrome_015

Now, you’ll see that the new server has been added to the Cockpit dashboard.

CentOS Linux - Google Chrome_016

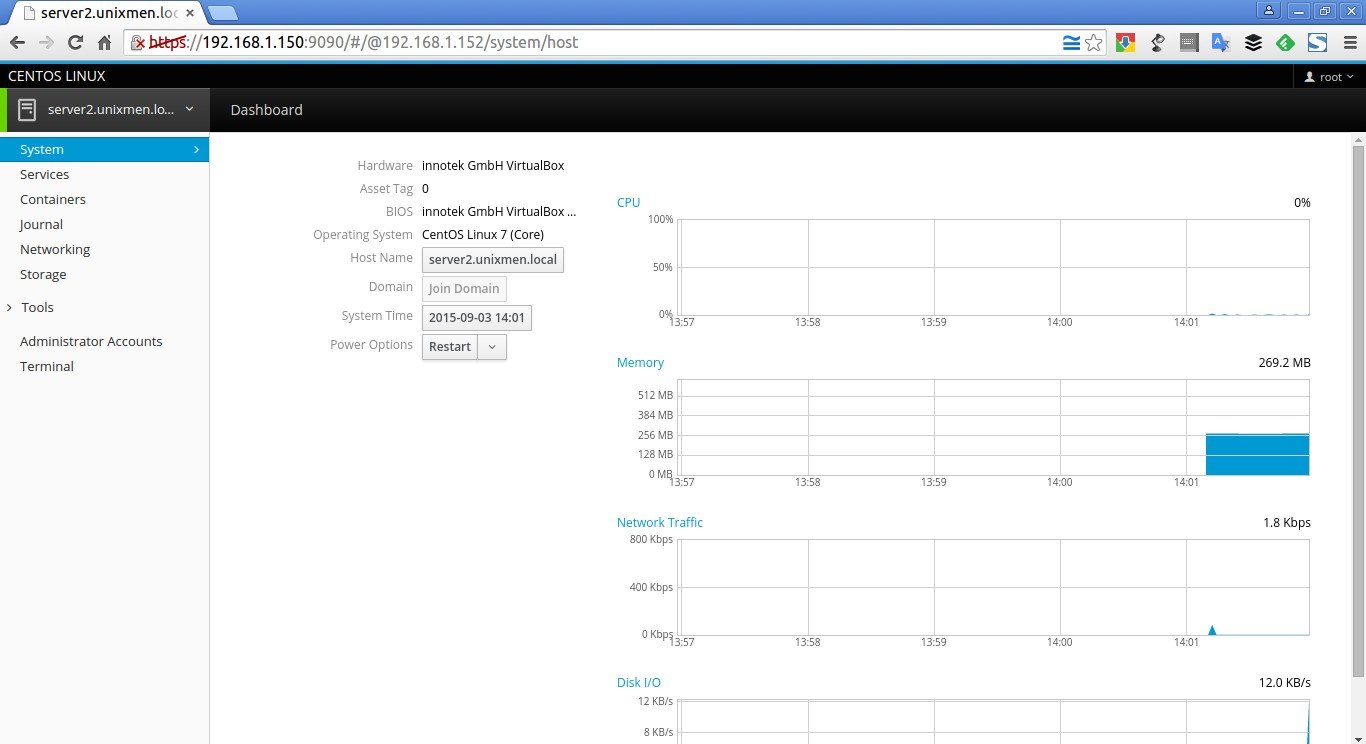
Just click on the remote server’s hostname to monitor or manage it.

server2.unixmen.local - Google Chrome_017

Similarly, you can add as many servers as you want to manage via Cockpit. Just install Cockpit on the server or system that you want to manage and manage it like a boss anywhere on your network.

Conclusion

Cockpit is a useful tool for less experienced system administrators and makes the system administration task easier and even better. Using this application, anyone can easily administer multiple remote headless servers on the go. Don’t compare it with advanced server management tools like Webmin or anything, Cockpit is just a beginner friendly server management interface tool for managing the remote servers, not to manage the remote server’s applications. However, you can install any applications from the Cockpit Terminal as the way you do in your remote system’s Terminal.

Give it a try, you won’t be disappointed.

Have a good day!

Reference links:

Featured Image: Dirk-Jan Kraan via Flickr.


The post Cockpit: A Beginner Friendly Server Administration Tool appeared first on Unixmen.
List Of 10 Funny Linux Commands

$
0
0


Working from the Terminal is really fun. Today, we’ll list really funny Linux commands which will bring smile on your face.

 1. rev

Create a file, type some words in this file, rev command will dump all words written by you in reverse.

# rev  <file name>

Selection_002

Selection_001

 2. fortune

This command is not install by default, install with apt-get and fortune will display some random sentence.

crank@crank-System:~$ sudo apt-get install fortune

Selection_003

Use -s option with fortune, it will limit the out to one sentence.

# fortune -s

Selection_004

3. yes

#yes <string>

This command will keep displaying the string for infinite time until the process is killed by the user.

# yes unixmen

Selection_005

4. figlet

This command can be installed with apt-get, comes with some ascii fonts which are located in /usr/share/figlet.

cd /usr/share/figlet
#figlet -f <font>  <string>

e.g.

#figlet -f big.flf unixmen

Selection_006

#figlet -f block.flf  unixmen
Selection_007

You can try another options also.

5. asciiquarium

This command will transform your terminal in to a Sea Aquarium.

Download term animator
# wget http://search.cpan.org/CPAN/authors/id/K/KB/KBAUCOM/Term-Animation-2.4.tar.gz

Install and Configure above package.

# tar -zxvf Term-Animation-2.4.tar.gz
# cd Term-Animation-2.4/
# perl Makefile.PL && make && make test
# sudo make install

Install following package:

# apt-get install libcurses-perl

Download and install asciiquarium

# wget http://www.robobunny.com/projects/asciiquarium/asciiquarium.tar.gz
# tar -zxvf asciiquarium.tar.gz 
# cd asciiquarium_1.0/
# cp asciiquarium /usr/local/bin/

Run,

# /usr/local/bin/asciiquarium

 asciiquarium_1.1 : perl_008

6. bb

# apt-get install bb
# bb

See what comes out:

Selection_009

 7. sl

Sometimes you type sl instead of ls by mistake,actually  sl is a command and a locomotive engine will start moving if you type sl.

# apt-get install sl
# sl

Selection_012

 8. cowsay

Very common command, is will display in ascii form whatever you wants to say.

apt-get install cowsay
# cowsay <string>

Selection_013

Or, you can use another character instead of com, such characters are stored in /usr/share/cowsay/cows

# cd /usr/share/cowsay/cows
cowsay -f ghostbusters.cow  unixmen

Selection_014 or

# cowsay -f bud-frogs.cow Rajneesh
Selection_015

 9. toilet

Yes, this is a command, it dumps ascii strings in colored form to the terminal.

# apt-get install toilet
# toilet --gay unixmen
Selection_016
 toilet -F border -F gay unixmen

Selection_020

toilet  -f mono12 -F metal  unixmen

Selection_018

 10. aafire

Put you terminal on fire with aafire.

# apt-get install libaa-bin
# aafire

Selection_019

That it, Have fun with Linux Terminal!!


The post List Of 10 Funny Linux Commands appeared first on Unixmen.

Five Useful Tools For Debian Based Systems

$
0
0


In this tutorial, we’ll be discussing some random useful tools that can be used by system administrators for maintaining Debian and derivative distributions.

1. Katoolin

Introduction

Katoolin is a tool which will make you able to install all Kali Linux tools to your Ubuntu 14.04/15.04 Desktop. With Katoolin, you can add or remove Kali Linux repository to Ubuntu.

Installation

Install git and add repo using git as follows:

# apt-get install git

Git clone to Katoolin repository and copy it to /usr/bin:

# git clone https://github.com/LionSec/katoolin.git
# cp katoolin/katoolin.py /usr/bin/katoolin

Set executable permissions:

# chmod +x /usr/bin/katoolin

Run the tool using command:

# katoolin

Here it is how Katoolin looks like;

Selection_024

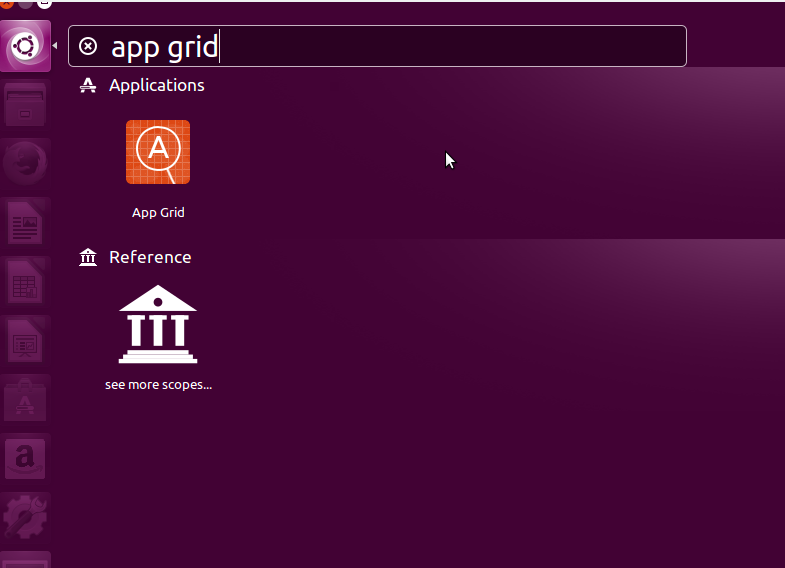
2. App Grid

Introduction

App Grid is an alternative to Ubuntu software center, it is lightweight feature and provide a grid view of available softwares.

Installation

Latest version of App Grid can be installed using ppa, add following repo to Ubuntu.

$ sudo add-apt-repository ppa:appgrid/stable

Update System:

$ apt-get update

Finally, install App Grid Package:

$ sudo apt-get install appgrid

Selection_026

Selection_027

3. BleachBit

Introduction

Bleachbit is a yet another important tool for Linux Admins. It free disk space and maintain privacy it can clean cookies,  history, cache files, logs, borken shortcuts and it can clean Firefox Mozilla and Chrome like Browsers.

Installation

Bleach is available via PPA.

Add repo:
$  sudo add-apt-repository ppa:n-muench/programs-ppa

Update System  and Install Package.

$ sudo apt-get update && sudo apt-get install bleachbit

Type in terminal:

$ sudo bleachbit&

Selection_028

4. Angry IP Scanner

Introduction

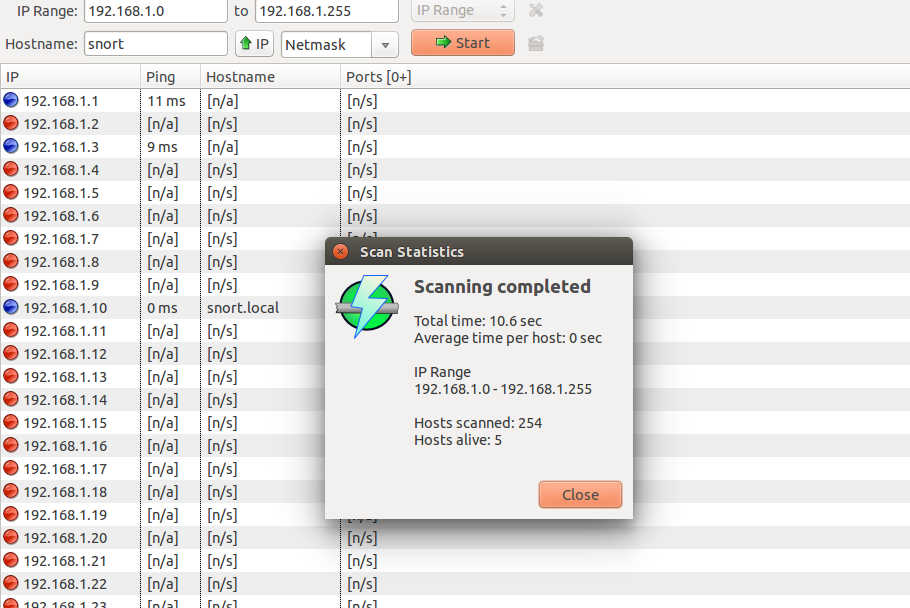
Angry IP Scanner is  very fast, reliable and popular cross platform IP and port Scanning  tool. It is used world wide by almost all System Admins, it can be used effectively for medium and large networks and scanned results can be saved in csv or txt format. Angry IP Scanner  can be downloaded from this link.

Installation

Open JDK is required to install this package, so download this package first.

$ sudo apt-get install openjdk-7-jdk ant rpm
 Download Package
$ sudo wget http://downloads.sourceforge.net/project/ipscan/ipscan3-binary/3.4/ipscan_3.4_a64.deb
Install Package
$ sudo dpkg -i ipscan_3.4_amd64.deb

Go to menu and run angry ip scanner.

Selection_030

5. Double Commander

Introduction

Double Commander is a cross platform open source file manages having two side by side panels. It supports almost all archive types, and searching along with logging features.

Installation

Double Commander can be downloaded from official page.

Add ppa repo to Ubuntu
$ sudo add-apt-repository ppa:alexx2000/doublecmd

Update and Install package:

$ sudo apt-get update && sudo apt-get install doublecmd-gtk

Type in terminal:

$ doublecmd

Selection_031

A lots of features are available with Double Commander, explore them and have fun!!


The post Five Useful Tools For Debian Based Systems appeared first on Unixmen.
Install Justniffer In Ubuntu 15.04

$
0
0


Introduction

Justniffer is a network protocol analyzer that can be used as alternative to Snort. It is a very popular network analyzer tool, it work interactively to trace/sniff a live network. It can capture traffic from a live environment, support “lipcap” a “tcpdump” file formats. It helps the users to perform analysis in a complex network where it is difficult to capture traffic with wireshark. Specially it help to analyze application layer traffic very significantly and can extract http contents like images, scripts, HTML etc easily. Justsniffer is helpful in understanding how communication occur among different components.

Features

This is the advantage of Justniffer that it collect all traffic from a complex network without affecting system performance, and can save logs for future analysis, some of the important features of Justniffer are:

1. Reliable TCP flow rebuilding

It can record and reassemble TCP segments and IP fragments using a portion of host Linux kernel.

2. Logging

Log are saved for future analysis and can be customized as and when required.

3. Extensible

Can be extended with external  python, perl and bash scripts to get some additional results from analysis reports.

4. Performance Management

Retrieve  information on the basis of Connection time, close time, response time or request time etc.

Installation

Justsniffer can be installed with ppa.

To add the repo, run:

$ sudo add-apt-repository ppa:oreste-notelli/ppa

Update System:

$ sudo apt-get update

Install Justniffer tool:

$ sudo apt-get install justniffer

It failed to install in make then i run following command and try to reinstall service

$ sudo apt-get -f install

Examples

First of all verify installed version of Justniffer with -V option, you will need super user privileges to utilize that tool.

$ sudo justniffer -V
Sample output:
j
1. Dump Traffic to terminal in apache like format for eth1 interface, type
$ sudo  justniffer -i eth1

Sample output:

Selection_001

2. You can trace running tcp stream with following option
$ sudo  justniffer -i eth1 -r

Sample output:

Selection_002

3. To get the response time of web server, type
$ sudo justniffer -i eth1 -a " %response.time"

Sample output:

Selection_003

4. Read a tcpdump captured file with Justniffer

First, capture traffic with tcpdump.

$ sudo tcpdump -w /tmp/file.cap -s0 -i eth0

Now access that data with justniffer

$ justniffer -f file.cap

Sample output:

Selection_005

5. Capture http only data
$ sudo justniffer -i eth1 -r -p "port 80 or port 8080"
Sample output:
Selection_006
6.  Get http only data from a specific host
$ justniffer -i eth1 -r -p "host 192.168.1.250 and tcp port 80"

Sample output:

Selection_007

7. Capture data in a more preciser format

When you will type justniffer -h You will see a lots of format key words which help to get data in more preciser  way

$ justniffer -h

Sample Output:

Selection_008

Let us retrieve data with some predefined parameter provided with justniffer

$ justniffer -i eth1 -l "%request.timestamp %request.header.host %request.url %response.time"
Sample Output:
Selection_009
There are lots of option which you can explore.

Conclusion

Justniffer is a very nice tool for network testing. In my view users who are using Snort for network sniffing will know justniffer as an less complicated tool. It is provided with a lots of  FORMAT KEYWORDS which are very helpful to retrieve data in specific formats as per your need. You can log your network in .cap file formats which can be analyzed later on to monitor network service performance.
Reference:


The post Install Justniffer In Ubuntu 15.04 appeared first on Unixmen.

Using Tcpdump To Capture And Analyze Network Traffic

$
0
0


Introduction

Tcpdump is one of the finest tools available for network analysis. It is a must have tool for all of the Network Administrators and users who wants to understand TCP/IP.It enable users to capture packets transmitted or received over the network/Internet. It is important to know that super user  authentication is required to run tcpdump, it is absolutely free tool available under BSD License.

Features

It is a command line tool available for Debian and Redhat based systems, packets can be saved in log form which can be analysed later on with tcpdump.  You can apply filters on the packets and can avoid the traffic which you do not wants to see.It understand hostname and almost all of the TCP and UDP protocols.

Installation

For CentOS:

# yum install tcpdump

For Ubuntu distribution:

# apt-get install tcpdump

for Debian OS:

# pkg install tcpdump

Utility Examples

1. Use tcpdump without any option it will dump output to the scree
# tcpdump

Sample Output:

Selection_012

2. Specify some interface to capture network traffic
# tcpdump -i eth1

Sample output:

Selection_013

Note that  in above example that Packet captured, packet received and packets drops are described at the end of each output.

3. Capture packet from some specific host
# tcpdump src host 192.51.15.1

Sample Output:

Selection_014

# tcpdump src host unixmen.com

Selection_015

4. Read data with time stamp
# tcpdump -i eth0 -n -tttt

Sample output:

Selection_016

5. Scan network for some specific ip range
# tcpdump net 192.51.15.0/24

Sample output:

Selection_017

6. Grab some icmp traffic for specific interface
# tcpdump -i eth1  icmp

Sample output:

Selection_018

7. Record log of tcpdump to some specific file
# tcpdump -w unixmen.cap

unixmen.cap is file name.

Read that recored log with tcpdump

# tcpdump -r unixmen.cap

Sample output:

Selection_019

8. Capture only ARP packets for any interface
# tcpdump -v arp

Sample output:

Selection_020

9. Capture the data using ip address
# tcpdump -n -i eth0

Sample output:

Selection_021

10. Scan network more deeply
# tcpdump -nnvvXS

Sample output:

Selection_022

There are lots of utility which can be used with tcpdump, we will try to provide more tutorials of security tools in future.

Conclusion

tcpdump is a easy to use tool, no supporting packages are required to install or configure this tool, .cap log format is supported which is common for most of network scanning tools.

Have fun!!


The post Using Tcpdump To Capture And Analyze Network Traffic appeared first on Unixmen.

Install OpenVAS Vulnerability Scanner In Ubuntu 15.04

$
0
0


article-best-practice-linux-guide-data-security

Introduction

OpenVAS (Open Vulnerability Assessment System) is an framework of several services and tool with mutually form an effective Vulnerability Scanner. It is an excellent tool for vulnerability scanning. It uses a database of over 28,00000 test plugins. It is a very good alternative for commercial network scanning tools available. OpenVAS is used worldwide by security enthusiasts and security experts. All products of openVAS are a free software and licensed under GPL.

Features

OpnVAS is consists of three parts i.e. OpenVAS Scanner, OpenVAS Manager and OpenVAS CLi.

A. OpenVAS Scanner

  1. The scanner very efficiently execute real time vulnerability test.
  2. It can handle more then one target host on a single time.
  3. OpenVAS Transfer Protocol (OTP) is provided.
  4.  SSL is supported for OTP

B. OpenVAS Manager

  1. Handles SQL Database where all scanning results and configurations are stored.
  2. Control scanner  via OTP and offers XML based OpenVAS Management Protocol (OMP)
  3. It can stop, pause or resume scanning operations.
  4. User management is possible including  group level management and access control management.

C. OpenVAS CLI

It is a command line tool and act as Client for OMP, it could be run over Windows or Linux.

Installation

We will be using Ubuntu 15.04 for installation example setup.

Install sqlite for OpenVAS manager.
$ sudo apt-get install sqlite3
Install other required packages
$ sudo apt-get -y install python-software-properties
Create PPA repo for OpenVAS
$ sudo add-apt-repository ppa:mrazavi/openvas

Update system

$ sudo apt-get update
Install OpenVAS Package
$ sudo apt-get install openvas

Selection_001

Press yes when above screen appear.

Restart services
$ sudo /etc/init.d/openvas-scanner restart
$ sudo /etc/init.d/openvas-manager restart
$ sudo /etc/init.d/openvas-gsa restart

Before running any test, upgrade network vulnerability tests

$ sudo openvas-nvt-sync

Open Browser and type:

https://localhost/login/login.html

Default user name is ‘admin’, password ‘admin’.

Selection_002

After login Greenbone security assistant portal will open

Selection_003

You have installed OpenVAS successfully.

Example

Scan some ip address

Selection_004

Process can be monitored in action with a click on immediate scan list

Selection_005

Update vulnerability database
$ sudo openvas-nvt-sync
Add a new openvas user
$ sudo openvas-adduser

Selection_006

Conclusion

OpenVAS is a modular security auditing tool. There are several scan configuration profiles like: full and last, very deep or full and fast ultimate etc. You have to be very careful while using various scanning modes, if some threat is detected you can go through various reports generated.

Have Fun!


The post Install OpenVAS Vulnerability Scanner In Ubuntu 15.04 appeared first on Unixmen.
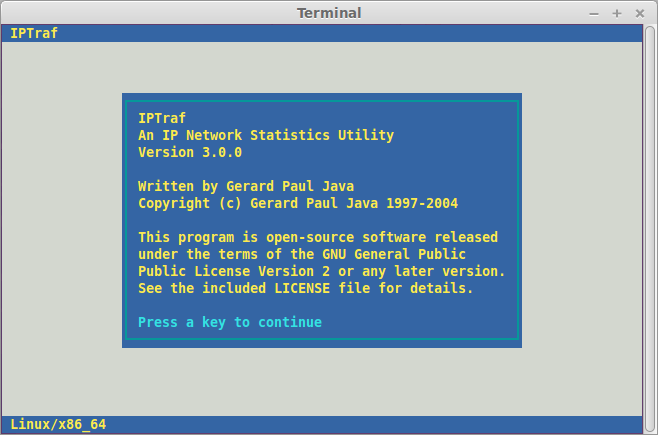
How To Install OPNsense Firewall

$
0
0


Introduction

OPNSense is an stateful firewall which comes with almost all of the features that are expected from a commercial firewall, it has a sleek graphical interface, very lightweight application which is based on freeBDS. The meaning of stateful firewall is that it keep tracking network streams and it is programmed to distinguish legitimate packets for various connection currently active onto your network. A firewall can filter source and destination IP,source and destination protocol.

Some highlight Features of OPNsense firewall

1. Control over state table

The State tables of  a firewall keep information on your open network connection, as OPNsence is a stateful firewall therefor all rules are stateful. OPNsense offer various options for state handling like:

Keep state – Work with all protocols and default for all rules.

Sloppy State – Work Only for TCP.

Synproxy state – Help to protect server from spoofed  TCP SYN floods.

None – Do not keep any track on state entries for the network traffic.

 2. Traffic shaper

To ensure “Guaranteed performance” traffic shaping is required.To lower the latency  rate, to increase usability of bandwidth by delaying packets that meet certain criteria. Specifically we can state that traffic shaping is to apply some sort of traffic profile over s set of packets so that they must meet some bandwidth control.

3. NAT (Network Address Translation)

Definition of NAT in terms of networking is to remapping of one IP address into another.I Default setting of NAT are outbound to the WAN IP Address, port forwarding is enabled and used for mutiple public IPs.

4.   VLAN Support

OPNsense supports multiple VLANs, VLAN are multiple LAN segments of a managed switch. With this feature you can have large number of networks without adding any extra physical interface to your firewall.

5. VPN

OPNsense supports three types of VPN Connectivity:

IPSec – Most commonly used for Site to Site connectivity.

OpenVPN – Powerful SSL VPN Solution supporting wide range of client OS.

PPTP –  Can use a local database or RADIUS Server for authentication.

6. High Availability

With the help of Common Address  Redundancy Protocol or CARP it allows multiple hosts over the same LAN to provide failover redundancy.

7. Reports

With the help of RRD Graphs you can have information of

  1. CPU Utilization.
  2. Total Throughput of Internet Bandwidth.
  3. Firewall State.
  4. Interface status.
  5. Ping Response time for WAN.

Installation

Requirements

  • Minimum 4 GB RAM
  • 40 GB Storage
  • Dual Core Processor
  • 2 Network Interface (LAN+WAN)

Procedure

Download Firewall image from this link

Boot the system.

Selection_032

Boot Menu will appear, press enter

Selection_033

A configuration Console will appear, accept these settings and press enter.

Selection_034

Choose quick easy install method. press enter.

Selection_035

Select the hard drive, press enter.

 Selection_036

This Step may take some time, the the process be complete.

Selection_037

After installation process is over, select reboot and press enter.

Selection_038

Remove the boot media, after reboot  it will ask you to set VLANs, press ‘no’ as will configure VLAN with GUI later on.

Selection_039

After above step is over,  server will ask for  login and password, login with ‘root’ with default password ‘opnsense’, login top the system and set the interface.

Selection_040 Selection_041

Access this ip address via browser on a remote system and complete rest of the configurations, note that in gui admin login admin  is ‘root’ and password is ‘opnsense’

Selection_042

Provide required DNS credentials.

Selection_043

In Same manner complete rest of the steps as per your network requirements.

Selection_044

Set Hostname and Time zone as per your need .

Selection_045

Set Your Traffic rules, click next.

Selection_046

Provide new admin password of root for next login, click next.

Selection_047

When installation process is over, reload service, this step will reboot the system.

Selection_048

After reboot, click ‘add widget’ icon at upper right corner of the portal, with the help of this your can add various widgets as per your requirement.

Selection_049

Sample  of  some installed widgets.

Selection_050

When All steps are over, configure your DHCP, DNS and other firewall setting, test for network.

Selection_051

Have fun!!

Reference Link:


The post How To Install OPNsense Firewall appeared first on Unixmen.

Install Froxlor Server Management Panel In Ubuntu

$
0
0


About Froxlor

Froxlor is a server management panel used to manage multiple-users services. It can be used to manage domain services, email accounts or web server etc. It is a good alternative of cpanel or webmin.

Features

  1. Enable customers to store ssl certificates per domain and determine which port should use ssl.
  2. You can choose which IP address and which port should be used per domain.
  3. Comes with an added layer of customer management,  allow customers to create support tickets and enable them to reply within froxlor with online/offline indicator.
  4. Comes with customizable themes, you can create your own themes.
  5. Save diffrent php configuration and choose which php.ini should be used.
  6. All http, mail and ftp traffic logs are stored and could be monitored with via interactive graphs.
  7. Users can upload or download theirs files directory via browser with the help of web-ftp.

Install Froxlor

We will install demo setup on Ubuntu 15.04. You have to Install all prerequisites like Mysql, apache, or python packages.

Add froxlor repo:

$ sudo add-apt-repository "deb http://debian.froxlor.org wheezy main"

Update your server

$ sudo apt-get update

I got following error while updating server

W: GPG error: http://debian.froxlor.org wheezy Release: The following signatures couldn't be verified because the public key is not available: NO_PUBKEY F6B4A8704F9E9BBC

So i search and got a software key for froxlor, we have to add that key then again update server.

$ sudo apt-key adv --keyserver pool.sks-keyservers.net --recv-key FD88018B6F2D5390D051343FF6B4A8704F9E9BBC

Install froxlor package:

$ sudo apt-get install froxlor php5-curl

During installation, you’ll be asked to enter few details.

First, provide mysql password:

unixmen@unixmen-VirtualBox: ~_002

Select yes and press enter for below step.

unixmen@unixmen-VirtualBox: ~_003

Select Internet Site (default), press enter.

unixmen@unixmen-VirtualBox: ~_004

I opted ‘unixmen.lan’ as mail name.

unixmen@unixmen-VirtualBox: ~_006

keep proFTPD option as default on standalone.

unixmen@unixmen-VirtualBox: ~_007

Restart apache service

$ sudo /etc/init.d/apache2 restart

Open Browser and type <Ip_address>/froxlor

Important: At this step i got web server  404 error, so i simply move froxlor directory (which was installed by default with froxlor package) from /var/www to /var/www/html, and then open  in browser it was working without any error.

Click to start install:

Selection_008

Verify whether all requirements are fulfilled or not then click to continue.

Selection_009Provided required Mysql, FQDN, Admin etc credentials, click next.

Selection_010

Make sure all services are functional, click next.

Selection_011

Login with username ‘admin’ and password assigned by you during installation.

Selection_012

Dashboard will look something like below.

Selection_013

Examples

Go to server hyperlink in right side menu, click settings-> Select web server settings.

Selection_015

Enable quota and save changes.

Selection_016

Click resources under customer hyperlink, provide credentials including email id.

Selection_018

Click to save.

Selection_019

Click to domains, create a domain, select customer created in previous  step, provide date in added at registry section, leave Document root section as default, leave IP Address section as default.

Selection_020

Save above settings.

Selection_021

In the same manner configure your panel setting.

Selection_022

Conclusion

As far as I tested froxlor, It is one of the best and top 5 available web based control panels. It is very easy to install and use. The froxlor documentation states that root directory is /var/www/froxlor, but when i setup demo installation it was working properly with document  root /var/www/html/froxlor and be mindful that the package does not come with ready to use LAMP package you have to install that manually.

That’s all for now. Let us know what do you think about this panel in the comment section.

Cheers!

The post Install Froxlor Server Management Panel In Ubuntu appeared first on Unixmen.
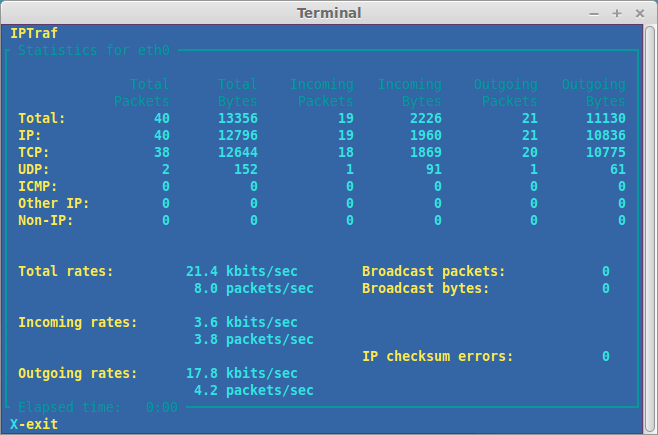
The Brief History Of Aix, HP-UX, Solaris, BSD, And LINUX

$
0
0


Always remember that when doors close on you, other doors open. Ken Thompson and Dennis Richie are a great example for such saying. They were two of the best information technology specialists in the 20th century as they created the UNIX system which is considered one the most influential and inspirational software that ever written.

The UNIX systems beginning at Bell Labs

UNIX which was originally called UNICS (UNiplexed Information and Computing Service) has a great family and was never born by itself. The grandfather of UNIX was CTSS (Compatible Time Sharing System) and the father was the Multics (MULTiplexed Information and Computing Service) project which supports interactive timesharing for mainframe computers by huge communities of users.

UNIX was born at Bell Labs in 1969 by Ken Thompson and later Dennis Richie. These two great researchers and scientists worked on a collaborative project with General Electric and the Massachusetts Institute of Technology to create an interactive timesharing system called the Multics.

Multics was created to combine timesharing with other technological advances, allowing the users to phone the computer from remote terminals, then edit documents, read e-mail, run calculations, and so on.

Over the next five years, AT&T corporate invested millions of dollars in the Multics project. They purchased mainframe computer called GE-645 and they dedicated to the effort of the top researchers at Bell Labs such as Ken Thompson, Stuart Feldman, Dennis Ritchie, M. Douglas McIlroy, Joseph F. Ossanna, and Robert Morris. The project was too ambitious, but it fell troublingly behind the schedule. And at the end, AT&T leaders decided to leave the project.

Bell Labs managers decided to stop any further work on operating systems which made many researchers frustrated and upset. But thanks to Thompson, Richie, and some researchers who ignored their bosses’ instructions and continued working with love on their labs, UNIX was created as one the greatest operating systems of all times.

UNIX started its life on a PDP-7 minicomputer which was a testing machine for Thompson’s ideas about the operating systems design and a platform for Thompsons and Richie’s game simulation that was called Space and Travel.

“What we wanted to preserve was not just a good environment in which to do programming, but a system around which a fellowship could form. We knew from experience that the essence of communal computing, as supplied by remote-access, time-shared machines, is not just to type programs into a terminal instead of a keypunch, but to encourage close communication”. Dennis Richie Said.

UNIX was so close to be the first system under which the programmer could directly sit down at a machine and start composing programs on the fly, explore possibilities and also test while composing. All through UNIX lifetime, it has had a growing more capabilities pattern by attracting skilled volunteer effort from different programmers impatient with the other operating systems limitations.

UNIX has received its first funding for a PDP-11/20 in 1970, the UNIX operating system was then officially named and could run on the PDP-11/20. The first real job from UNIX was in 1971, it was to support word processing for the patent department at Bell Labs.

The C revolution on UNIX systems

Dennis Richie invented a higher level programming language called “C” in 1972, later he decided with Ken Thompson to rewrite the UNIX in “C” to give the system more portability options. They wrote and debugged almost 100,000 code lines that year. The migration to the “C” language resulted in highly portable software that require only a relatively small machine-dependent code to be then replaced when porting UNIX to another computing platform.

The UNIX was first formally presented to the outside world in 1973 on Operating Systems Principles, where Dennis Ritchie and Ken Thompson delivered a paper, then AT&T released Version 5 of the UNIX system and licensed it to the educational institutions, and then in 1975 they licensed Version 6 of UNIX to companies for the first time with a cost $20.000. The most widely used version of UNIX was Version 7 in 1980 where anybody could purchase a license but it was very restrictive terms in this license. The license included the source code, the machine dependents kernel which was written in PDP-11 assembly language. At all, versions of UNIX systems were determined by its user manuals editions.

The AIX System

In 1983, Microsoft had a plan to make a Xenix MS-DOS’s multiuser successor, and they created Xenix-based Altos 586 with 512 KB RAM and 10 MB hard drive by this year with cost $8,000. By 1984, 100,000 UNIX installations around the world for the System V Release 2. In 1986, 4.3BSD was released that included internet name server and the AIX system was announced by IBM with Installation base over 250,000. AIX is based on Unix System V, this system has BSD roots and is a hybrid of both.

AIX was the first operating system that introduced a journaled file system (JFS) and an integrated Logical Volume Manager (LVM). IBM ported AIX to its RS/6000 platform by 1989. The Version 5L was a breakthrough release that was introduced in 2001 to provide Linux affinity and logical partitioning with the Power4 servers.

AIX introduced virtualization by 2004 in AIX 5.3 with Advanced Power Virtualization (APV) which offered Symmetric multi-threading, micro-partitioning, and shared processor pools.

In 2007, IBM started to enhance its virtualization product, by coinciding with the AIX 6.1 release and the architecture of Power6. They also rebranded Advanced Power Virtualization to PowerVM.

The enhancements included form of workload partitioning that was called WPARs, that are similar to Solaris zones/Containers, but with much better functionality.

The HP-UX System

The Hewlett-Packard’s UNIX (HP-UX) was based originally on System V release 3. The system initially ran exclusively on the PA-RISC HP 9000 platform. The Version 1 of HP-UX was released in 1984.

The Version 9, introduced SAM, its character-based graphical user interface (GUI), from which one can administrate the system. The Version 10, was introduced in 1995, and brought some changes in the layout of the system file and directory structure, which made it similar to AT&T SVR4.

The Version 11 was introduced in 1997. It was HP’s first release to support 64-bit addressing. But in 2000, this release was rebranded to 11i, as HP introduced operating environments and bundled groups of layered applications for specific Information Technology purposes.

In 2001, The Version 11.20 was introduced with support for Itanium systems. The HP-UX was the first UNIX that used ACLs (Access Control Lists) for file permissions and it was also one of the first that introduced built-in support for Logical Volume Manager.

Nowadays, HP-UX uses Veritas as primary file system due to partnership between Veritas and HP.

The HP-UX is up to release 11iv3, update 4.

The Solaris System

The Sun’s UNIX version, Solaris, was the successor of SunOS, which was founded in 1992. SunOS was originally based on the BSD (Berkeley Software Distribution) flavor of UNIX but SunOS versions 5.0 and later were based on Unix System V Release 4 which was rebranded as Solaris.

SunOS version 1.0 was introduced with support for Sun-1 and Sun-2 systems in 1983. Version 2.0 was introduced later in 1985. In 1987, Sun and AT&T announced that they would collaborate on a project to merge System V and BSD into only one release, based on SVR4.

The Solaris 2.4 was first Sparc/x86 release by Sun. The last release of the SunOS was version 4.1.4 announced in November 1994. The Solaris 7 was the first 64-bit Ultra Sparc release and it added native support for file system metadata logging.

Solaris 9 was introduced in 2002, with support for Linux capabilities and Solaris Volume Manager. Then, Solaris 10 was introduced in 2005, and has number of innovations, such as support for its Solaris Containers, new ZFS file system, and Logical Domains.

The Solaris system is presently up to version 10 as the latest update was released in 2008.

Linux

By 1991 there were growing requirements for a free commercial alternative. Therefore Linus Torvalds set out to create new free operating system kernel that eventually became Linux. Linux started with a small number of “C” files and under a license which prohibited commercial distribution. Linux is a UNIX-like system and is different than UNIX.

Version 3.18 was introduced in 2015 under a GNU Public License. IBM said that more than 18 million lines of code are Open Source and available to developers.

The GNU Public License becomes the most widely available free software license which you can find nowadays. In accordance with the Open Source principles, this license permits individuals and organizations the freedom to distribute, run, share by copying, study, and also modify the code of the software.

UNIX vs. Linux: Technical Overview

  • Linux can encourage more diversity, and Linux developers come from wider range of backgrounds with different experiences and opinions.
  • Linux can run on wider range of platforms and also types of architecture than UNIX.
  • Developers of UNIX commercial editions have a specific target platform and audience in mind for their operating system.
  • Linux is more secure than UNIX as it is less affected by virus threats or malware attacks. Linux has had about 60-100 viruses to date, but at the same time none of them are currently spreading. On the other hand, UNIX has had 85-120 viruses but some of them are still spreading.
  • With commands of UNIX, tools and elements are rarely changed, and even some interfaces and command lines arguments still remain in later versions of UNIX.
  • Some Linux development projects get funded on a voluntary basis such as Debian. The other projects maintain a community version of commercial Linux distributions such as SUSE with openSUSE and Red Hat with Fedora.
  • Traditional UNIX is about scale up, but on the other hand Linux is about scale out.

The post The Brief History Of Aix, HP-UX, Solaris, BSD, And LINUX appeared first on Unixmen.
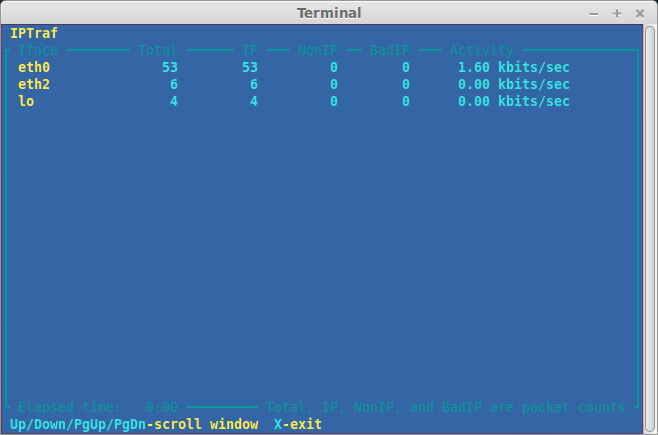
Viewing all 194 articles
Browse latest View live